Tag: bathroom remodel

  • A Homeowner’s Guide To Tub To Shower Conversions

    A Homeowner’s Guide To Tub To Shower Conversions

    If you've ever looked at your old, clunky bathtub and pictured a sleek, spacious shower in its place, you're in good company. A tub-to-shower conversion is one of the most popular bathroom upgrades out there. It’s a project where you rip out the old tub and install a walk-in shower, which can instantly update the look of your space while making it far more practical and safe.

    Why Ditch the Tub for a Shower?

    The choice to swap a rarely-used bathtub for a modern shower usually comes down to a mix of lifestyle changes, a desire for a fresh look, and a bit of future-proofing. This isn't just about changing a fixture; it's about making your bathroom work better for you and your daily routine. It's an upgrade that can completely change how the room feels and functions.

    This isn't a niche trend, either. The North American bath remodeling market was worth a massive $67.8 billion in 2023 and is expected to climb to $88.4 billion by 2032. That number tells you just how many people are rethinking their bathrooms. You can explore more data on the growing bathroom remodeling market to get a sense of the scale.

    More Space, Modern Style

    The most immediate change you'll notice is how much bigger the room feels. A traditional tub with a shower curtain really closes off a space, making it feel dark and cramped. A walk-in shower, especially one with a simple glass door, opens everything up with clean lines and an illusion of depth.

    This project is your chance to bring your bathroom's style into the present day. You're getting rid of a standard-issue fixture and creating a focal point that feels truly contemporary. The main benefits here are:

    • An Open, Airy Vibe: Tearing out the high walls of a tub makes a small bathroom feel significantly larger and brighter.
    • A Fresh Look: It’s the perfect excuse to bring in modern materials like large-format tiles, stylish new fixtures, or frameless glass.
    • Endless Customization: You can design your shower from the ground up with cool features like built-in storage niches, a comfortable bench, or a unique tile pattern that a standard tub just can't offer.

    A Safer, More Accessible Bathroom

    For a lot of homeowners, the decision is all about safety. Having to step over a high tub wall every day is not just an annoyance; it's a genuine fall risk, particularly for older adults or anyone with limited mobility. A tub-to-shower conversion is a direct solution.

    A low-curb or zero-threshold shower entry removes one of the biggest tripping hazards in the home. It's a smart, forward-thinking move that supports aging in place, making it possible to stay in your home safely and comfortably for years to come.

    And focusing on accessibility doesn't mean you have to compromise on style. These days, you can find beautiful grab bars in finishes like matte black or brushed gold that look more like high-end accessories than safety equipment. Benches can be built right into the tile work for a seamless look. The end result is a bathroom that’s as sophisticated as it is safe.

    Exploring Your Shower Conversion Options

    So, you've decided to ditch that old tub for a new shower. That’s the first big step! Now comes the fun part: figuring out what kind of shower is right for your home. This isn't a one-size-fits-all decision. The best path for you really boils down to your budget, your timeline, and the look you’re going for.

    Think of it like getting a new suit. You could grab one off the rack, get a custom-tailored one, or even opt for something completely bespoke. Each gets the job done, but the experience, cost, and final result are worlds apart. Your shower options are pretty similar.

    This little flowchart helps visualize that first fork in the road. Is that old tub just not cutting it anymore?
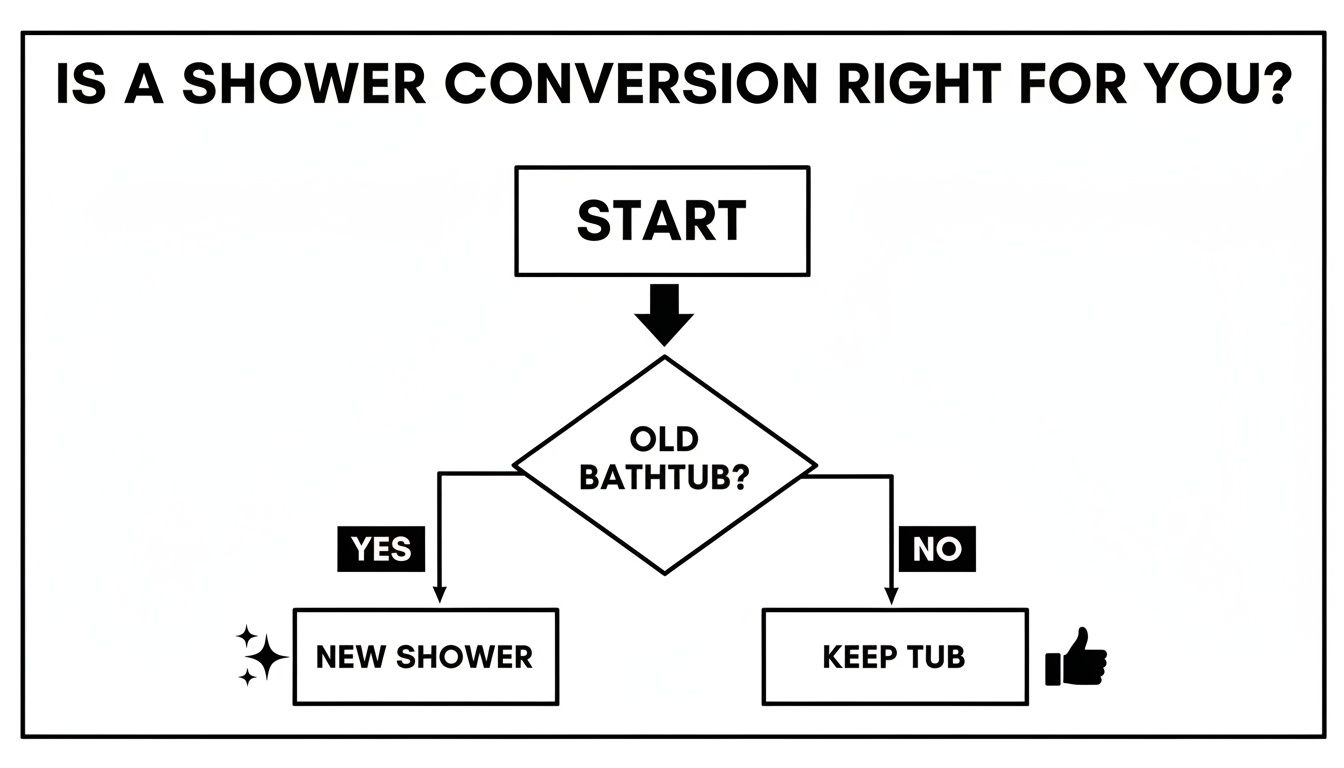
    A flowchart on shower conversion asks if a bathtub is old, leading to a new shower or keeping the tub.

    Ultimately, the goal is to swap out that old tub space for something that works better for you and looks a whole lot sharper. Let's break down the three main ways to get there.

    The Prefabricated Shower Kit: Quick and Easy

    A prefabricated shower kit is the "all-in-one" solution of the bathroom world. It's a complete package that includes a shower pan and interlocking wall panels, usually made from durable materials like acrylic or fiberglass. If speed and budget are your top priorities, this is often the way to go.

    The biggest selling point here is how fast it comes together. A good pro can often get a prefab kit installed in just a couple of days since there’s no tile setting or grout work involved. Plus, the seamless, non-porous surfaces are a breeze to clean—no more scrubbing grout lines!

    The trade-off, of course, is customization. You’re working with the sizes, colors, and styles the manufacturer offers. While the designs have gotten much better over the years, they might not deliver that unique, high-end look some homeowners are after.

    The Custom Tiled Shower: Your Vision, Your Design

    If a prefab kit is the off-the-rack option, a custom tiled shower is the perfectly tailored one. This route gives you complete creative freedom. You choose literally everything: the exact size and shape of the shower, the tile material, the layout pattern, and where you want to put handy features like benches and shampoo niches.

    This is how you get a shower that feels like it was truly made for your bathroom. From timeless subway tile to elegant natural stone, the design possibilities are virtually endless. This level of detail doesn't just look great; it can also add significant value to your home.

    A custom tiled shower is a real investment in your home's style and day-to-day function. It costs more and takes longer to build, but the payoff is a durable, personalized oasis that often becomes the centerpiece of the bathroom.

    The main considerations here are time and money. Tiling is a skilled craft that demands expert waterproofing and precise installation, making it a more expensive and drawn-out project than putting in a prefab unit.

    The Curb-less (or Barrier-Free) Shower: The Peak of Style and Safety

    The curb-less shower, also called a barrier-free or zero-threshold shower, is where modern design and accessibility meet. Just as the name implies, the bathroom floor flows right into the shower space without any curb or lip to step over.

    This is the gold standard for aging-in-place design because it eliminates a common trip hazard and makes it easy for a wheelchair to roll right in. But beyond the practical safety benefits, curb-less showers create an open, spa-like atmosphere that can make the whole bathroom feel bigger and more luxurious.

    This is, however, the most complex and expensive conversion of the bunch. To make it work, the shower floor has to be recessed into your home’s floor joists to create the proper slope for drainage. It’s a major construction project involving structural and plumbing modifications, so it’s definitely a job for a seasoned professional. While it isn’t the right fit for every home or budget, its blend of safety and high-end style is truly unmatched.

    Comparing Tub To Shower Conversion Types

    To help you weigh your options, here’s a quick side-by-side comparison of the three main conversion types. Think about what matters most to you—cost, speed, or complete design freedom.

    Feature Prefabricated Kit Custom Tiled Shower Curb-less Shower
    Typical Cost Low to Moderate Moderate to High High to Very High
    Installation Time 1-3 days 5-10+ days 2+ weeks
    Customization Low (limited sizes/colors) High (endless options) Very High (fully integrated)
    Maintenance Very Low (no grout) Moderate (grout sealing) Moderate (grout sealing)
    Best For Budget, speed, rental properties Personalization, home value Accessibility, luxury design

    Each path leads to a fantastic new shower, but knowing the pros and cons upfront will ensure you choose the one that aligns perfectly with your goals for the project.

    Budgeting for Your Tub-to-Shower Conversion

    Let's talk money. It's often the biggest question mark in any remodel, and a tub-to-shower conversion is no different. The final price can swing wildly, from around $3,000 for a simple, all-in-one prefabricated kit to well over $15,000 for a custom-tiled, curb-less shower with all the bells and whistles. Knowing what drives those numbers is the first step to building a budget that actually works for you.

    Think of it like buying a car. You have the base model price, but then you start adding features—leather seats, a sunroof, a better sound system. Each choice affects the final sticker price. A basic, functional shower is your starting point, but luxury tile, high-end fixtures, and complex plumbing changes are the upgrades that will shape your total investment.

    Key Factors That Influence Your Budget

    A few key decisions will have the biggest impact on your total spending. Once you understand them, you can figure out where to splurge and where you might be able to save a few bucks.

    • Type of Shower: As we've touched on, a prefabricated kit is your most economical route. A custom-tiled shower lands in the mid-to-high range, while a true curb-less design is the premium option because of the extra structural and plumbing work it demands.
    • Material Choices: This is a big one. The price gap between standard ceramic tile and imported natural stone can easily run into the thousands. The same goes for fixtures—a basic showerhead is a world away from a multi-jet, thermostatic shower system.
    • Plumbing Complexity: Is your contractor just swapping out the old fixtures for new ones? Or are they tearing into the walls and floor to move the drain and supply lines? Rerouting plumbing is a labor-intensive job that will definitely add to the bottom line.
    • Labor Rates: Where you live matters. A seasoned pro in a high-cost-of-living area like California is going to charge more than a general handyman in a more affordable region. Experience and reputation play a huge role here, too.

    Understanding Market Context

    It's also interesting to see how this project fits into the broader home improvement landscape. While the global bathtub market was valued at a massive USD 10.72 billion in 2023, the numbers also show a clear shift in what homeowners want, especially here in North America. This region holds the largest market share, but the fast-growing popularity of modern shower systems tells us that the old tub-centric bathroom is on its way out.

    The cost of your conversion is an investment in your home's functionality, safety, and aesthetic appeal. By understanding the cost breakdown, you can allocate your funds to the features that matter most to you, whether that's accessibility, luxury, or a simple, modern update.

    Smart Ways to Manage Your Spending

    Getting a beautiful new shower doesn’t have to mean draining your savings. With some smart planning, you can make choices that give you a high-end look without the high-end price. For more ideas on managing costs, check out our guide on bathroom remodel tips to help you upgrade without breaking the bank.

    Here are a few proven strategies to keep your budget on track:

    1. Keep the Plumbing Layout: This is the single most effective way to control costs. If you can leave your shower drain and water supply lines right where they are, you'll save a significant amount on labor.
    2. Choose Cost-Effective Materials: You can absolutely get a premium look for less. For example, modern porcelain tiles do an incredible job of mimicking expensive marble or natural stone for a fraction of the cost.
    3. Bundle Your Purchases: Whenever you can, try to buy your shower pan, wall surrounds, and fixtures from the same supplier. Many companies offer package deals or discounts for buying everything together.
    4. Prioritize Your "Wants" vs. "Needs": Get honest about what's a must-have and what's a nice-to-have. If an integrated bench is non-negotiable for safety, make it a priority in your budget. If that fancy rainfall showerhead is just a "want," it might be the first thing to cut if costs start to creep up.

    Choosing The Right Materials And Fixtures
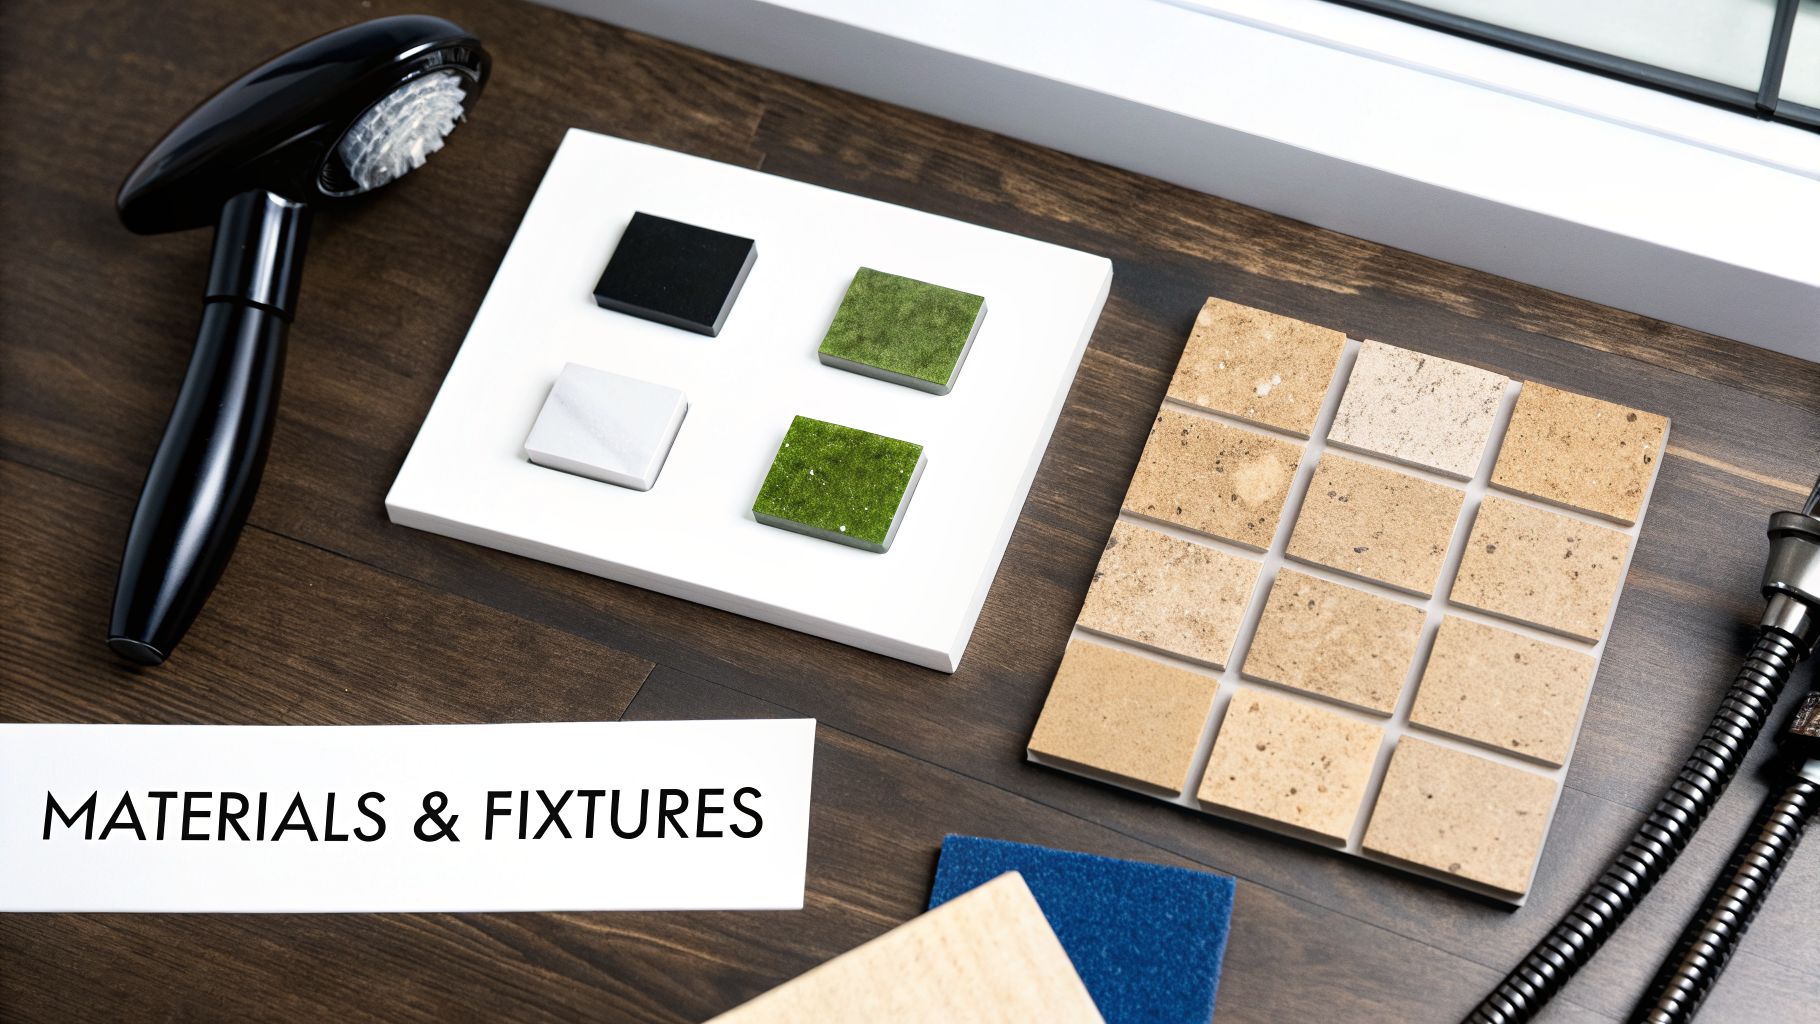
    Bathroom renovation materials and fixtures, including tile samples, a shower head, and plumbing hoses.

    Okay, you’ve got the bones of your project planned out. Now for the fun part—choosing the materials and fixtures that will bring your new shower to life. This is where your personal style really gets to shine.

    The choices you make here will define everything from the daily vibe of your bathroom to how much time you spend cleaning it on weekends. It's a balancing act between the look you want, the durability you need, and the budget you have.

    Start with the Shower Walls

    Think of the shower walls as the main backdrop. They set the tone for the entire room, so it’s a big decision.

    • Acrylic and Fiberglass Panels: If "low-maintenance" is your mantra, these are for you. They create a seamless, grout-free surface that’s a breeze to wipe down. No scrubbing grout lines on a Saturday morning.
    • Porcelain and Ceramic Tile: For total creative freedom, nothing beats tile. You can go for a timeless subway tile pattern, a bold mosaic, or something totally unique. The design possibilities are endless, but just remember that those grout lines will need regular attention.
    • Natural Stone: For pure, organic luxury, materials like marble, granite, or travertine are hard to beat. Every piece is one-of-a-kind. The trade-off? Stone is porous and needs to be sealed regularly to keep it looking pristine and prevent water stains.

    Selecting Your Shower Fixtures

    Next up is the hardware—the stuff you'll actually touch and use every single day. These fixtures have a massive impact on your daily routine, so it’s worth thinking through how you want your shower to feel.

    The showerhead is obviously the star of the show. A standard wall-mounted head gets the job done, but why stop there? A rainfall showerhead delivers a gentle, luxurious stream, while a handheld wand is incredibly practical for rinsing hair, cleaning the shower, or bathing kids and pets. Many people opt for a dual system to get the best of both worlds.

    Don't forget the valve hiding behind the wall—it’s just as important. Upgrading to a thermostatic valve is a game-changer. It keeps the water temperature perfectly consistent, meaning no more surprise bursts of icy cold or scalding hot water when someone flushes a toilet.

    The right fixtures do more than just deliver water; they elevate the entire shower experience. From maintaining the perfect temperature to providing targeted relief for sore muscles, modern hardware turns a daily chore into a moment of relaxation.

    Elevating Function with Smart Add-Ons

    The final touches are all about adding convenience and a little bit of luxury. These are the details that take a shower from good to great.

    Consider a few of these popular upgrades:

    • Built-In Niches: These recessed shelves give you a sleek, clutter-free spot for shampoos and soaps. Say goodbye to rusty shower caddies.
    • Integrated Benches: A built-in or fold-down seat is a fantastic addition for comfort and safety. It’s perfect for relaxing under the water or just having a place to prop your leg while shaving.
    • Glass Doors: A frameless glass door instantly makes a bathroom feel bigger and brighter, a huge step up from a clingy shower curtain.

    Technology is also making its way into the bathroom. The smart shower market is booming, expected to hit $1.49 billion by 2031 in the U.S. alone. These systems let you dial in the perfect temperature, pressure, and even steam settings with a digital controller or your voice. You can explore the latest trends in the smart shower market to see what's possible.

    By mixing and matching these elements thoughtfully, your new shower becomes a truly personalized retreat that not only looks incredible but works perfectly for you.

    Understanding The Conversion Process Step By Step
    An outdoor image featuring a house, backyard, a clawfoot bathtub, and 'CONVERSION STEPS' text.

    Turning a clunky bathtub into a sleek, modern shower might seem like a bit of construction magic, but it’s really a well-defined process. Knowing what happens behind the scenes helps you set realistic expectations for timelines, understand the temporary disruption, and truly appreciate the skill involved.

    Think of it as a carefully choreographed performance in several acts. Each phase is critical, building on the last to create the final, beautiful result. A small mistake in an early step, like waterproofing, can cause major headaches down the road, which is why a methodical, professional approach is non-negotiable.

    Phase 1: Initial Demolition and Preparation

    The first day is always the messiest but also the most satisfying—it’s time to say goodbye to the old tub. Before the first swing of a hammer, your contractors will prep the area to keep dust and debris contained. This usually means laying down protective floor coverings and sealing the bathroom doorway with plastic sheeting.

    Then, the demolition begins. The crew will disconnect the plumbing and physically remove the old bathtub and any surrounding materials, like dated tile or a one-piece fiberglass insert. The goal is to strip the space right down to the wall studs and subfloor, creating a clean slate for your new shower.

    This demolition phase is also a moment of truth. Once the walls are open, contractors can inspect the existing plumbing, framing, and subfloor. It's the best time to spot any hidden water damage or mold that needs to be fixed before anything new goes in.

    This initial teardown typically takes about a day and sets the stage for everything that follows.

    Phase 2: Plumbing and Electrical Rough-In

    With the area cleared out, the focus shifts to the "bones" of your new shower. During the rough-in phase, plumbers and electricians map out and install all the necessary infrastructure that lives behind the walls. This is where the real transformation of a tub to shower conversion happens.

    A plumber will move the drain from the tub's position to the center of the new shower floor. They'll also install the new shower valve at the proper height and run water lines for the showerhead and any other fixtures you've chosen, like a handheld wand or body jets. If you're adding new lighting, a better exhaust fan, or a smart shower controller, an electrician runs the new wiring at this stage.

    It’s called a "rough-in" because it's all done before any drywall or backer board goes up. This step is critical and requires a solid understanding of local building codes to ensure everything is safe, functional, and ready for inspection.

    Phase 3: Waterproofing and Installation

    This is, without a doubt, the most important stage of the entire project. Faulty waterproofing is the number one cause of shower failures, leading to thousands of dollars in hidden damage from leaks and mold. Professionals use a multi-layered system to create a completely sealed, watertight enclosure.

    The process usually involves these key steps:

    • Installing the Shower Pan: The base of your shower is set in place. It's carefully sloped to guarantee water flows directly to the drain.
    • Putting Up Cement Backer Board: Water-resistant backer board is installed on the wall studs, creating a stable and durable surface for your tile or wall panels.
    • Applying a Waterproofing Membrane: A liquid-applied or sheet membrane is used to seal every seam, corner, and screw head. This creates a seamless, impenetrable barrier against moisture.

    Only after the waterproofing is complete and fully cured can your chosen wall material—whether it's elegant tile or low-maintenance acrylic panels—be installed. Tiling is a particularly meticulous job that can take several days to allow for setting and grouting.

    For more deep-dive project management tips, our article on how to plan a bathroom remodel step-by-step is a great resource.

    Phase 4: Final Fixtures and Finishing Touches

    The finish line is finally in sight! Once the tile grout or panel adhesive has fully cured, the final elements that bring the whole look together are installed. This is the part where your new shower really starts to look like the one you envisioned.

    Your contractor will install the showerhead, the control trim, and any other fixtures. The glass door or panel is carefully measured and fitted into place, and any final painting or trim work is completed.

    The very last step is a thorough cleaning and a final inspection to make sure every single detail is perfect. Then, it's all yours to enjoy.

    To help you keep track of all the moving parts, here’s a simple checklist you can use to follow your project from start to finish. It’s a great way to stay organized and ensure nothing gets missed.

    Tub-To-Shower Conversion Project Checklist

    Phase Task Status (To Do, In Progress, Complete)
    1. Planning & Design Finalize shower layout, style, and dimensions.
    Select all materials: tile, wall panels, shower pan, fixtures.
    Choose a contractor and sign the contract.
    Apply for and receive any necessary building permits.
    2. Demolition Protect surrounding areas from dust and debris.
    Remove the old bathtub and wall surrounds.
    Inspect studs, subfloor, and plumbing for hidden damage.
    Address any necessary repairs (e.g., rot, mold).
    3. Rough-In Adjust drain location for the new shower.
    Install the new shower valve and water lines.
    Run any new electrical wiring for lights or fans.
    Pass the rough-in inspection with the city/county inspector.
    4. Waterproofing Install the new shower pan.
    Install cement backer board on walls.
    Apply a waterproof membrane to the pan and walls.
    5. Installation Install wall tile or surround panels.
    Grout and seal the tile (if applicable).
    Install the flooring in the rest of the bathroom (if part of the project).
    6. Finishing Install the shower trim kit, showerhead, and other fixtures.
    Install the shower glass door or panel.
    Complete any final painting, trim, or caulking.
    7. Final Inspection Conduct a final walkthrough with your contractor.
    Complete the final inspection with the city/county inspector.
    Make the final payment to your contractor.

    Using a checklist like this simplifies the entire process, giving you a clear roadmap and peace of mind as your beautiful new shower comes to life.

    Navigating Permits And Local Building Codes

    Let's be honest, diving into the world of building permits and local codes can feel a little intimidating. It's definitely not as fun as picking out tile, but getting this part right is one of the most important steps in any tub to shower conversion.

    Think of building codes less like a rulebook meant to slow you down and more like a safety manual for your home. They exist to make sure every project is structurally sound, safe, and built to last. A permit is simply the green light from your city or county to start the work, kicking off a process of inspections that protect you, your family, and your home’s value.

    When Is A Permit Required?

    This is one of the first questions homeowners ask. While the specific rules can change from one town to the next, you will almost certainly need a permit for a tub-to-shower conversion because the project involves changing your home's plumbing.

    Count on getting a permit if your project involves any of these key tasks:

    • Moving or altering plumbing lines: Shifting the drain from a tub’s position to the center of a new shower floor is a major plumbing change that requires a permit.
    • Changing electrical wiring: If you're adding recessed lighting in the shower or putting in a new, more powerful exhaust fan, that's electrical work that needs to be up to code.
    • Modifying structural elements: This is a big one. For more involved projects like a curb-less, walk-in shower, the floor structure itself often has to be altered.

    A permit is your insurance policy against shoddy work. It ensures that critical systems like plumbing and waterproofing are installed correctly by a professional, preventing nightmare scenarios like hidden leaks, rot, and mold growth down the road.

    A reputable, professional contractor will take care of the entire permitting process for you, from submitting the plans to scheduling all the necessary inspections.

    Key Code Requirements Inspectors Look For

    When the city inspector shows up, they aren’t there to admire your tile choice. Their focus is 100% on safety and function, and they have a specific checklist of items that must comply with local and national building codes. Knowing what’s on their list really highlights why hiring a pro is so critical.

    For homeowners in states with stringent building standards like California and Arizona, these points are especially important.

    • Proper Drain Size and Slope: To prevent clogs and standing water, the shower drainpipe must be at least 2 inches in diameter. The shower floor itself needs a precise slope—at least 1/4 inch per foot, but no more than 1/2 inch per foot—to guide every drop of water toward that drain.
    • Ventilation: A damp bathroom is a breeding ground for mold and mildew. Codes mandate a mechanical exhaust fan that can move enough air (measured in CFM, or cubic feet per minute) to vent all that moist, steamy air directly outside.
    • Waterproofing: This is a make-or-break item. The inspector will verify that a continuous, properly installed waterproofing membrane is in place behind the tile and under the shower floor. This is absolutely non-negotiable.
    • Accessibility Standards: Even if you don't need them now, thinking ahead is smart. Many codes encourage following standards from the Americans with Disabilities Act (ADA). A common practice is to install solid wood blocking inside the walls, making it easy and secure to add grab bars in the future.

    Meeting every one of these requirements is just part of the job for an experienced contractor. They make sure your beautiful new shower isn't just a cosmetic upgrade, but a safe, durable, and fully compliant improvement to your home.

    Answering Your Top Questions About Tub-to-Shower Conversions

    As you get closer to pulling the trigger on your bathroom remodel, you're bound to have some practical questions. These are the details that really matter for your budget, timeline, and home's future. Let's tackle the questions we hear most often from homeowners just like you.

    How Long Will This Actually Take?

    Every project is a little different, but we can give you a pretty good idea of what to expect. If you're going with a straightforward, prefabricated shower kit, a pro can often have it installed in just one to three days.

    For a custom-tiled shower, however, you'll need a bit more patience. A realistic timeline for a custom job is anywhere from three to seven days. That longer window gives us the time needed for proper demolition, plumbing work, installing a bulletproof waterproofing system, carefully setting tile, grouting, and finally, putting in the glass and fixtures. The final timeline always comes down to the complexity of your specific design and whether any city inspections are required.

    Will I Tank My Home's Value by Removing My Only Tub?

    This is probably the number one concern we hear, and it's a smart question to ask. The short answer is: probably not. In today's market, a beautifully designed walk-in shower often maintains or even increases a home's value. The old rule of thumb that every home needs a bathtub is fading, especially when it comes to the master suite.

    What really matters is who your potential buyer might be down the road. If you live in a neighborhood full of young families, taking out the only tub could be a negative. But for a huge number of buyers, like empty-nesters or anyone valuing accessibility, that spacious, modern shower is a major selling point.

    Here's the bottom line: A dated, clunky bathroom will hurt your home's value far more than the absence of a tub. A well-executed shower conversion is a significant upgrade that makes your home more beautiful and functional.

    Can I Just Do This Myself?

    We love the DIY spirit, but a tub-to-shower conversion is one of those jobs best left to the professionals. This isn't just about looks; it involves tricky plumbing and electrical work. Most importantly, it requires expert-level waterproofing, where a tiny mistake can lead to a total disaster.

    A failed waterproofing job is a homeowner's nightmare. It can cause slow, hidden leaks that lead to structural rot and black mold—problems that can easily cost tens of thousands to fix. A licensed contractor brings the necessary skills and ensures the entire project is up to code. You can learn more about the dangers of hiring the wrong person in our guide on how to spot and avoid fake bathroom remodel contractors.

    Hiring a pro isn't just an expense; it's an investment in protecting your home and getting the job done right the first time.


    Ready to transform your bathroom with a seamless, professional tub-to-shower conversion? The team at NorCal Construction has the expertise to bring your vision to life, ensuring a beautiful, durable, and fully compliant result. Start your project with a free consultation today!

    Published via the Outrank app
  • 2026 Bathroom Design Trends: 8 Inspiring Ideas

    2026 Bathroom Design Trends: 8 Inspiring Ideas

    You're staring at a bathroom that still works, but nothing about it feels easy. The shower is cramped, storage is improvised, the lighting is harsh, and the finishes belong to a different era. In California, you may also be weighing water-efficiency requirements, local permitting, wildfire or seismic considerations, and the realities of coastal moisture or desert heat. A bathroom remodel has to look good, but it also has to handle daily use, ventilation, maintenance, accessibility, and the building conditions behind the walls.

    The most useful bathroom design trends for 2026 aren't just decorative styles. They combine comfort with practical planning, from spa-inspired wet zones and integrated lighting to water-conscious fixtures, durable surfaces, and future-ready layouts. The bathroom remodeling market remains a major global construction category. One industry estimate values it at USD 412.8 billion in 2025 and projects USD 615.61 billion by 2036, while another estimates USD 200.2 billion in 2025 and USD 315.9 billion by 2035. The different estimates use different methodologies, but both point to sustained investment in renovation, smart fixtures, and water-efficient systems. (Global bathroom remodeling market estimates)

    Below are ten directions worth considering for a California or Arizona remodel. Each includes the practical trade-offs, coordination issues, and cost and complexity signals that matter before you commit to a finish or fixture.

    1. Spa-Like Wellness Bathrooms

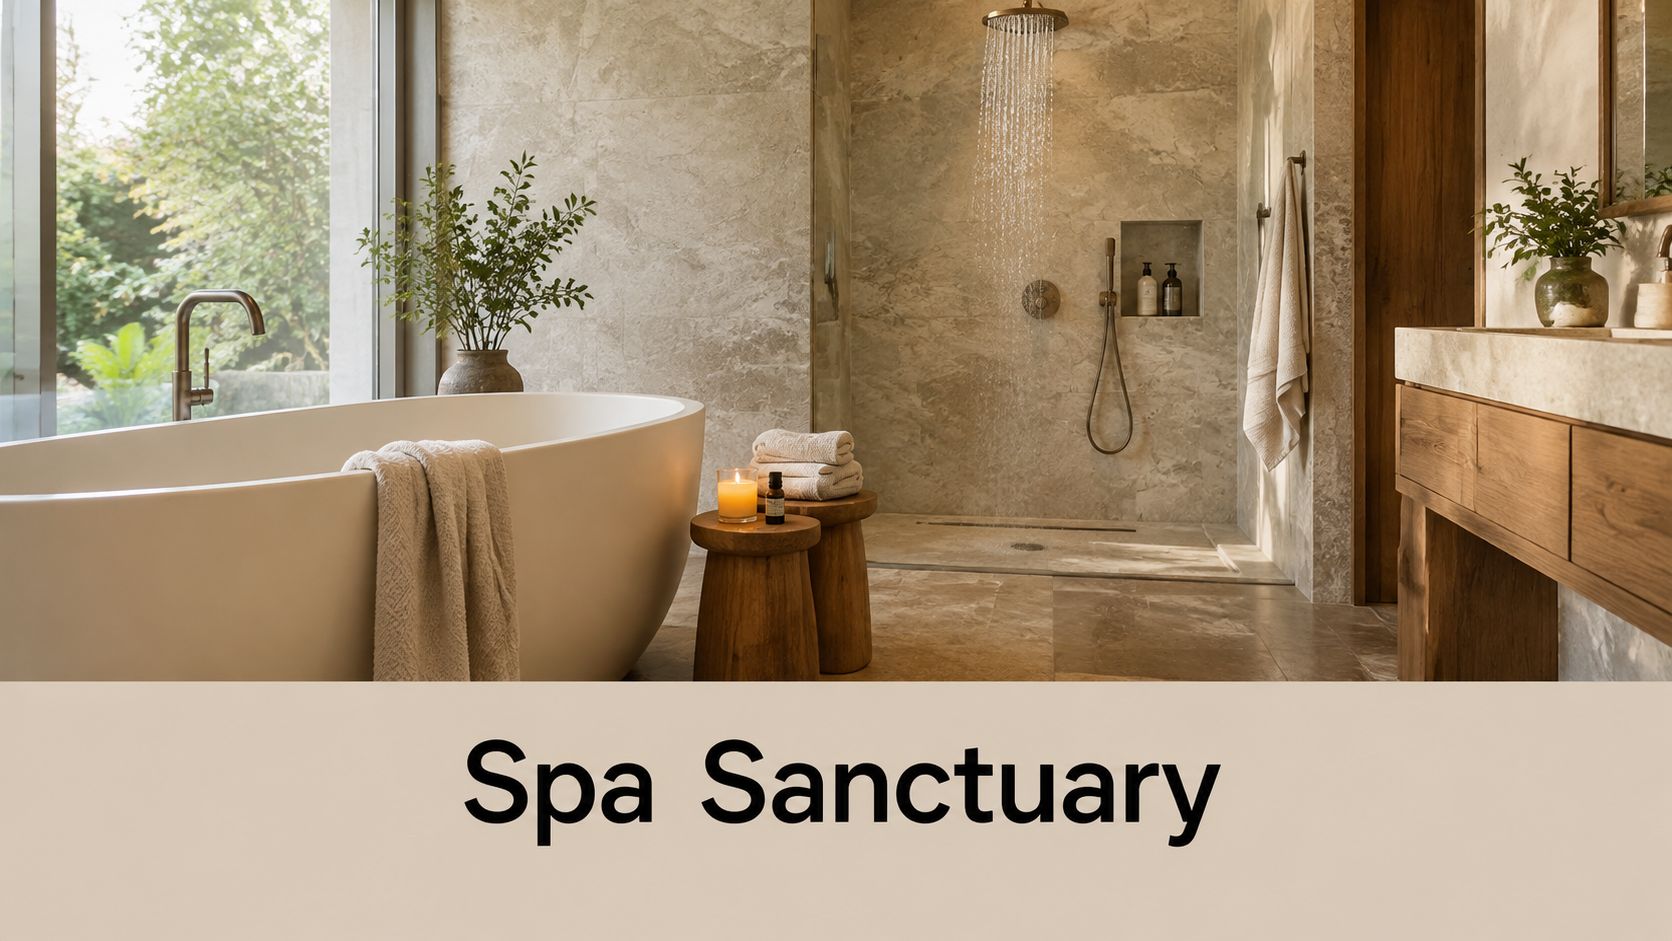
    The shower is often the first place to test whether a spa-style bathroom works in daily life. A generous walk-in shower, soaking tub, warm natural materials, heated floors, a heated towel rack, and dimmable lighting can create a comfortable retreat, provided the room can support the added plumbing, electrical, ventilation, and maintenance. Marin County homes may suit a calm stone palette with a steam shower. In Scottsdale, a resort-style wet zone can work well in a larger luxury home, but desert heat and water use still affect fixture selection and ventilation.

    A 2025 Fixr study found that 73% of surveyed experts named spa-like design the top trend, 78% reported that homeowners prioritize a relaxing spa-like experience, and 45% identified walk-in showers as the most popular shower design trend. (2025 bathroom trends report)

    Plan the wet zone before choosing finishes

    A larger shower improves access and comfort, while increasing waterproofing, drainage, ventilation, and glass coordination. The floor needs a reliable slope, the waterproofing system must connect correctly at corners and penetrations, and the exhaust fan must move humid air effectively. Steam showers add further coordination: the enclosure, ceiling, generator location, vapor control, controls, and electrical work must be planned before installation.

    Practical rule: Treat every spa feature as part of a system. A rainfall showerhead cannot compensate for poor ventilation, weak waterproofing, or an undersized drain.

    Multiple shower functions can increase water demand, so specify efficient fixtures and confirm that pressure and drainage support the intended experience. Plan dedicated electrical capacity for heated floors, towel racks, lighting controls, and steam equipment. A remodeling contractor such as NorCal Construction's remodeling team can coordinate design, permitting, waterproofing, and installation instead of treating each feature as an isolated purchase.

    Cost and complexity signal: A basic material refresh is relatively straightforward. A steam shower, heated floor, custom niche, upgraded ventilation, and tub relocation create a high-coordination remodel with more electrical and plumbing rough-in work. In California and Arizona, confirm local requirements before demolition, particularly when the project changes circuits, ventilation, plumbing locations, or structural framing.

    A luxurious modern bathroom featuring a freestanding white bathtub, a walk-in rain shower, and natural wooden furniture.

    2. Sustainable and Eco-Friendly Bathrooms

    In a Berkeley remodel, recycled glass counters or reclaimed wood can add local character. In Tucson and Phoenix, water efficiency often deserves priority, while greywater may be feasible only after checking local rules, site conditions, routing, and maintenance needs. Sustainability should be set during specification, with efficient toilets, faucets, and shower fittings paired with durable surfaces and cabinetry that will not need frequent replacement.

    Recent Houzz research reported that 87% of homeowners added sustainable features during bathroom renovations. It also found that 58% enlarged their primary bathroom shower, showing that resource efficiency and comfort can be planned together rather than treated as competing goals. (Houzz and bathroom sustainability findings)

    Specify for the whole life of the room

    A low-flow fixture provides limited value if it fails early or performs poorly for the household. Choose products with accessible replacement parts, clear service information, and finishes that tolerate regular cleaning. WaterSense-certified fixtures offer a useful starting point, but confirm pressure, spray performance, drain capacity, and daily use before finalizing the specification.

    Use these practical checks:

    • Choose efficient fixtures: Verify certification and performance before choosing the style.
    • Use lower-impact materials: Recycled glass, reclaimed wood, and durable engineered surfaces can reduce reliance on newly sourced materials while adding texture.
    • Investigate greywater carefully: Ask the local building department whether the system is permitted and what treatment, routing, inspections, and maintenance it requires.
    • Protect indoor air quality: Specify low-VOC adhesives, coatings, sealants, and cabinetry finishes for the enclosed environment.
    • Use daylight strategically: A window or skylight can reduce artificial lighting, but the design must address privacy, heat gain, moisture, and water intrusion.

    Cost and complexity signal: Efficient fixtures usually add little construction complexity because they are selected during specification. Greywater systems, skylights, new windows, and custom reclaimed materials can require design coordination, permits, specialized installation, and added inspections. Arizona bathrooms need shading and ventilation strategies that limit heat gain while supporting water conservation. Coastal California projects need careful moisture control and hardware that resists corrosion. Confirm local permitting requirements before demolition, especially when plumbing, electrical work, windows, or structural framing will change.

    3. Minimalist Modern Design

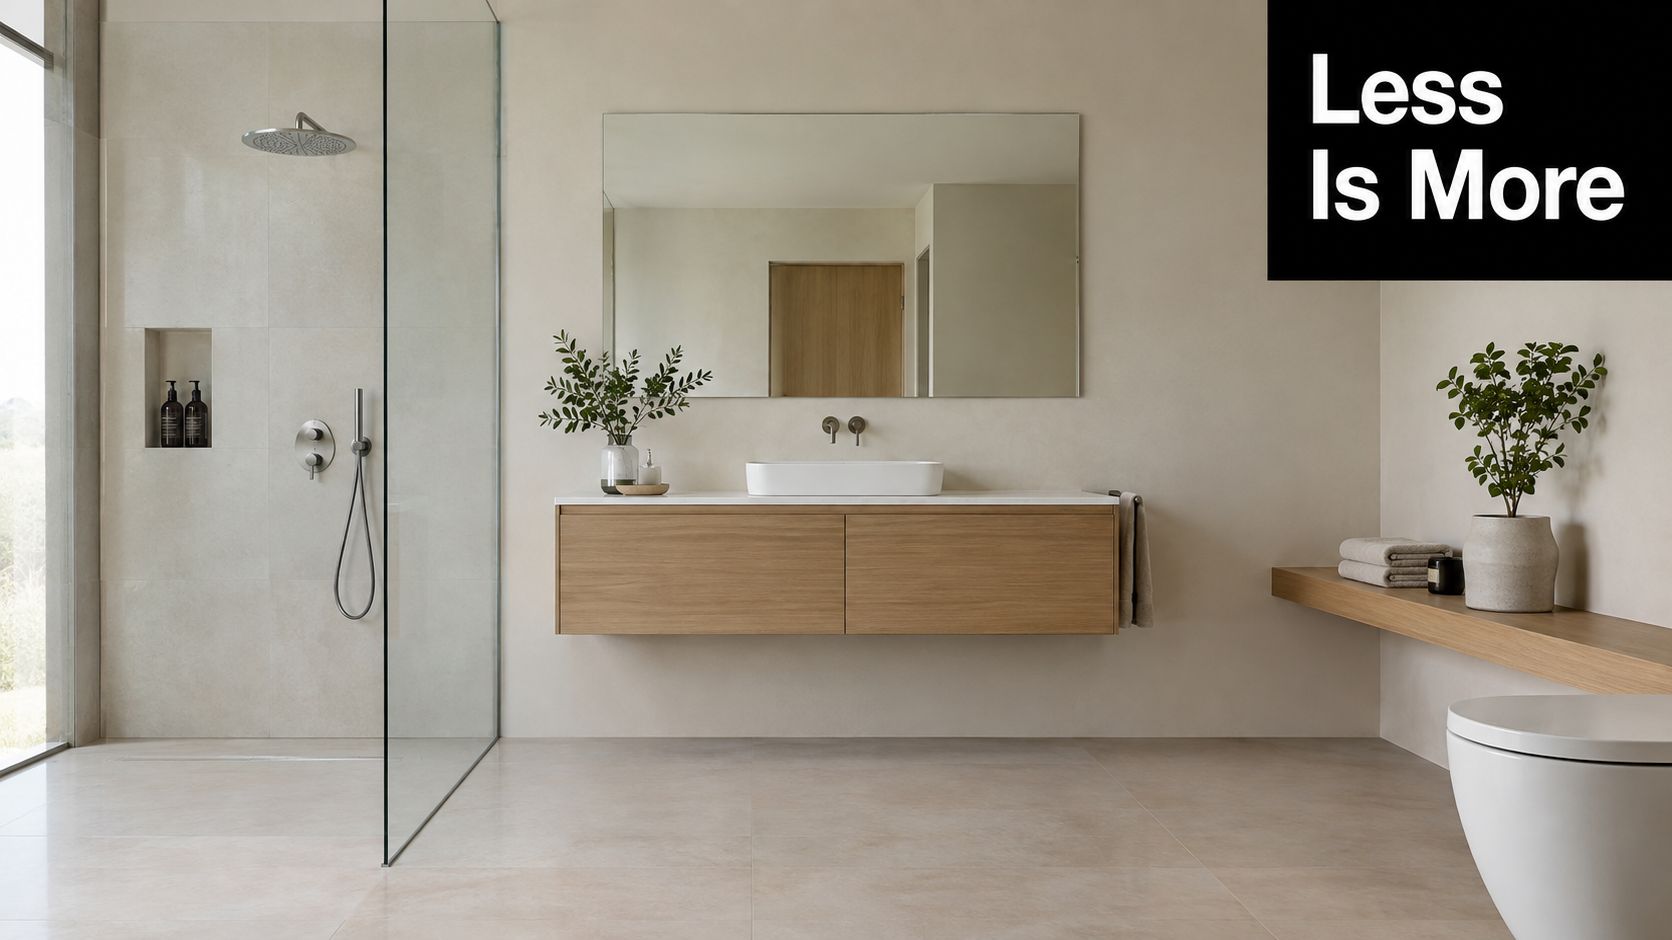
    Minimalism gives a bathroom a clean visual field, but it doesn't mean removing everything useful. A wall-mounted vanity, concealed storage, floating toilet, large-format tile, and restrained color palette can make a room feel calmer and easier to clean. This approach suits contemporary San Francisco homes, neutral-toned Los Angeles remodels, and modern Phoenix properties where a simple material palette can complement strong architecture.

    The risk is a bathroom that looks empty in a photograph but feels inconvenient at seven in the morning. Open shelves collect dust and moisture, a vanity without enough drawers pushes toiletries onto the counter, and a monochromatic room can feel flat if the lighting isn't layered.

    Make restraint perform real work

    Start with the daily routine. Decide where electrical appliances, medications, towels, cleaning supplies, and spare paper products will go before finalizing the vanity. A recessed medicine cabinet can preserve a clean wall, while deep drawers and a wall-hung cabinet keep less attractive items out of sight. Wall-mounted fixtures can free floor area, but they require accurate rough-in locations and sufficient wall depth or framing.

    Use one deliberate contrast to keep the room from feeling clinical. A warm wood vanity, textured stone, a patterned floor, or a muted accent color can provide the visual anchor. In a Phoenix home, a warm oak tone may balance pale tile. In a San Francisco remodel, a charcoal fixture finish or handmade tile can add character without disrupting the restrained layout.

    A minimalist bathroom succeeds when the clutter disappears because the storage works, not because the homeowner has fewer things.

    Cost and complexity signal: Floating fixtures and concealed plumbing raise rough-in precision and access concerns. A wall-hung toilet may simplify floor cleaning, but the carrier and service access must be installed correctly. Custom recessed storage can also involve framing changes. The cleanest appearance often requires more planning behind the finished surfaces.

    For examples of completed remodeling work and material combinations, review the NorCal Construction portfolio before choosing a style that may need specialized installation.

    A modern minimalist bathroom featuring a floating wooden vanity, neutral stone walls, and a glass shower.

    4. Natural Stone and Raw Materials

    Natural stone brings weight, variation, and a direct connection to the surrounding environment. Napa Valley homes may use marble or limestone-inspired surfaces, Scottsdale bathrooms can draw from desert stone and slate, and coastal California interiors often pair river rock with weathered wood. In the Lake Tahoe region, textured stone and timber can reinforce the setting without turning the bathroom into a rustic theme room.

    The material is beautiful because it varies, and that variation is also the main design responsibility. Porous marble in a constantly wet shower can stain or etch. Rough river rock can be uncomfortable underfoot and harder to clean. Wood can swell or deteriorate if it isn't specified and finished for a humid environment.

    Match the surface to the exposure

    Use dense, moisture-appropriate materials in direct wet areas, and reserve more sensitive stone for walls, vanities, or carefully protected surfaces. Honed or textured finishes can improve traction, but texture increases cleaning effort. A sample board should be viewed under the actual bathroom lighting because stone color and veining can change dramatically between a showroom and a windowless room.

    Natural stone also needs a maintenance plan. Seal stone after installation according to the product and installer's instructions, then maintain it as required. Annual resealing may be appropriate for some applications, but it isn't a universal rule for every stone or finish. The contractor should identify the stone, its absorption characteristics, the sealer, and the cleaning products that won't damage the surface.

    A useful combination is natural stone with complementary engineered materials. For example, a stone accent wall can sit beside a durable porcelain floor, while a wood vanity uses a moisture-resistant finish and a solid-surface countertop. That approach preserves the organic character while reducing maintenance in high-wear locations.

    Cost and complexity signal: Slab selection, edge details, bookmatching, specialty cuts, structural support, sealing, and skilled installation can make natural stone a higher-complexity choice. In desert areas, confirm that the material and finish won't create an uncomfortable heat or glare response. In coastal regions, specify hardware and sealants with moisture and salt-air exposure in mind.

    5. Statement Tile Work and Pattern Play

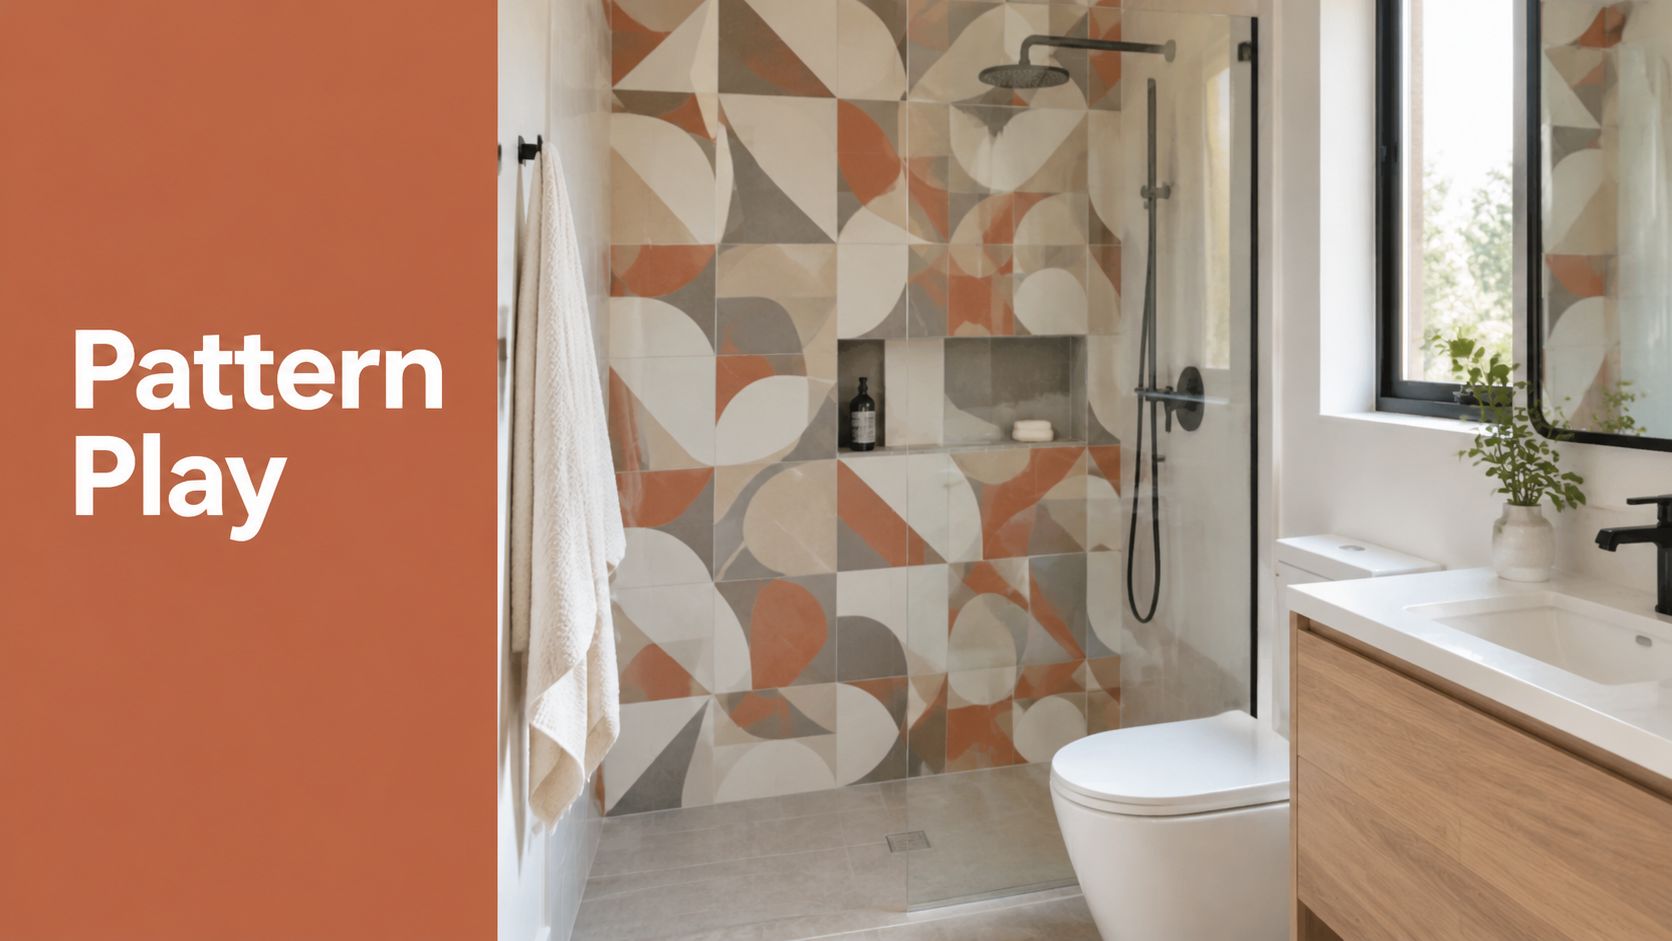
    A patterned tile wall can give a small bathroom more personality than a room full of expensive fixtures. San Francisco homeowners may choose Portuguese-inspired azulejo patterns, Los Angeles remodels can use geometric Moroccan designs, and Arizona bathrooms often pair terracotta tones with desert-inspired geometry. Large-format statement tile can also create a strong focal surface in a contemporary Bay Area bathroom.

    The most reliable strategy is controlled contrast. Use bold tile on an accent wall, shower back wall, floor, or vanity surround, then pair it with quieter tile and cabinetry. Covering every surface with a high-energy pattern can make the room feel busy, especially when the layout includes niches, benches, plumbing controls, and multiple corners.

    Draw the pattern before ordering

    Pattern work needs a layout plan, not just a product selection. The installer should map the centerline, determine where cuts will land, coordinate grout joints, and account for outlets, valves, niches, drains, and glass hardware. A pattern that looks balanced on a sample may become awkward when a niche interrupts the repeat.

    Grout color changes the result. A close match softens the pattern, while contrast emphasizes every joint and installation variation. Textured or encaustic-style tiles can create a strong tactile effect, but they may need more careful cleaning than smooth porcelain.

    • Use the feature selectively: Let one surface carry the visual weight.
    • Coordinate the quiet materials: Match the neutral tile to a secondary tone in the pattern.
    • Check maintenance: Small joints and textured surfaces require more cleaning attention.
    • Light the work properly: Poor lighting can flatten color and hide the detail you paid for.
    • Hire for precision: Pattern alignment matters as much as the tile itself.

    Cost and complexity signal: Standard tile in a simple layout is lower complexity than handmade tile, mosaics, mitered edges, or repeating geometric patterns. Add time for dry layouts, waste planning, specialty cuts, and potential replacement pieces. Order enough material from the same batch when color variation matters.

    A modern bathroom interior featuring patterned geometric tiles, a glass shower enclosure, and a wood vanity cabinet.

    6. Smart Bathroom Technology

    Smart fixtures are most useful when they solve a daily problem. A heated mirror can reduce fogging, a digital shower can make temperature control easier, a sensor faucet can reduce unnecessary contact, and a smart toilet can combine comfort and hygiene features in one fixture. In Silicon Valley and San Francisco tech communities, homeowners may want the bathroom integrated with the wider home system. In Phoenix and Scottsdale, automated shower controls and lighting can add convenience without changing the room's visual character.

    NKBA's 2026 Bath Trends Report places fixture technology, wellness features, and aging-in-place innovations closer to mainstream planning. It also describes younger homeowners using AI for design inspiration that combines smart features, sustainability, and style. For California and Arizona remodels, the practical lesson is clear. Electrical rough-ins, control locations, waterproofed niches, lighting, HVAC, and automation need coordination before the walls close. (NKBA 2026 Bath Trends Report)

    Choose an ecosystem, not a gadget collection

    Start with the feature that improves the routine most. Confirm Wi-Fi coverage, electrical requirements, app support, manual controls, replacement parts, and warranty service. A smart device that depends on an unsupported app can become an expensive ordinary fixture, so manual override should remain available for essential functions.

    Plan wiring and outlets away from splash zones and coordinate controls with the waterproofing design. A digital shower controller shouldn't force an awkward niche or create an unsealed penetration in the wet area. If the bathroom connects to a broader home automation platform, verify compatibility rather than assuming that every product will communicate reliably.

    Integration matters more than novelty. The best smart bathroom is easy to use when the network is unavailable.

    Watch this product demonstration for a clearer sense of how technology can change the shower and fixture experience.

    Cost and complexity signal: A heated mirror or smart toilet may be a focused upgrade. A fully integrated system can require new circuits, controls, networking, programming, and coordinated commissioning. Specify service access and a conventional fallback before approving the final package.

    7. Lighting, Color Palettes, and Statement Fixtures

    Lighting determines whether a bathroom feels calm, functional, or uncomfortable. A warm earth-tone palette can work beautifully in an Arizona home, especially when paired with controlled daylight and bronze or matte black hardware. Northern California bathrooms often benefit from softer neutrals, natural materials, and sculptural fixtures that echo the atmosphere of a spa. San Francisco, Marin County, and Los Angeles projects can use a designer pendant or mid-century-inspired fixture as a focal point, provided the electrical and moisture requirements are handled properly.

    One fixture can't perform every lighting task. Overhead light may illuminate the room but leave shadows on the face. Mirror lighting can support grooming but feel too bright for a late-night bath. Layer the plan with dimmable ambient lighting, vertical or integrated task lighting at the mirror, and accent lighting in niches or architectural recesses.

    Design the scene and the routine

    Use warm light for relaxation, but confirm that the mirror lighting renders skin tones accurately enough for grooming. Dimmers must be compatible with the lamps and control system. Moisture-resistant fixtures and appropriate installation locations matter more than a decorative shape that happens to be fashionable.

    The color palette should support the actual light available. Pale greige, sand, sage, terracotta, warm white, and muted brown can create a grounded room, while a darker tone may need stronger task lighting. In a bathroom with limited daylight, test paint, tile, metal, and wood samples together under the selected lamps.

    A statement fixture works when it has room to read as an object. Don't place a sculptural pendant where it competes with a busy tile wall, obstructs a mirror, or creates glare in the shower. Confirm clearances, wet-location ratings, switch locations, and service access during the design phase. NorCal Construction can help coordinate the lighting plan with the remodel rather than leaving fixture placement until the final installation stage.

    Cost and complexity signal: Replacing a fixture is relatively limited. Adding layered lighting, new circuits, dimmers, skylights, or relocated switches increases electrical and permitting coordination. Skylights and new windows also introduce waterproofing, privacy, structural, and heat-gain considerations.

    8. Accessible and Universal Design Features

    Universal design can make a bathroom safer and more comfortable without giving it an institutional appearance. Curbless showers, handheld controls, slip-resistant flooring, lever handles, wider clearances, and well-positioned grab bars serve children, older adults, guests with mobility limitations, and anyone recovering from an injury. California ADUs and in-law suites often benefit from these decisions, as do multigenerational Arizona homes and aging-in-place remodels across the Bay Area and Southern California.

    Plan flexibility before the walls close. Add blocking during framing so grab bars can be installed later, even if they are not needed today. Lay out the shower for a future bench or handheld control. Where space allows, specify a roll-under or adjustable-height vanity and preserve clear movement paths.

    Future-proof a smaller bathroom

    A compact bathroom rarely accommodates every feature of a fully accessible suite. Prioritize work that becomes disruptive later: reinforced walls, a curbless shower, a wider entry, strong task lighting, and slip-resistant flooring. These measures can improve safety without relocating every fixture.

    The 2025 Houzz study found that 68% of homeowners considered special needs in their bathroom projects, up 4 percentage points year over year, while 36% of renovated bathrooms included wellness-oriented features. (Houzz accessibility and wellness findings)

    A curbless shower depends on accurate floor recessing or a carefully built-up floor, dependable waterproofing, and drainage that keeps water within the wet zone. In California and Arizona, confirm applicable requirements with the design and permitting team before construction. A wheelchair-friendly arrangement may require more clearance than an existing room provides, so measure first and avoid promising a specific level of access prematurely.

    Cost and complexity signal: Adding grab-bar blocking during framing is comparatively simple. A curbless shower, structural floor changes, widened doors, relocated plumbing, and larger turning clearances require more coordination and may increase permitting complexity. Treat accessibility as a layout decision from the beginning, not hardware added during the final installation.

    9. Maximized Storage and Organization Solutions

    A bathroom feels more luxurious when the counter stays clear. Floor-to-ceiling cabinetry can use vertical space in a Bay Area remodel, while a carefully planned vanity and corner storage can make a small Los Angeles or Arizona bathroom work harder without making it feel crowded. Built-in shower niches, recessed medicine cabinets, pull-out drawers, linen storage, and dedicated grooming zones all help the room support real routines.

    Storage should be drawn at the same time as the plumbing layout. A niche placed after the shower valves are set may end up too shallow, too low, or in conflict with framing. Cabinet depth also matters. A cabinet that projects too far into a narrow passage can create a daily obstruction, even if it provides useful capacity.

    Assign every item a home

    Divide storage by function. Keep daily grooming tools near the mirror, medicines in a secure and appropriate location, towels near the shower, and cleaning supplies away from personal products. Closed storage hides visual clutter, while a small amount of open shelving can keep frequently used items accessible.

    • Use vertical space: Tall cabinets can add capacity without consuming much floor area.
    • Build in drawer organization: Pull-outs and dividers make deep drawers easier to use.
    • Protect wet storage: Select moisture-resistant materials and seal penetrations around niches.
    • Specify durable hardware: Soft-close hinges and drawer runners should suit the cabinet weight and frequency of use.
    • Coordinate early: Confirm niches, medicine cabinets, outlets, and lighting before framing and rough-in.

    A minimalist look depends on this hidden infrastructure. Without it, homeowners often compensate with countertop containers and open shelving, which makes cleaning harder and undermines the intended design.

    Cost and complexity signal: Stock vanities and surface-mounted medicine cabinets are simpler. Custom cabinetry, recessed storage, integrated lighting, specialty hardware, and framing changes increase design and installation effort. In older California homes, hidden plumbing or irregular framing may affect the final cabinet plan, so verify field conditions before ordering custom pieces.

    10. Integrated Indoor Plants and Biophilic Design

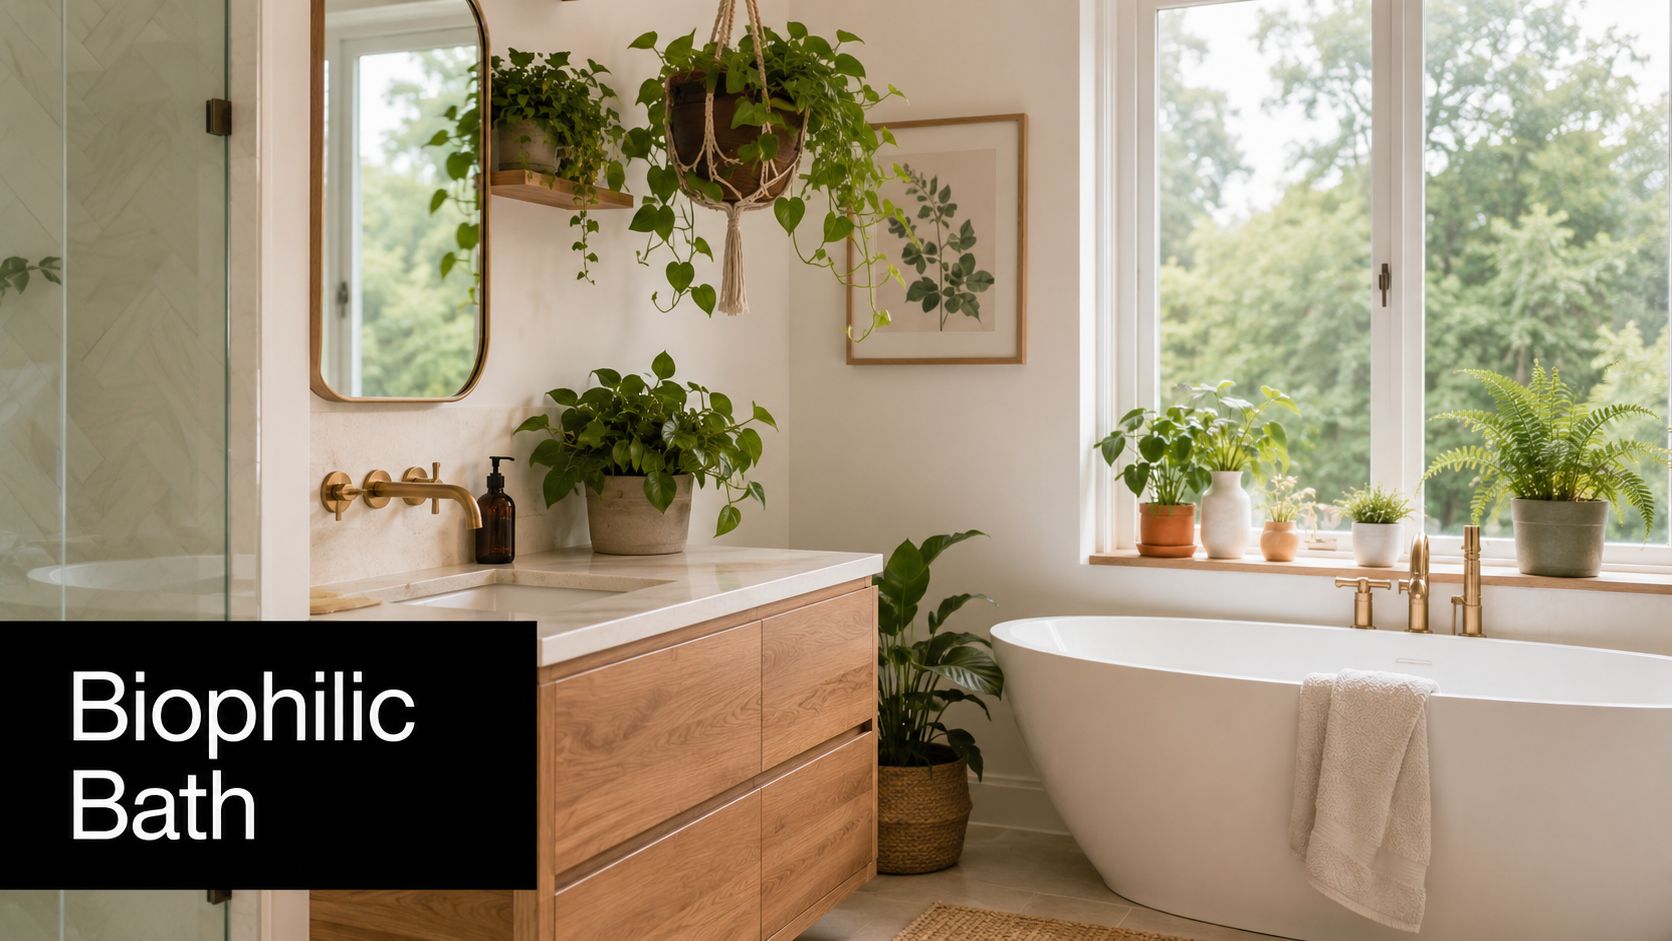
    Plants soften hard tile, stone, and glass, especially in a wellness-oriented bathroom. A San Francisco bathroom with ferns near a bright window can feel connected to the outdoors, while a Marin County design might use moss, timber, and woodland textures. In Arizona, drought-tolerant succulents can provide greenery where humidity-loving plants would struggle, though the bathroom still needs enough light for healthy growth.

    Choose plants for the room's actual conditions, not for a showroom photograph. Pothos, ferns, snake plants, bamboo palms, and philodendrons may suit a humid, well-lit bathroom, but low light, poor drainage, or irregular care can quickly turn a plant feature into maintenance. Air plants and preserved moss offer lower-maintenance alternatives, although preserved materials still need protection from direct water.

    Keep greenery away from the building envelope

    Use waterproof containers with saucers and provide a clear drainage strategy. Wall-mounted planters need properly sealed backing and moisture protection, especially when attached to tiled or painted walls. Don't place a large planter where overflow can reach a wood vanity, electrical outlet, or unprotected floor joint.

    Ventilation remains essential. Plants don't replace an exhaust fan, and excess humidity can contribute to mold, peeling finishes, and damage to cabinetry. A skylight or window can support both daylight and plant health, but it also needs privacy control, water intrusion protection, and appropriate detailing.

    Combine greenery with natural stone, wood, woven accessories, and warm lighting rather than scattering unrelated planters around the room. A dedicated shelf, recessed ledge, windowsill, or vertical planting zone gives the design intention and makes watering easier.

    Cost and complexity signal: A few movable plants are a low-complexity update. Built-in planters, living walls, grow lights, irrigation, waterproofing, and drainage turn the feature into a construction system. In Arizona, select plant species and irrigation with water conservation in mind. In coastal California, focus on corrosion-resistant hardware and reliable moisture control.

    A modern, sunlit bathroom featuring lush indoor plants, a wooden vanity, and a freestanding soaking bathtub.

    Bathroom Design Trends: 10-Point Comparison

    Design Trend 🔄 Implementation Complexity 📊 Resource / Cost ⭐ Expected Outcomes 💡 Ideal Use Cases ⚡ Key Advantages
    Spa‑Like Wellness Bathrooms High 🔄: complex plumbing, electrical, ventilation High 📊: $15,000–$50,000+; premium materials & trades Luxury retreat, strong resale, wellness gains ⭐⭐⭐⭐ Master suites, luxury remodels, wellness-focused homes Creates resort-like relaxation; high market appeal ⚡
    Sustainable & Eco‑Friendly Bathrooms Medium‑High 🔄: product research, specialized contractors Medium–High 📊: higher upfront; rebates may offset cost Lower utility bills; reduced environmental footprint ⭐⭐⭐ Eco-conscious homeowners, new builds, regions with rebates Long‑term savings; healthier indoor air; incentives ⚡
    Minimalist Modern Design Medium 🔄: careful planning for hidden storage & finishes Low–Medium 📊: moderate material quality; efficient layouts Clean, timeless, low‑maintenance, feels spacious ⭐⭐⭐ Small baths, contemporary homes, busy professionals Easy to maintain; flexible for updates ⚡
    Natural Stone & Raw Materials High 🔄: heavy materials, skilled installers, sealing High 📊: expensive materials + ongoing maintenance Durable, unique, timeless aesthetic; increases value ⭐⭐⭐⭐ Luxury homes, nature‑inspired designs, high‑end remodels High durability and visual impact; long‑term value ⚡
    Statement Tile Work & Pattern Play Medium‑High 🔄: pattern layout increases install complexity Variable 📊: $3,000–$15,000+ depending on tile choice Strong visual impact; personality and focal points ⭐⭐⭐ Accent walls, shower surrounds, feature floors High design flexibility; hides imperfections; durable ⚡
    Smart Bathroom Technology High 🔄: electrical, Wi‑Fi, integration, ongoing updates High 📊: $1,500–$5,000+ per device; full systems $15k–$40k+ Convenience, efficiency, hygiene; remote control ⭐⭐⭐⭐ Tech-forward homes, accessibility upgrades, luxury builds Water/energy savings, accessibility benefits; automation ⚡
    Lighting, Color & Statement Fixtures Medium 🔄: layered circuits, dimmers, fixture placement Medium 📊: fixtures $300–$2,000+; installation costs extra Enhanced ambiance, perceived luxury, mental wellness ⭐⭐⭐⭐ Spa‑inspired baths, small budget luxury upgrades, hospitality High aesthetic impact for moderate cost; mood control ⚡
    Accessible & Universal Design Features Medium 🔄: layout changes, possible structural work Medium 📊: varies with scope; may need professional consult Improved safety, aging‑in‑place, broader market appeal ⭐⭐⭐⭐ Multi‑generational homes, ADUs, aging‑in‑place projects Future‑proofs home; reduces injury risk; stylish options ⚡
    Maximized Storage & Organization Solutions Medium 🔄: custom cabinetry planning & installation Medium 📊: $2,000–$10,000+ for custom solutions Reduced clutter, improved functionality, perceived space ⭐⭐⭐⭐ Small bathrooms, families, organized lifestyles Enhances daily use; custom fit for needs; hides clutter ⚡
    Integrated Indoor Plants & Biophilic Design Low–Medium 🔄: lighting/ventilation planning for plants Low–Medium 📊: modest plant costs; potential grow lights Improved wellbeing, air quality, natural aesthetic ⭐⭐⭐ Wellness bathrooms, urban homes, bright windowsills Low‑cost wellbeing boost; connects to nature; visual warmth ⚡

    Bring Your Vision to Life

    A bathroom remodel should make daily routines easier, aiming for utility beyond a showroom image. A spa shower should provide comfortable, reliable bathing. Sustainable fixtures should reduce water use while maintaining useful pressure. Minimalist cabinetry should simplify cleaning and storage. Smart controls should still work if the technology changes. Accessibility features should support the household today and preserve choices for the future.

    Organize the project into three layers. The first is the layout, including fixture locations, shower dimensions, door swings, clearances, storage, and plumbing access. The second is the infrastructure, including electrical circuits, ventilation, waterproofing, drainage, framing, blocking, and controls. The third is the visible finish package, including tile, stone, cabinetry, hardware, lighting, mirrors, and paint. Finishes are easy to browse, but layout and infrastructure determine whether the completed room performs well.

    Build the budget around the work behind the finishes. A survey of 500 U.S. homeowners who recently completed bathroom renovations found that 50% exceeded their planned budget, while 40% remodeled primarily to refresh outdated aesthetics. (Bathroom remodeling budget survey) Those findings show why a cosmetic goal can become a larger project after walls, floors, plumbing, or ventilation are opened. Set aside room in the scope for concealed damage, outdated wiring, drainage problems, and waterproofing repairs.

    Match the trend to the property

    Coastal California bathrooms need careful moisture management, corrosion-aware specifications, and effective daylight and ventilation planning. Older Bay Area and Los Angeles homes may require investigation of framing, plumbing, electrical capacity, and previous unpermitted work. Arizona projects need a practical water strategy, protection from heat and glare, and materials that remain comfortable and stable in a dry climate.

    Permit and inspection requirements vary by jurisdiction. Confirm requirements for demolition, plumbing changes, electrical work, ventilation, structural modifications, and accessibility before construction begins. Early review can prevent a finish selection from forcing a late layout change or an inspection-related rework.

    Wellness and accessibility can share the same improvements. A walk-in shower can provide a more open, comfortable experience while reducing trip hazards. A handheld shower, bench, reinforced walls, strong lighting, and thermostatic controls support both convenience and long-term usability. NKBA's 2026 reporting says 72% of respondents expect bathrooms to get larger and 91% rank lighting as a top priority, reinforcing the need for deliberate space planning and coordinated lighting. (NKBA bath planning priorities)

    Control complexity before it controls the budget

    Request a scope that identifies concealed work, not only the elements shown in renderings. The estimate should cover demolition, waterproofing, substrate repair, plumbing and electrical rough-ins, ventilation, permits, inspections, finish installation, and contingency planning. Confirm fixture locations, control types, lighting circuits, and storage dimensions before rough-ins are complete. That sequence reduces rework when a late product decision changes the wall or ceiling requirements.

    The National Association of the Remodeling Industry's Remodeling Impact Survey reports a typical Joy Score of 9.6, with 56% of respondents feeling happy and 39% satisfied after project completion. (NARI Remodeling Impact Survey findings) Careful planning remains important, but these figures help explain the lasting appeal of a functional bathroom remodel. Durable materials, sound waterproofing, and a layout suited to the household can improve comfort even when the style is restrained.

    Choose one or two major ideas, then make the supporting details consistent. A spa shower pairs with layered lighting, concealed storage, slip-resistant flooring, and water-efficient fixtures. A statement tile wall usually works best with simpler cabinetry and quieter hardware. Smart features need early electrical coordination, manual controls, and a service plan. Biophilic design requires ventilation, drainage, and plants suited to the local climate.

    NorCal Construction works with homeowners on bathroom remodeling, permitting, design coordination, material selection, and construction management across California and Arizona. The right remodeling partner should test each trend against existing conditions, household routines, accessibility needs, local requirements, and the available budget before demolition.

    NorCal Construction offers bathroom remodeling support for California and Arizona homeowners, including design coordination, permitting, material selection, and construction management. Visit NorCal Construction to discuss a bathroom plan that balances spa comfort, water efficiency, accessibility, storage, and durable execution.