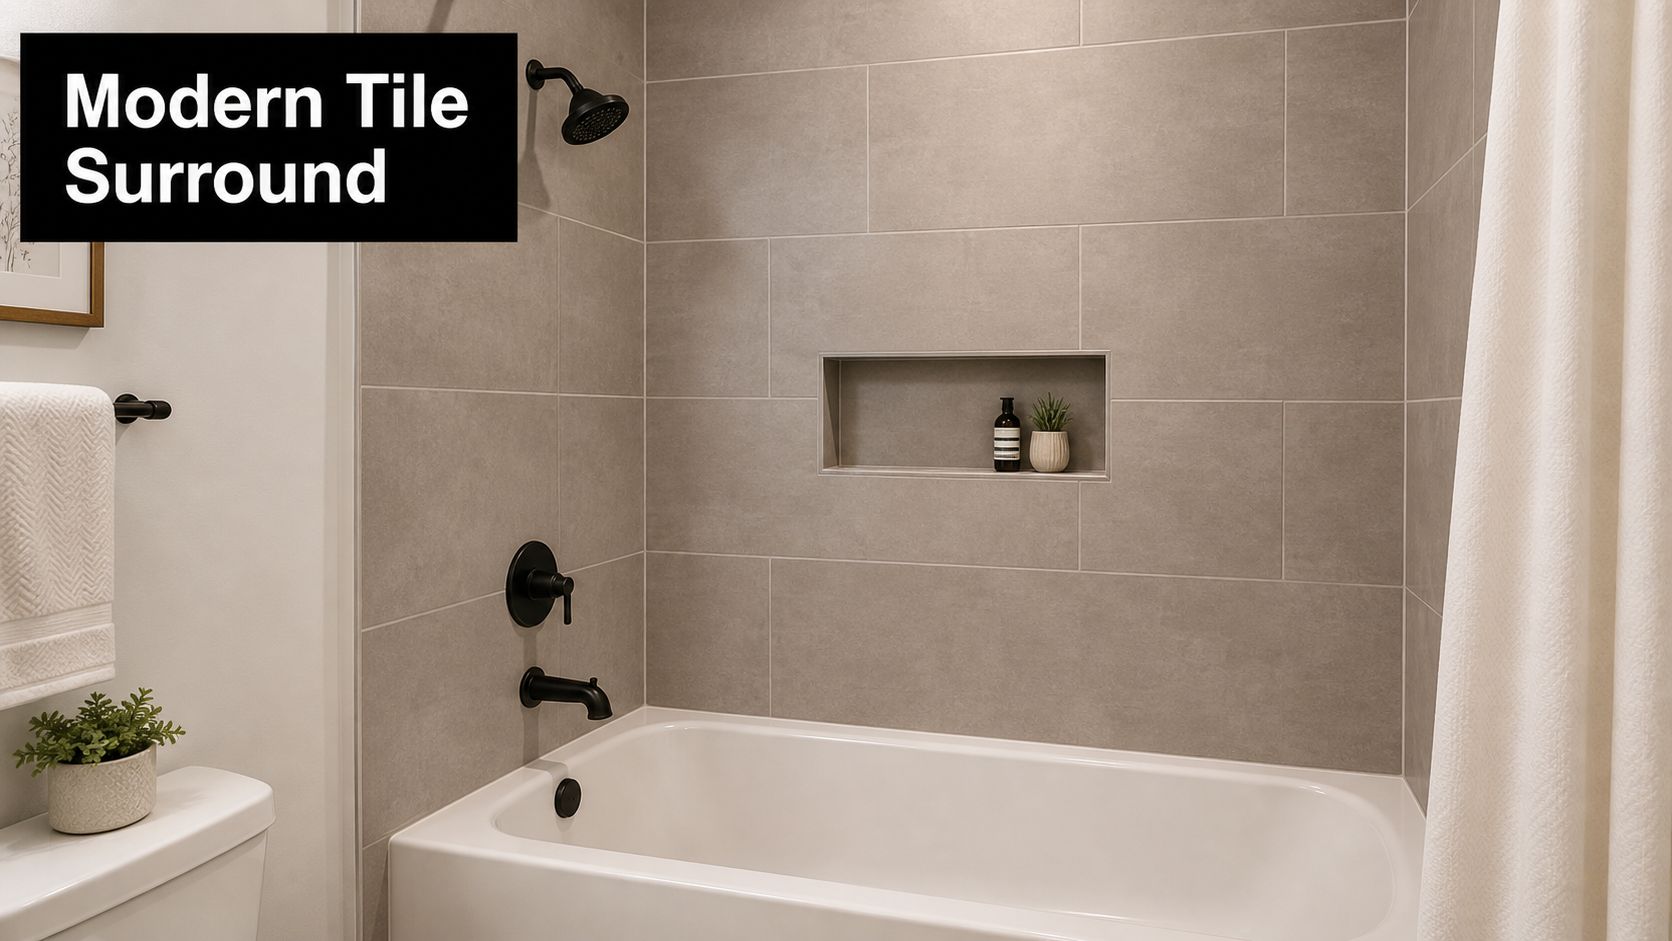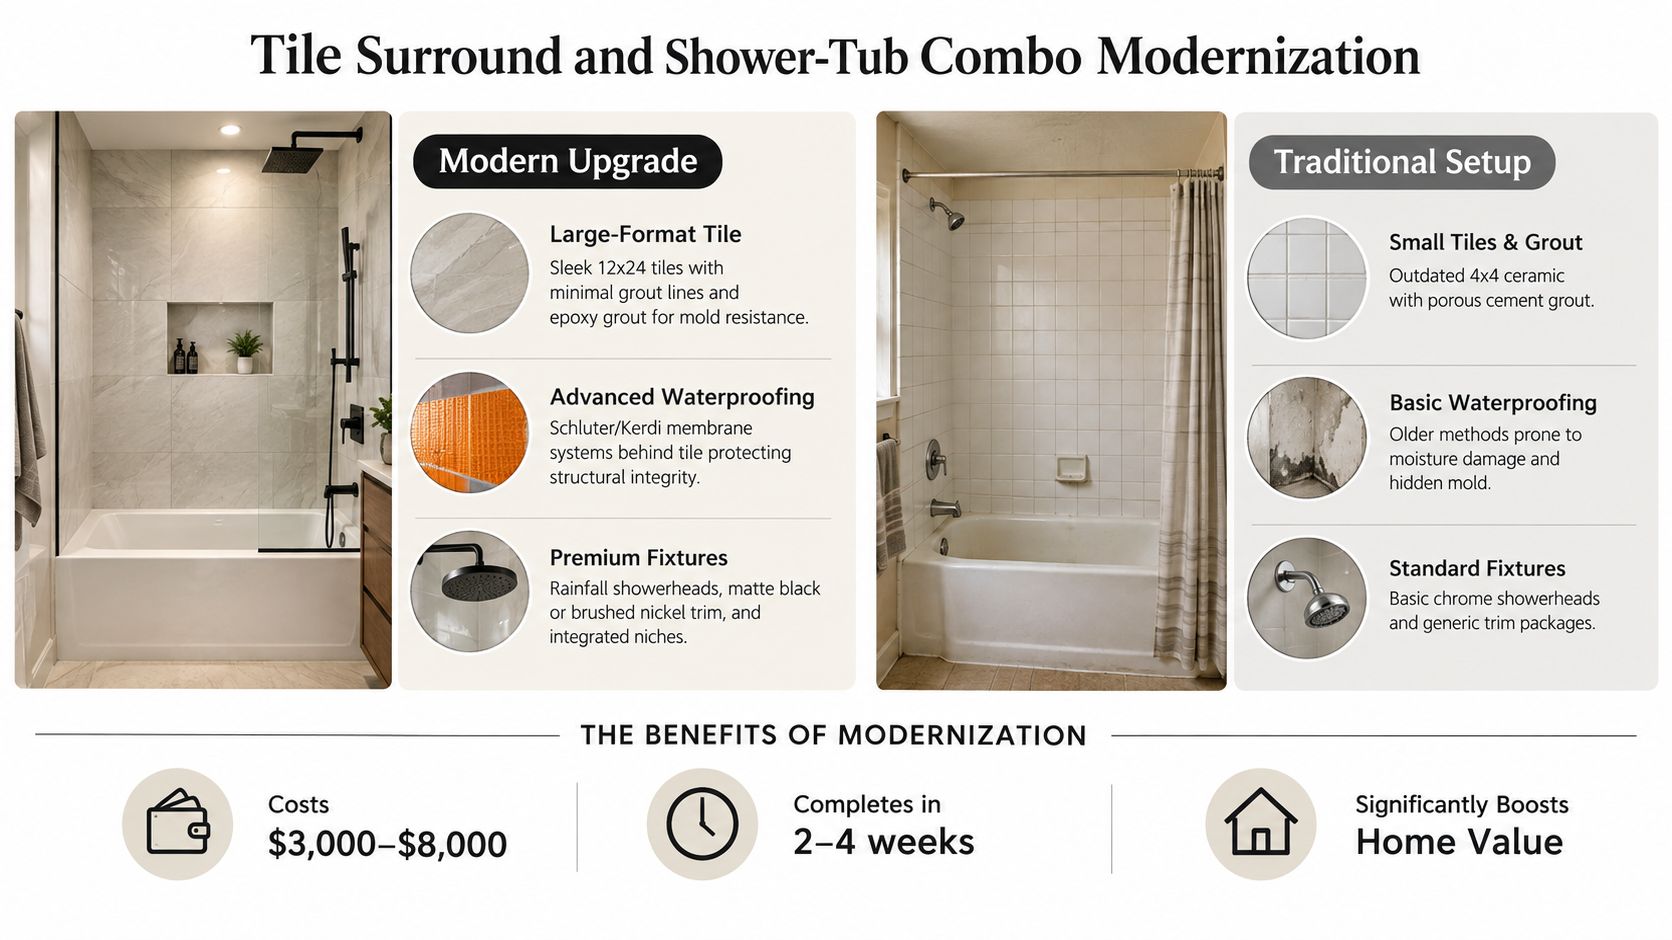
You choose the tile first because it's the visible part of the room. Then the contractor points out that the vanity won't fit the existing plumbing, the shower valve needs a different wall depth, the electrical plan doesn't include the lighted mirror, and the preferred fixtures won't arrive before demolition. What looked like a simple finish upgrade becomes a chain of change orders, missed inspections, and a bathroom that stays unusable longer than expected.
A dependable bathroom remodel checklist is not a shopping list. It's a project-control system that tells you what to decide, verify, order, photograph, and approve before the next trade begins. The sequence matters because layout affects plumbing, plumbing affects framing, framing affects waterproofing, and waterproofing affects tile and final fixture installation.
This guide follows the full path, from defining goals and documenting the existing room through budget and financing decisions, California or Arizona permitting, contractor verification, demolition, rough plumbing, rough electrical, waterproofing, finishes, ventilation, accessibility, inspection, and punch-list closeout. Bathroom work is labor-heavy, and typical remodels can run from 2 to 4 weeks, while a full gut renovation can extend to 12 weeks, according to this bathroom remodeling cost and timeline guide. Plan for how your household will bathe, store supplies, control dust, and access the rest of the home during that disruption.
NorCal Construction can be positioned as a California and Arizona remodeling partner when you want one team coordinating permitting, material selection, and construction management instead of managing separate handoffs yourself.
1. Plumbing Updates and Fixture Installation
Plumbing decisions belong near the beginning of the project, not at the fixture showroom after the walls are already open. Confirm the toilet, vanity, sink, tub, shower valve, handheld sprayer, and drain locations on the plan. Keeping fixtures near existing lines may reduce demolition and coordination, while moving them can improve the room enough to justify additional framing, drainage, venting, and inspection work.
Ask the contractor to identify every concealed connection before the framing closes. Water supply lines, shutoff valves, drain assemblies, pressure-balancing or thermostatic valves, and access panels should be documented. A new faucet or shower system also needs to work with the home's water pressure and the selected valve body. Products such as Moen Eco-Performance or Kohler WaterSense fixtures can support water-conscious design, but the specific model still needs to match the rough-in and local requirements.
Make the rough-in measurable
Use a marked elevation or dimensioned drawing rather than verbal instructions. Label the centerline of each fixture, finished floor height, valve height, niche location, toilet clearance, and vanity plumbing. Install shutoff valves where a homeowner or service technician can reach them without removing cabinetry or tile.
California and Arizona projects must follow the requirements enforced by the local authority having jurisdiction. Permit and inspection needs vary by municipality, particularly when you alter supply lines, drains, electrical work, ventilation, or walls. Don't assume a fixture swap is permit-free because the finished product looks similar to the old one.
Before ordering, confirm:
- Fixture compatibility: Check drain size, valve body, supply connection, electrical needs, and manufacturer installation requirements.
- Service access: Keep shutoffs, cleanouts, pumps, and controls reachable for future maintenance.
- Safety controls: Specify temperature-balancing protection for showers and consider accessible fixture arrangements.
- Handoff approval: Have the contractor and homeowner sign off on the rough-in locations before insulation, drywall, or backer board begins.
If the layout, code questions, or permit coordination remain unresolved, use NorCal Construction's contact page before committing to demolition.
2. Tile, Flooring, Substrate and Waterproofing
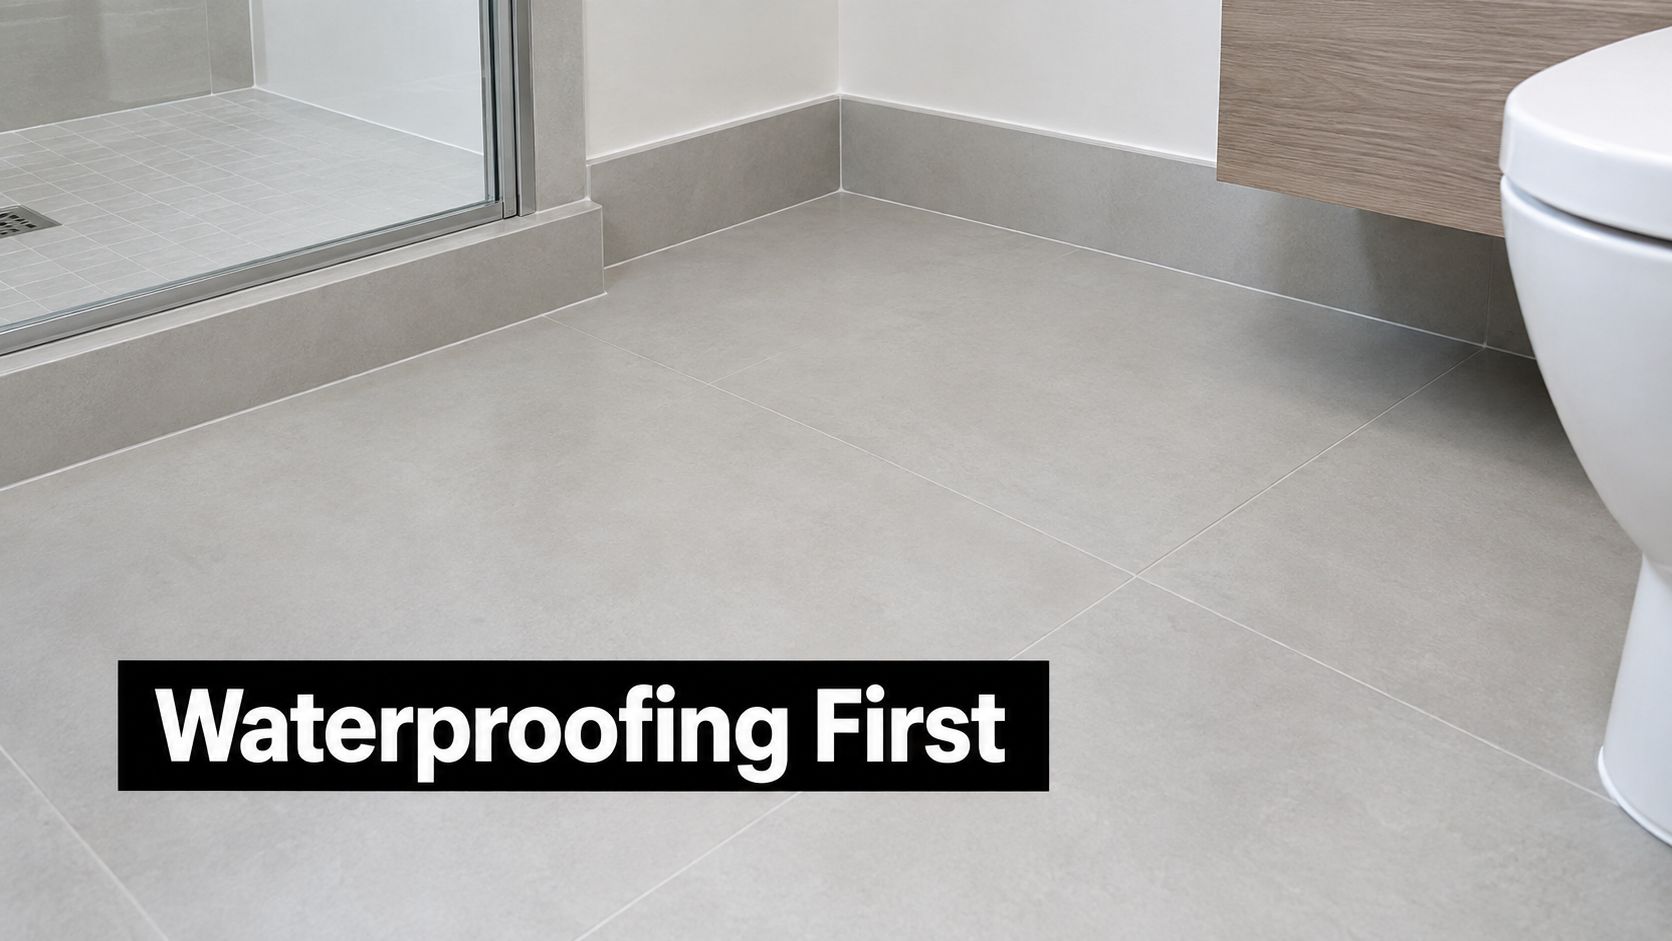
Tile can hide poor preparation for a while, but it can't correct a weak substrate, an incorrect slope, or missing waterproofing. Treat the tile assembly as a system. The floor, shower pan, wall substrate, membrane, drain, transitions, grout, and sealants must be compatible and installed according to their manufacturers' requirements.
Porcelain is often the practical choice for a bathroom floor because it tolerates moisture and daily traffic well. Large-format porcelain planks can reduce grout joints, but they require a flatter substrate and careful handling. Natural stone may create warmth and variation, yet it can demand more sealing and maintenance. A matte or textured surface generally gives a better footing than a polished surface, especially where water collects.
Approve the water-management assembly
Before tile arrives, review the layout with the installer. Confirm full-tile positions, cuts, grout joints, niche alignment, trim profiles, drain placement, and transitions at the doorway. Missing trim or undecided grout can stop an otherwise ready installation.
In a shower, the waterproofing system matters more than the decorative tile. A Schluter KERDI system, Mapei AquaDefense, Laticrete Hydro Ban, or RedGard product may be appropriate when installed as part of a compatible assembly. The installer should seal penetrations and transitions, waterproof the wet walls, form the shower slope toward the drain, and allow required curing time before tile is set.
Practical rule: Never approve tile installation by looking only at the membrane. Check corners, seams, fasteners, valve penetrations, niches, curb details, and the drain connection before the surface disappears.
Photograph the completed waterproofing, including close-ups of corners and penetrations. Keep product labels, batch information, installation instructions, and approval notes with the project file. These records help with warranty questions and make future repairs less speculative.
This waterproofing installation video can help you understand why the layer beneath the tile deserves a formal handoff check.
3. Lighting Design and Installation
A bathroom may look finished yet fail during daily grooming. Check the lighting at the mirror, shower, toilet, and circulation path before approving the electrical layout. Vanity light should reach the face from the front or both sides. Ceiling fixtures provide general illumination and help with visibility in the shower area.
Set the mirror and framing dimensions before the electrician places boxes. A linear LED bar suits a narrow wall with little room beside the mirror. Sconces on both sides usually give more even grooming light, but they require planned box locations and enough clearance from the mirror. Recessed fixtures keep the ceiling visually clean. Direct placement over a person's head can cast shadows, so use them to supplement, not replace, face-level lighting.
Coordinate light, fan, and controls
Select fixture color and controls after reviewing the room's finishes, ceiling height, and use. The plan notes specify a warm-neutral 3,000K color temperature and 50 to 100 lumens per square foot. Confirm those selections against the fixture and manufacturer data before ordering.
Use dimmers for bright morning tasks and lower evening light. Fixtures in wet locations must carry the correct rating. A light inside or immediately above a shower needs product approval for that exposure, along with careful placement around the water spray.
Backlit mirrors, niche lights, and heated mirrors can change the rough-in. Confirm wall depth, electrical load, wiring route, and access to the connection point before closing the wall. Do not allow a late mirror choice to force a second electrical visit.
Record these decisions on the lighting schedule:
- Fixture type: Identify every sconce, ceiling light, niche light, mirror light, and heater.
- Switch logic: Set separate controls for the fan, vanity lighting, ambient lighting, and night lighting where daily use supports them.
- Outlet protection: Coordinate GFCI-protected receptacles and place outlets where grooming appliances can reach them without cords crossing wet areas.
- Inspection timing: Photograph wire routes and box locations before the walls close. After trim-out, test every switch, dimmer, fixture, and receptacle.
The handoff is complete only when the installed lighting matches the approved mirror, fan, and control layout. Record any field change on the project file before final sign-off.
4. Vanity and Storage Solutions
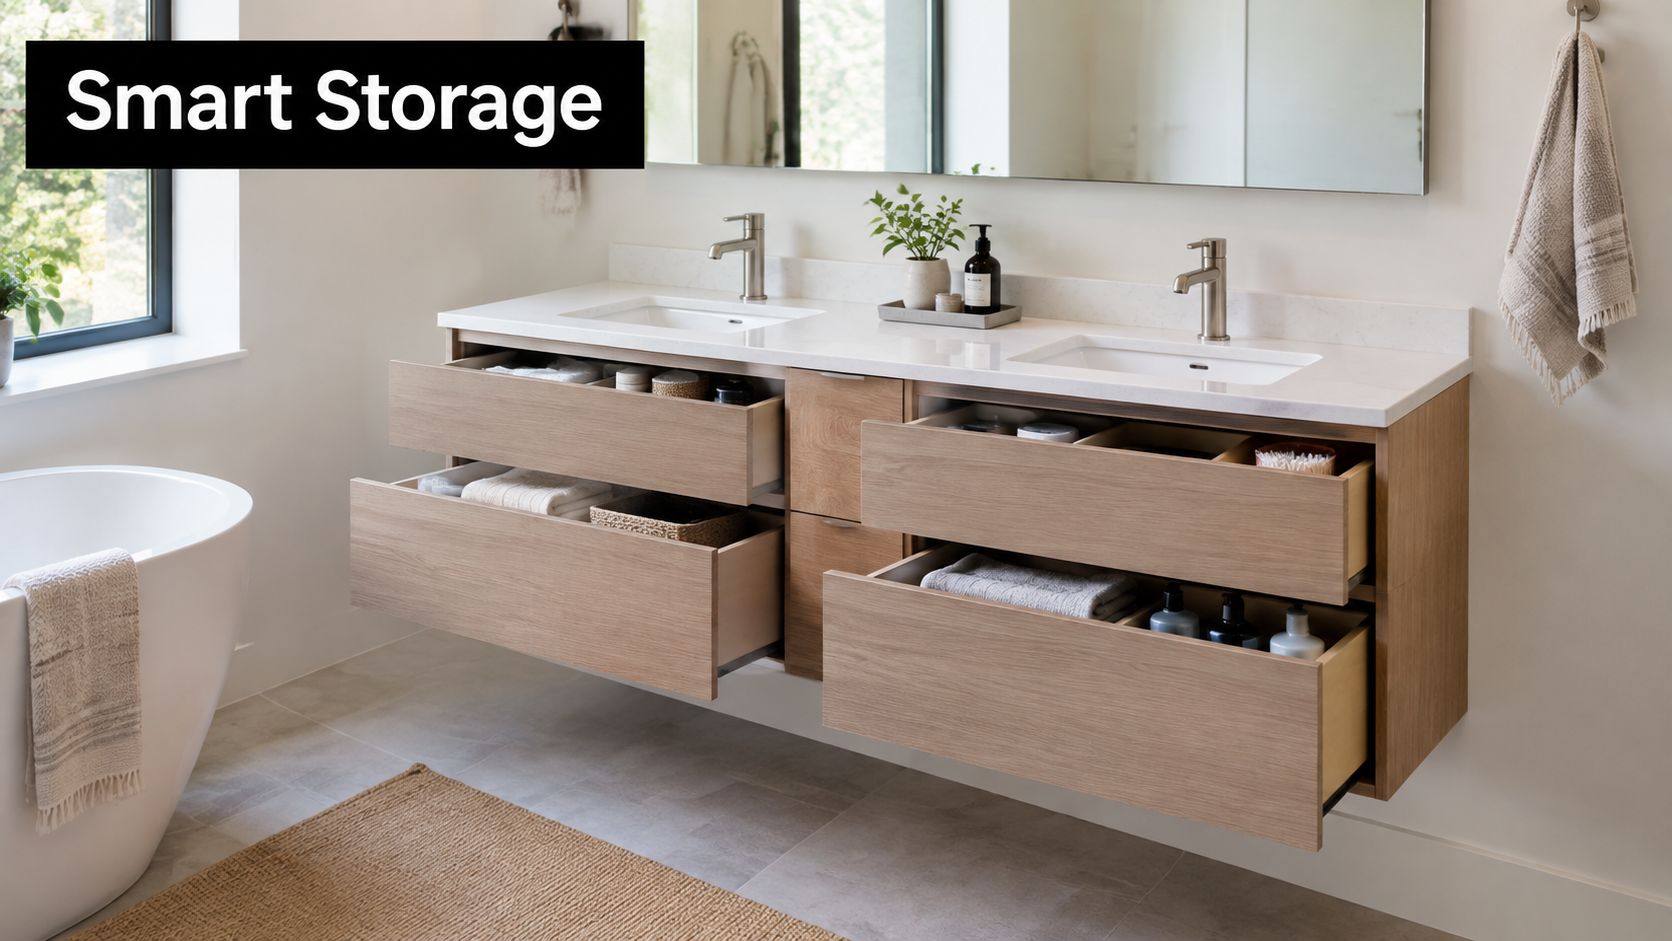
A vanity must handle daily moisture, cleaning products, towels, hair tools, and personal items without turning the floor into overflow storage. Start by mapping the household's routines. A floating vanity leaves more floor visible and makes cleaning easier in a small room. A freestanding cabinet usually provides more concealed storage and may simplify installation.
Choose custom cabinetry when the room includes an awkward wall, shallow corner, or integrated linen-storage requirement. Custom work gives tighter control over dimensions, but requires early field measurements and hardware decisions. Stock vanities can arrive sooner, yet their drawer layout and plumbing openings may conflict with the existing wall or drain centerline. Confirm that fit before ordering, not after demolition.
Quartz suits owners who want a non-porous, lower-maintenance countertop. Marble provides distinctive veining and requires acceptance of more care, including possible etching or staining. Concrete creates a strong architectural finish, but it must be specified and sealed for bathroom exposure.
Plan the cabinet interior around reach and cleanup. Drawers keep frequently used items visible and accessible without kneeling. Leave a defined area beneath the sink for cleaning products, then protect it with a removable liner or water-resistant construction. If aging in place may matter later, review counter height, knee clearance, reach ranges, and reinforcement for future grab bars before the cabinet order is released.
Use this decision gate before installation:
- Wall condition: Confirm the wall is flat, sound, and able to support the cabinet and countertop.
- Plumbing opening: Mark supply lines and the drain so drawers and hardware clear the pipes.
- Countertop template: Recheck the finished wall, cabinet width, sink model, faucet holes, backsplash, and side clearances.
- Moisture protection: Seal exposed edges and exclude untreated materials from areas that receive repeated splashing.
Measure the finished room, not only the old vanity. Tile thickness, baseboard, wall treatment, and countertop overhang can reduce the usable opening. At handoff, compare the installed cabinet with the approved layout, test every drawer and door, confirm plumbing access, and record any field change before final sign-off.
5. Shower and Tub Enclosures
The shower or tub should be designed around water containment and safe use before appearance. A curbless shower can improve accessibility and create a continuous floor, but it needs enough structural depth for slope, drain placement, waterproofing, and the finished transition. A low curb may simplify construction while still reducing the step over a traditional tub or high curb.
A freestanding soaking tub can become the room's focal point, but it consumes floor area and adds cleaning access around the base. A tub-shower combination may serve a family better than a separate tub and open shower, even if the latter looks more luxurious in an inspiration photo. Multiple showerheads and body jets also increase valve, supply, pressure, and waterproofing coordination.
Build for the person using it
Place a bench where it won't obstruct the main spray path. Add a niche at a reachable height, with a properly sloped sill so water returns to the shower rather than collecting inside the cavity. Specify slip-resistant flooring, particularly on the shower slope, and locate grab bars based on actual transfer and standing needs rather than treating them as decorative accessories.
A shower enclosure isn't complete when the glass is installed. The installer must confirm that the pan or wet-area membrane is continuous, the drain is secure, the door swings away from hazards, and the glass hardware is supported by suitable framing or approved anchors. Temperature-balancing or thermostatic controls can reduce scald risk, but they still need correct installation and commissioning.
A glass panel can make a shower look larger, but it won't compensate for poor drainage, an undersized curb, or a niche that leaks into the wall.
Before choosing a system, compare the proposed shower details in the contractor's drawings and portfolio, including examples available through the NorCal Construction portfolio. The useful question isn't whether the image looks attractive. It's whether the construction details match your room, household, maintenance expectations, and accessibility needs.
6. Ventilation and Moisture Control
A bathroom fan is a moisture-management appliance, not a decorative ceiling accessory. It should move humid air to the exterior through a sealed duct route, not discharge into an attic or an enclosed cavity. Moisture left in the room can affect paint, trim, cabinetry, grout, insulation, and indoor air quality.
The project guidance uses 1 CFM per square foot as a baseline sizing rule and identifies a larger primary bathroom with a tub or shower as commonly needing 80 to 100 CFM. Treat those figures as design starting points, then have the contractor verify the fan, duct length, bends, exterior termination, and local requirements. A fan that is technically powerful may still perform poorly if the duct is crushed, leaky, excessively long, or fitted with an unsuitable termination.
Make the fan easy to live with
A humidity-sensing Panasonic WhisperSense or Broan InVent system can automate operation, while an integrated fan-light-heater can consolidate controls in a compact room. Quiet operation matters because occupants are less likely to use a fan that is disruptive. A short, smooth, sealed duct run generally performs better than a convoluted route assembled from flexible material.
Set the control so the fan can continue running after a shower. The supplied guidance recommends a 15 to 20 minute runtime for dehumidification, but the installer should confirm the control and local requirements for your specific room. Make sure the exterior damper opens freely and prevents backdrafts.
At closeout, test the fan while the door is in its normal position. Check airflow at the grille, listen for rattling, inspect the exterior termination, and verify that the switch or humidity sensor responds correctly. A fan that works only when someone remembers to turn it on is less dependable than a properly commissioned automatic control.
7. Paint, Wall Treatments, and Finishes
Paint decisions should follow the wet-area plan, not replace it. Paint is suitable for many dry bathroom walls, but it isn't a substitute for a waterproof shower assembly. Keep tile, approved panels, or another compatible wet-area finish in places exposed to direct spray and standing water.
A satin or semi-gloss bathroom paint is easier to clean than a flat finish and can tolerate routine humidity better. Use a bathroom-specific primer where the substrate, repairs, or prior coating require it. Preparation determines whether the finish looks durable. Clean residue from the wall, sand as needed, fill holes, remove dust, and prime repaired areas before applying the finish coat.
Choose finish materials with the room's humidity in mind
Soft whites, pale blues, and light grays can make a compact room feel calmer, but the undertone may shift under warm vanity light and cooler daylight. Test samples near the mirror, tile, countertop, and flooring instead of judging a color on a distant wall. Deep accent colors can provide contrast, yet they show uneven preparation and touch-ups more readily.
Wallpaper, beadboard, shiplap, and wainscoting can add character when installed in a suitable location with sealed edges and correct clearances. Peel-and-stick products still need honest moisture expectations. A bathroom with weak ventilation or frequent direct splashing is a poor place to rely on a decorative wall treatment that cannot tolerate those conditions.
Paint before final tile and fixture trim when the sequence allows it. Protect finished surfaces, keep caulk lines neat, and leave adequate ventilation during curing. At the handoff, inspect corners, ceiling transitions, behind the toilet, around casing, and near the vanity backsplash. These areas often reveal rushed preparation more clearly than the center of the wall.
8. Mirror and Medicine Cabinet Selection
Set the mirror and medicine cabinet during layout review, before tile, backsplash, and wall finishes hide mounting points. A large frameless mirror can spread light through a compact bathroom, while a framed or round model creates a stronger visual anchor. Confirm the vanity width, faucet height, sconces, cabinet depth, and viewing needs for every household user before ordering.
Choose the function first. A mirror may provide reflection only, or combine storage, lighting, anti-fog control, and electrical features. Recessed medicine cabinets keep storage within the wall plane, but the cavity must be clear of plumbing, wiring, framing, and structural elements. Surface-mounted cabinets reduce wall-opening work, though their projection can narrow circulation or interfere with a door swing.
Make the electrical and mounting handoff explicit. Backlit LED mirrors and lighted cabinets require a confirmed power source, junction box, mounting method, and service access. Record those details in the contractor's layout package. A hidden cord is difficult to correct after tile installation. Verify the manufacturer's clearances and weight, particularly when the assembly mounts to tile or a wall with limited blocking.
Before drilling, mark the proposed outline on the finished wall and check:
- Viewing height: Include standing, child, seated, or mobility-related users where applicable.
- Lighting relationship: Keep sconces clear of the mirror and position the main light to reduce facial shadows.
- Storage access: Confirm that cabinet doors clear the faucet, side wall, and adjacent user.
- Mounting strength: Specify suitable anchors or blocking, then confirm the finished wall supports the full assembly.
- Maintenance: Prefer accessible switches, anti-fog controls, and replaceable components where available.
A rendering can make a mirror appear correctly sized, yet the installed vanity, backsplash, side walls, and sconces may leave it looking narrow. Treat the taped outline as a decision gate. Approve the size and swing before drilling, and photograph concealed blocking and electrical locations for the final project record.
9. Hardware, Accessories, and Finishing Touches
A towel bar placed behind the shower door is inconvenient from day one. Set accessory locations against the room's actual movement, including towel pickup, toilet access, cabinet use, and entry for seated or mobility-related users. Mark them before tile, backer board, and paint are finished, then confirm the layout during the trade handoff.
Choose finishes for both appearance and upkeep. Matte black gives a crisp modern look but can show water spots and fingerprints. Brushed nickel is more forgiving in a transitional room, polished chrome supports a bright, spa-like palette, and antique brass adds warmth. Match the finish to the household's cleaning routine instead of requiring every product to be identical.
Treat accessibility hardware as infrastructure
Grab bars require proper blocking or an approved structural fastening method. A decorative bar without adequate support cannot protect a user. A combination grab bar and towel rail can serve both purposes, provided its load rating and installation requirements are verified before the wall is closed.
Place accessories for wet hands, children, seated reach, and users carrying towels. Keep towel bars outside the wettest spray area and clear of door movement. Recessed niches preserve wall space, while open shelves make towels easy to reach but leave them exposed to humidity and dust.
Use one marked accessory elevation for the installer. Include:
- Mounting points: Confirm studs, blocking, anchors, and the planned tile layout.
- Clearances: Check door swings, drawer fronts, toilet access, shower glass, and appliance outlets.
- Cleaning zones: Keep corners open enough to prevent trapped dust, hair, and moisture.
- Final finish: Inspect screw heads, escutcheons, caps, caulk joints, and transitions during the punch list.
Install accessories after major surfaces cure, but approve their positions earlier. Before drilling, compare the marked locations with tile joints and concealed support. Photograph blocking and any changed attachment points for the project record. Late decisions can leave crooked alignments, cracked tile, or weak fastening that requires reopening finished work.
10. Design Planning and Layout Optimization
Design planning controls nearly every later decision. Begin by documenting the existing room with photographs, measurements, ceiling height, window and door locations, plumbing connections, electrical devices, ventilation route, floor transitions, and visible signs of moisture damage. Record which walls are shared with bedrooms or living areas, since noise, access, and dust control may affect the work plan.
Then define the room's actual job. A primary bathroom for two adults has different storage and circulation needs from a family bathroom, guest bath, or aging-in-place conversion. A layout that looks spacious in a plan can become difficult when drawers open, a shower door swings, a caregiver assists someone, or two people use the vanity at the same time.
Set decision gates before construction
Keep plumbing-heavy items near existing lines when that supports the household's needs, but don't preserve a poor layout solely to avoid every change. Compare the cost and disruption of relocating a fixture against the years of daily inconvenience. Include GFCI-protected receptacles, useful lighting, reachable storage, slip-resistant surfaces, blocking for future grab bars, and a shower threshold that supports safe entry.
A design drawing or 3D rendering should show more than colors. It should identify fixture centerlines, door swings, cabinet dimensions, tile extents, drain slopes, niche sizes, light locations, exhaust routing, and accessibility features. Review it with the person who will build the room, not only the person selecting finishes.
The budget should reflect scope, not wishful thinking. The 2025 Houzz Bathroom Trends Study reported a $13,000 national median spend in 2024, down from $15,000 in 2023, while major remodels rose from $21,000 to $22,000. Larger bathrooms of 100 square feet or more held a $25,000 median, while smaller bathrooms under 100 square feet reached $17,000, a 13% increase. Review the original Houzz Bathroom Trends Study when setting expectations, then replace broad benchmarks with contractor pricing for your property.
Use NorCal Construction's remodeling services early if you want help aligning the layout, selections, permits, and construction sequence. The decision gate is simple: don't authorize demolition until the drawings, scope, permit path, selections, lead times, temporary-bathroom plan, and payment schedule are documented.
10-Point Bathroom Remodel Comparison
| Item | 🔄 Implementation complexity | ⚡ Resource requirements | ⭐ Expected outcomes | 📊 Ideal use cases | 💡 Key advantages |
|---|---|---|---|---|---|
| Plumbing Updates and Fixture Installation | High, permits, rough‑in plumbing, disruptive | Licensed plumber, PEX/fixtures, permits; moderate–high cost | Improved water efficiency, leak prevention, code compliance | Full remodels, older homes, water‑conservation upgrades | Reduces bills, prevents damage, raises property value |
| Tile, Flooring, Substrate and Waterproofing | High, substrate prep, sequencing, skilled tiler | Tile, membranes, backer board, labor‑intensive install; higher cost | Long‑lasting waterproof surfaces, low maintenance, warrantyable | Showers, wet floors, high‑traffic bathrooms, full remodels | Best moisture protection, wide design options, durability |
| Lighting Design and Installation | Moderate, electrical layout, controls, fixture placement | Electrician, LED fixtures, dimmers/sensors; moderate cost | Energy savings, better grooming light, flexible ambiance | Vanities, mood lighting, energy‑code retrofits | Energy efficient, improves functionality and atmosphere |
| Vanity and Storage Solutions | Low–Moderate, carpentry and plumbing coordination | Cabinets, countertops, hardware; moderate cost | Increased storage, organized surfaces, visual focal point | Small baths, shared bathrooms, storage‑limited spaces | Maximizes space, customizable, improves organization |
| Shower and Tub Enclosures | High, waterproofing, glazing, structural work | Glass, tile, membranes, specialized labor; high cost | Spa‑like comfort, improved accessibility, higher resale value | Master baths, accessible/aging‑in‑place upgrades, luxury remodels | Creates luxury focal point, accessible options, versatility |
| Ventilation and Moisture Control | Low–Moderate, duct routing and correct sizing | Exhaust fan, ducting, electrician; low–moderate cost | Reduced mold/mildew, protected structure, better air quality | Any bathroom, especially humid climates or poorly ventilated rooms | Prevents moisture damage, inexpensive relative benefit |
| Paint, Wall Treatments, and Finishes | Low, prep and correct product selection | Primer, moisture‑resistant paint, minor tools; low cost | Updated aesthetics, moisture‑resistant surfaces, easy refresh | Cosmetic refreshes, accent walls, rentals | Low cost, quick impact, easily changed later |
| Mirror and Medicine Cabinet Selection | Low, mounting; powered options need electrical | Mirror/cabinet units, possible electrician; low–moderate cost | Better light/reflection, added storage, improved grooming | Small baths, vanity upgrades, storage‑constrained spaces | Brightens room, combines storage with function |
| Hardware, Accessories, and Finishing Touches | Low, simple installs, finish coordination needed | Hardware sets, accessories; minimal labor and cost | Cohesive look, improved usability, polished finish | Final design phase, quick visual updates, staging | High visual impact for low cost, easily replaced |
| Design Planning and Layout Optimization | Moderate, iterative planning, professional input | Designer/architect, software, time; upfront cost | Optimized workflow, fewer changes, long‑term savings | Full remodels, complex or small spaces, accessibility projects | Prevents costly rework, maximizes function and value |
Finish With Proof, Not Just a Pretty Room
A bathroom is not complete because the tile is clean and the fixtures photograph well. It's complete when the concealed work has been recorded, the permitted work has passed required inspections, every fixture operates correctly, and the finished room matches the approved selections.
Use the following printable-style project-control sheet. Copy it into a document, print it for the jobsite, and give a current copy to the homeowner, contractor, designer, and relevant trades.
Bathroom remodel checklist
- Goals: Record the household's priorities, daily routines, accessibility needs, storage requirements, and features that are optional rather than essential.
- Existing conditions: Attach photographs, room measurements, fixture locations, window and door dimensions, ceiling height, plumbing access, electrical devices, ventilation route, and visible moisture or framing concerns.
- Layout approval: Confirm the toilet, vanity, sink, tub, shower, doors, niches, outlets, lights, fan, and grab-bar blocking on a marked plan.
- Budget and financing: Record the approved scope, allowances, payment schedule, financing decision, and process for written change orders.
- Permit status: List the California or Arizona municipality, permit type, application date, permit number, required inspections, and person responsible for scheduling them.
- Contractor documents: Keep the signed contract, scope, insurance information, license verification, warranty terms, subcontractor responsibilities, and contact details.
- Selections: Record manufacturer, model, finish, size, color, quantity, supplier, delivery status, and inspection date for tile, grout, trims, membrane, vanity, countertop, sink, faucet, toilet, shower system, lighting, mirror, glass, paint, accessories, and hardware.
- Lead times: Mark each item as ordered, received, inspected, damaged, missing, or approved for installation. Don't start demolition with critical materials still uncertain.
- Temporary living plan: Identify bathing arrangements, toilet access, dust containment, protected paths through the house, storage for removed items, and communication procedures for a one-bathroom household.
- Demolition: Confirm shutoffs, dust barriers, floor protection, debris removal, salvage decisions, and inspection of framing, subfloor, plumbing, and hidden water damage.
- Rough plumbing: Verify supply lines, drains, venting, valves, shutoffs, cleanouts, pressure or leak testing, fixture centerlines, and service access.
- Rough electrical: Verify circuits, GFCI protection, switch locations, mirror power, vanity lighting, ceiling lighting, fan controls, heated-floor wiring, and required inspection.
- Inspections: Record the date, inspector comments, corrections, approval status, and photographs before walls or ceilings close.
- Waterproofing approval: Photograph substrate, seams, corners, penetrations, niches, curb or curbless transition, pan, drain, slope, and membrane. Record the product system and installer approval.
- Tile and flooring: Approve layout, cuts, grout color, trim, slope, transitions, expansion details, curing time, sealing requirements, and protection of completed surfaces.
- Paint and wall finishes: Verify substrate preparation, primer, finish, color, sheen, sealed edges, ventilation during curing, and protection from later trades.
- Fixture installation: Test faucets, shower controls, toilet fill and flush, sink drains, shutoffs, escutcheons, seals, countertop joints, vanity doors, and drawers.
- Ventilation: Test fan operation, airflow, controls, exterior termination, damper, noise, and post-shower runtime.
- Glass and doors: Verify measurements, clearances, swing direction, seals, anchors, alignment, and safe operation.
- Cleanup: Remove construction dust, labels, protective film, debris, and unused sealants. Keep approved spare tile, grout, paint, and product documentation.
- Final inspection: Record required approvals before treating the remodel as complete.
- Warranties: Collect contractor, fixture, waterproofing, glass, cabinetry, countertop, fan, mirror, and paint warranties, along with maintenance instructions.
- Punch list: Assign each item to a responsible person, add a due date, photograph the correction, and obtain homeowner acceptance.
Timeline template
Before demolition
- Goals and scope approved: ____________________
- Existing conditions documented: ____________________
- Layout and accessibility plan approved: ____________________
- Budget, financing, allowances, and change-order process confirmed: ____________________
- Contractor documents verified: ____________________
- Permit application and status: ____________________
- Materials ordered and delivery dates confirmed: ____________________
- Temporary bathroom and dust-control plan ready: ____________________
Demolition and inspection
- Water and electrical shutoffs confirmed: ____________________
- Protection and containment installed: ____________________
- Demolition completed: ____________________
- Framing, subfloor, plumbing, and moisture conditions reviewed: ____________________
- Hidden-condition decisions approved in writing: ____________________
Rough-in
- Rough plumbing completed and tested: ____________________
- Rough electrical completed and tested: ____________________
- Ventilation duct route completed: ____________________
- Blocking for grab bars, accessories, cabinets, and glass installed: ____________________
- Rough inspection scheduled: ____________________
- Rough inspection approved: ____________________
Waterproofing and surfaces
- Substrate installed: ____________________
- Shower pan, drain, curb or curbless transition completed: ____________________
- Waterproofing installed: ____________________
- Waterproofing photographs and approval recorded: ____________________
- Tile layout approved: ____________________
- Tile installed and cured: ____________________
- Grout, caulk, sealing, and transitions completed: ____________________
- Paint and wall treatments completed: ____________________
Trim-out and closeout
- Vanity and countertop installed: ____________________
- Plumbing fixtures installed and tested: ____________________
- Lighting, mirror, and GFCI devices tested: ____________________
- Exhaust fan and controls tested: ____________________
- Shower glass and doors installed: ____________________
- Hardware, grab bars, shelves, and accessories installed: ____________________
- Final cleaning completed: ____________________
- Final inspection approved: ____________________
- Warranties and maintenance documents received: ____________________
- Punch list completed and accepted: ____________________
During the final walkthrough, test water flow at every fixture, check drainage, confirm hot-water control, inspect all supply and drain connections, test each light and dimmer, verify GFCI protection, run the exhaust fan, operate doors and drawers, inspect grout and caulk, and check shower glass for alignment and leaks. Photograph the finished room and retain images of every concealed stage. Those records are more useful than memory when a repair or warranty question arises later.
The 2026 bathroom remodeling market overview projects global market growth from USD 200.2 billion in 2025 to USD 315.9 billion by 2035, with a projected 4.7% CAGR. That projection doesn't determine your renovation budget, but it reinforces a practical point. Planning value comes from preventing rework, scope creep, material gaps, waterproofing failures, and permit delays before they reach the jobsite.
Homeowners also need a plan for the weeks when the bathroom is unavailable. Temporary bathing, dust containment, protected walkways, and household access deserve the same attention as tile and fixtures, particularly for one-bathroom homes, families, and caregiving situations. This temporary bathroom and renovation disruption guide addresses that often-overlooked part of the process.
Finally, don't treat accessibility as a trend that can be added later. Door width, blocking, curbless or low-curb entry, grab bars, reachable storage, and slip-resistant surfaces are easier to coordinate before framing and waterproofing. Style-led features such as freestanding tubs and warm metallic finishes can be attractive, but durable universal-design decisions often determine whether the room remains safe and useful as household needs change. The 2025 bathroom trends coverage from Porcelanosa provides context for the design direction, while your contractor should translate those ideas into buildable, code-conscious details.
Before you release the final payment, confirm final approval, written warranty information, operating instructions, spare materials, photographs, and punch-list completion. A good remodel should be beautiful, but it should also be documented, serviceable, dry, safe, and ready for daily use.
NorCal Construction helps California and Arizona homeowners coordinate bathroom remodeling from layout and material selection through permitting, construction management, inspections, and closeout. Use this bathroom remodel checklist as your planning file, then visit NorCal Construction to discuss the scope, sequence, and support your project requires.