Tag: home improvement

  • Your Guide to the Average Bathroom Remodel Cost

    Your Guide to the Average Bathroom Remodel Cost

    So, you're thinking about remodeling your bathroom. It's one of the best home improvements you can make, but the first question on everyone's mind is always the same: what's it going to cost?

    The truth is, there's no single answer. A bathroom remodel can range from a simple weekend refresh to a down-to-the-studs transformation. Nationally, you can expect the average bathroom remodel cost to land somewhere between $7,000 for a small, basic update and upwards of $25,000 for a high-end, luxury project.

    For most people, a full remodel of a standard 5×8 foot bathroom usually settles in the $10,000 to $15,000 range. These numbers are a great starting point, but your final cost will come down to the specific choices you make.

    What Is the True Cost of a Bathroom Remodel?

    Before you start pinning pictures of walk-in showers and freestanding tubs, it's crucial to get a handle on your budget. Think of it like planning a road trip—you need to know your destination and how much gas money you have before you hit the road. It saves you from running out of fuel halfway there.

    The final price of your remodel really boils down to three things: the scope of the project, the materials you choose, and the cost of labor. Let's break down what that means for your wallet.

    Setting a Realistic Financial Baseline

    To give you a clearer picture, let's look at the different tiers of a bathroom remodel. This will help you see where your own project might fit in.

    Bathroom Remodel Cost at a Glance

    This table offers a quick summary of what you can expect to spend based on how deep you want to go with your renovation.

    Remodel Tier Typical Cost Range (National Average) Common Features
    Basic / Cosmetic Update $3,000 – $7,000 New paint, updated fixtures (faucet, showerhead), new lighting, and replacing a vanity or toilet with stock models. The layout remains unchanged.
    Mid-Range Remodel $7,000 – $18,000 Includes everything in a basic update, plus new flooring, a new tub/shower combo, a semi-custom vanity, and better-quality tile. Plumbing stays in the same location.
    Full / Luxury Overhaul $18,000 – $35,000+ A complete gut renovation. This tier involves changing the layout, moving plumbing and electrical, high-end materials (natural stone), custom cabinetry, and luxury features like heated floors or a steam shower.

    As you can see, the jump from a simple cosmetic touch-up to a full luxury overhaul is significant, and it all comes down to the details.

    The Three Pillars of Remodel Costs

    Getting a grip on your budget means understanding where every dollar is going. Essentially, your total cost is a balancing act between these three key components.

    • Scope of Work: This is the biggest driver. Are we just swapping out a faucet and painting the walls, or are we tearing down walls and moving the toilet? The more complex the job, the higher the cost.

    • Materials and Finishes: Your taste has a major impact. Choosing a standard ceramic tile versus imported Carrara marble will create a massive difference in your materials budget.

    • Labor: Don't underestimate this one. The skilled professionals—plumbers, electricians, tile setters, and carpenters—are what make the project happen. Labor often accounts for 40% to 60% of the total project cost.

    Here's a pro tip: a smaller bathroom doesn't always mean a dramatically smaller price tag. The cost per square foot can actually be higher because you're fitting all the same complex plumbing and electrical work into a tighter, more challenging space.

    Where Your Remodel Budget Actually Goes

    So, you've seen the average price tags, but what are you actually paying for? Let's pop the hood on a bathroom remodel budget and see where every dollar goes. It’s easy to get fixated on the final number, but the real power comes from understanding how that number is built.

    Think of it this way: the total cost isn't one giant, mysterious expense. It's a collection of dozens of smaller costs, from the plumber's hourly rate to the exact faucet you fell in love with. When you can see the individual pieces, you can start having real, productive conversations with your contractor about where to spend and where you might be able to save.

    The Great Divide: Labor vs. Materials

    The first thing to understand is the fundamental split in any remodel budget: labor versus materials. Most homeowners focus on the shiny new fixtures and tile, but it’s often the skilled labor that makes up the biggest chunk of the bill.

    You can generally expect labor to eat up 40% to 60% of your total project cost. This isn’t just one person’s time; it’s the combined expertise of a whole team of professionals who make the magic happen.

    • General Contractor: The project's quarterback, managing schedules, coordinating all the different trades, and making sure the job site runs like a well-oiled machine.
    • Plumbers & Electricians: These are the licensed pros doing the critical work behind the walls. Their job is to ensure your bathroom is not just beautiful, but safe and up to code.
    • Tile Setters & Carpenters: True artisans. Their craftsmanship is what you see every day, from perfectly level tile lines to a flawlessly installed custom vanity.
    • Painters & Finishers: They're the ones who handle the final details, applying that perfect coat of paint and making the whole space feel polished and complete.

    The other 40% to 60% of your budget is for all the physical stuff—the materials and fixtures. This is where your personal taste really drives the cost, covering everything from the tub and toilet to the grout, paint, and light switches.

    A Detailed Cost Breakdown by Category

    Ready to get even more granular? Let's slice up that budget pie a bit further. While every single project has its own unique quirks, a typical mid-range bathroom remodel budget tends to follow a predictable pattern.

    The chart below gives a great visual overview of how projects scale from a simple refresh to a full-blown luxury gut renovation.
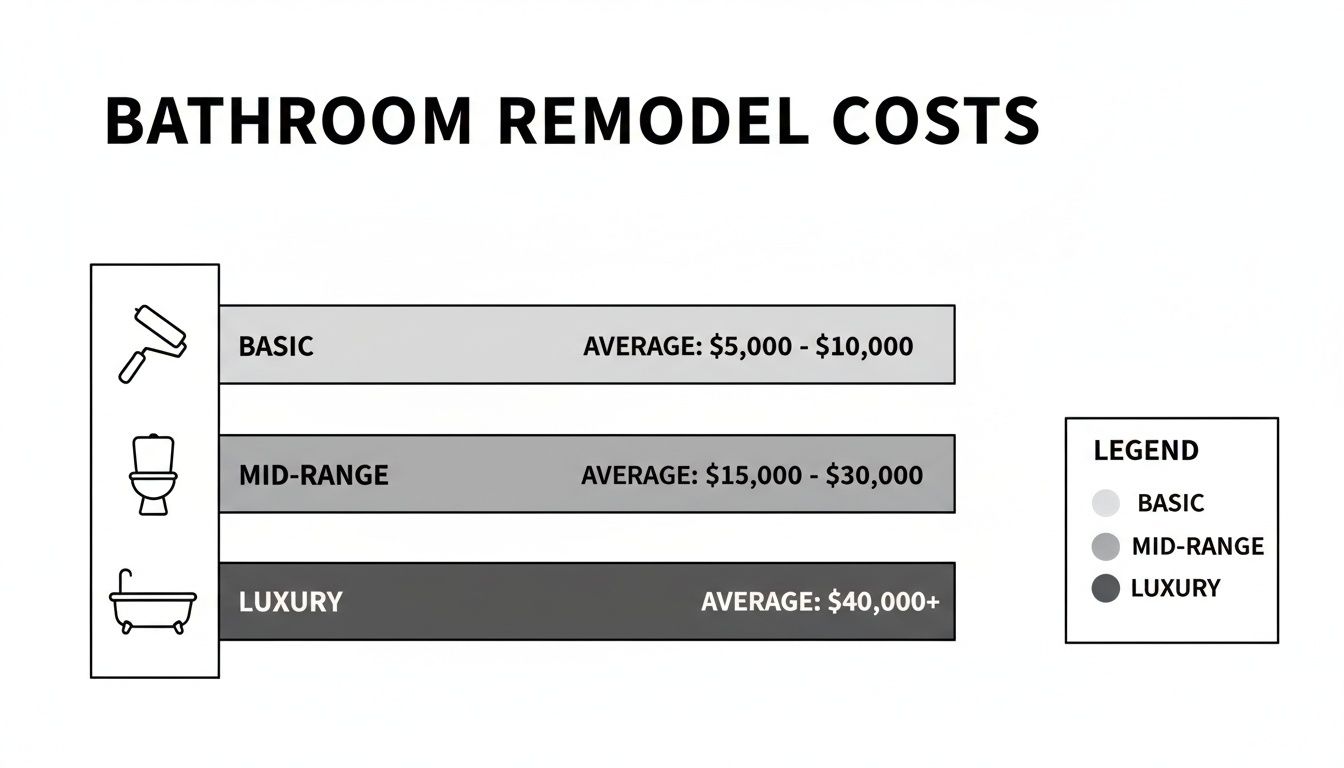
    Infographic detailing average bathroom remodel costs for basic, mid-range, and luxury projects.

    It’s a handy reference to see where your own project might fall on the spectrum. Now, let’s dig into the line items that add up to those final numbers.

    • Labor (40-60%): As we covered, this is almost always the biggest piece of the pie, paying for all the skilled professionals.
    • Cabinetry and Vanities (10-20%): This is a wide range. You could be looking at a simple, off-the-shelf vanity from a big-box store or a fully custom, furniture-grade piece.
    • Fixtures (10-15%): This bucket includes your toilet, sink, faucet, tub, and showerhead. Opting for a high-end freestanding tub or a smart toilet with all the bells and whistles will quickly push this percentage up.
    • Tile and Flooring (7-12%): The cost here is a two-part equation: the price of the material (think ceramic vs. marble) and the complexity of the installation. A tricky mosaic pattern takes way more time and skill to lay than simple, large-format tiles.
    • Plumbing and Electrical (5-10%): This might look like a small slice, but don't be fooled. The moment you decide to move a toilet or add new recessed lighting, this cost can climb fast.
    • Countertops (3-7%): Your options here run the gamut from affordable laminate to premium quartz or granite.
    • Lighting and Ventilation (3-5%): Never underestimate the importance of good lighting and a powerful, properly vented exhaust fan. They're critical for making the room functional and preventing moisture issues down the road.
    • Permits, Design, and Other (2-5%): This catch-all category covers the necessary evils like city permits, any professional design fees, and hopefully, a small contingency fund for those "uh-oh" moments.

    It's crucial to remember that labor and materials are deeply intertwined. A complex herringbone tile pattern, for example, doesn't just mean more intricate tile cuts (which creates more material waste); it dramatically increases the installer's time, bumping up your labor cost.

    Seeing your project broken down like this helps you shift your mindset. You're not just buying "a new bathroom"; you're orchestrating an assembly of specific parts and expert services. That perspective is the key to making smart, confident decisions that honor both your design dreams and your budget.

    How Project Scope Determines Your Final Cost
    Spacious modern bathroom featuring a double vanity, glass shower, and large sliding doors to a lush backyard.

    The single biggest factor driving the average bathroom remodel cost is the scope of the project. There's a world of difference between a simple weekend refresh and a complete, down-to-the-studs transformation. That difference shows up not just on the final invoice but in the timeline, the disruption to your daily life, and the overall complexity.

    Think of it like working on a car. A cosmetic update is like getting new tires and a fresh coat of wax—it looks fantastic but doesn't touch the engine. A mid-range remodel is like dropping in a new engine and transmission; you're overhauling the core components. A luxury renovation? That's building a custom car from the ground up, where every single part is hand-selected for performance and style.

    To get a real handle on your budget, let's break down these three main tiers of bathroom remodeling. Figuring out which category your vision fits into is the essential first step toward setting a realistic financial plan.

    The Cosmetic Update: A High-Impact Refresh

    A cosmetic update is all about getting the maximum visual bang for your buck with minimal disruption. This is the perfect route if your bathroom's layout works and the main fixtures are in good shape, but the style just feels dated. The key here is that you are not moving any plumbing or electrical wiring.

    This approach zeroes in on surface-level changes that can often be knocked out pretty quickly. The goal is a fresh new look without the cost and headache of major construction.

    Common cosmetic updates include:

    • A Fresh Coat of Paint: Still the most cost-effective way to completely change the mood of a room.
    • New Fixtures: Swapping out an old faucet, showerhead, and cabinet hardware is an instant modernization trick.
    • Updated Lighting: Ditching a dated vanity light for a stylish new fixture can brighten the whole space and make it feel more inviting.
    • Refinishing Surfaces: Instead of a full replacement, you can have a tub or tile professionally reglazed for a clean, like-new appearance.
    • New Accessories: Don't underestimate the power of new towel bars, a stylish mirror, or even a new shower curtain to tie the room together.

    The Mid-Range Remodel: A Substantial Overhaul

    This is the most common type of bathroom remodel we see. It goes well beyond the surface, involving the replacement of major components but without changing the room's fundamental layout. A mid-range project is the right call when fixtures are starting to fail, surfaces are worn out, and you need more than just a cosmetic lift.

    While the toilet, sink, and shower stay in their original spots to avoid expensive plumbing rerouting, almost everything else you see and touch gets replaced. This tier delivers a powerful transformation, significantly improving both how the bathroom works and how it looks.

    Key Insight: The main jump from a cosmetic to a mid-range remodel is the replacement of major items. In a mid-range project, the old vanity comes out, the tub is swapped for a new one, and new flooring goes down—all tasks that require more skilled labor and materials.

    Typical elements of a mid-range remodel:

    1. New Vanity and Countertop: Upgrading from a basic cabinet to a quality semi-custom vanity with a new stone or quartz top.
    2. New Toilet and Tub/Shower: Replacing old, inefficient models with modern, water-saving fixtures and a fresh tub or shower stall.
    3. New Flooring: Tearing out that old linoleum or cracked tile and installing durable, beautiful flooring like porcelain tile or luxury vinyl plank.
    4. Updated Tile Work: Adding a new tile surround for the shower or a stylish backsplash behind the vanity for a more finished look.

    When you're planning a project of this scale, knowing the sequence of events is crucial. For a detailed look, check out our guide on how to plan a bathroom remodel step-by-step, which walks you through the entire process.

    The Luxury Transformation: A Complete Reimagining

    A luxury or full-gut renovation is where you truly start with a blank slate. This isn't an update; it's a complete reimagining of the space. Walls might come down, the entire layout could be reconfigured, and premium materials and high-end features are brought in.

    This is, by far, the most expensive and time-consuming scope. It involves every trade—plumbers, electricians, carpenters, and tile setters—all working together to build a completely new room from the studs out. The average bathroom remodel cost for this tier can climb quickly, as every custom choice adds another layer of labor and complexity.

    Luxury transformations often feature:

    • Layout Changes: Moving the toilet to a new wall, converting a tub into a massive walk-in shower, or even expanding the bathroom's footprint by borrowing space from a closet.
    • High-End Materials: Custom cabinetry, natural stone countertops, and designer tile that makes a statement.
    • Premium Features: Think heated floors, steam showers, smart toilets with all the bells and whistles, and elegant freestanding soaking tubs.
    • Structural and Systems Work: This means rerouting all plumbing and electrical lines to fit the new design and bringing everything up to modern building codes.

    Why Your Zip Code Is a Major Factor in Your Remodel Budget

    It’s easy to find a "national average" for a bathroom remodel, but honestly, those numbers can be pretty deceptive. The reality is, a project in Phoenix and the same project in the San Francisco Bay Area will have wildly different price tags. Your specific location is one of the biggest drivers of the final cost, affecting everything from your plumber's hourly rate to the cost of a simple 2×4.

    Think about it like this: a cup of coffee costs more in a big city airport than it does at your local small-town diner. The coffee is the same, but you're paying for the higher rent, wages, and operating costs of that location. Construction works the exact same way. The local economy dictates the price of just about everything.

    This is especially true for homeowners in the areas we know best: California and Arizona. Getting a handle on these regional differences is the first step to building a budget that makes sense and avoiding any nasty surprises when the quotes start rolling in.

    California vs. Arizona: A Tale of Two Budgets

    Even though they're neighbors, California and Arizona can feel like they're on different planets when it comes to construction costs. Why the huge gap? It mostly boils down to three things: labor rates, material costs, and how complicated the local building codes are. A bathroom remodel that runs you $18,000 in a Phoenix suburb could easily cost $25,000 or more for the exact same job in much of Northern California.

    Let’s dig into what’s behind that price difference.

    • Labor Wages: This is the big one. California, especially around its major cities, has some of the highest labor costs in the nation. Skilled tradespeople—the plumbers, electricians, and tile setters who make your project happen—need to earn a higher wage just to keep up with the state's cost of living.
    • Material and Supply Chain Costs: While a faucet might have a national price, getting it to your front door doesn't. Logistics, fuel, and local supplier pricing mean that same vanity or box of tile will almost always have a higher sticker price in California than in Arizona.
    • The Regulatory Maze: All the permits and paperwork required for a remodel come with fees, and those fees are typically much steeper in California.

    The takeaway is simple: A higher cost of living means a higher cost of construction. Every single person on your job site, from the project manager down to the person hauling away debris, has their wages tied to the local economy. This is, without a doubt, the single biggest factor in regional price differences.

    How Building Codes Drive Up Costs

    Beyond the broad economic picture, specific state and local building codes can add unique costs to your project. California is known for having some of the most rigorous regulations in the country. While they’re great for safety and energy efficiency, they definitely add to the total cost of a remodel.

    A perfect example of this is California's Title 24, the state's building energy efficiency standards. For your bathroom remodel, Title 24 sets strict rules for things like:

    • High-efficacy lighting: You'll be required to use energy-saving fixtures, like LEDs.
    • Ventilation fan performance: Your exhaust fan has to meet specific standards for both airflow and energy consumption.
    • Water conservation: Toilets, faucets, and showerheads must all be low-flow models to comply with state water-saving mandates.

    These upgrades will absolutely save you money on your utility bills over the long run, but they often mean buying more expensive fixtures and paying for a more careful installation to pass inspection. This adds to your upfront cost. Arizona has its own building codes, of course, but they tend to be less complex, making the compliance process simpler and usually cheaper. It’s a clear example of how your address directly impacts the final number on your invoice.

    Getting the Best Return on Your Investment

    A bathroom remodel isn't just an expense; it's a strategic investment in your home's value and your daily life. When we talk about "return," we're really talking about two different things. There's the financial payback you get when you sell, and then there's the immediate upgrade to your quality of life. Thinking about both is how you make smart decisions that truly pay off.

    The financial return on investment (ROI) is simply how much of your project cost you can expect to get back. While the housing market always has its ups and downs, a solid mid-range bathroom remodel is consistently one of the best home improvement projects for ROI. Nationally, it's not uncommon for homeowners to recoup 55% to 70% of what they spent.

    Let’s put that into perspective. If your average bathroom remodel cost comes in at $15,000, a good ROI could add over $10,000 to your home's resale value. But here’s the key: not all upgrades have the same impact on potential buyers.

    Maximizing Your Financial ROI

    If you're looking for the best financial return, your goal should be to appeal to the broadest audience of future buyers. That usually means choosing functional, timeless upgrades over highly personal or trendy ones that could look dated in a few years.

    Here are some of the upgrades that consistently deliver the biggest bang for your buck:

    • Universal Design Features: Think walk-in showers with no curb, comfort-height toilets, and even stylish grab bars. These features make a bathroom safer and more accessible for everyone, from young kids to older adults, which is a huge selling point.
    • Neutral and Timeless Finishes: You really can't go wrong with the classics. White subway tile, simple quartz countertops, and clean, elegant fixtures have a lasting appeal. They create a bright, inviting space that lets buyers easily imagine themselves living there.
    • Water-Efficient Fixtures: Low-flow toilets and faucets have gone from a "green" option to a standard expectation. They signal that a home is modern and efficient, and buyers appreciate the real savings on their future utility bills.

    The most profitable remodels are the ones that solve obvious problems. If you fix a clumsy layout, add desperately needed storage, or replace fixtures that are clearly past their prime, you’re making a tangible improvement that buyers can see and are willing to pay more for.

    Don't Forget Your "Lifestyle ROI"

    Numbers are important, but don't lose sight of your own happiness and comfort in the home you live in now. We call this your "lifestyle ROI"—the daily dividend you collect from having a space that works beautifully for you and just makes you feel good.

    Think about the little annoyances in your current bathroom. Are you constantly fighting for sink space in the morning? Is the lighting so bad it makes getting ready a chore? Is the tiny shower a daily source of frustration? A smart remodel gets rid of those friction points, making every single day a little easier and more enjoyable.

    This personal value is harder to put a number on, but it's just as real. Creating a spa-like retreat where you can decompress after a long day or a super-functional bathroom that gets your family out the door on time is an investment in your well-being. The best remodels strike that perfect balance, mixing smart, resale-friendly choices with the features that will bring you personal joy. That's how you make sure your new bathroom is an asset in every sense of the word.

    Smart Ways to Manage Your Remodel Costs

    Two construction workers in a kitchen setting review plans and discuss savings on a tablet.

    Keeping your project on budget doesn't mean you have to give up on your dream bathroom. It's all about making smart, strategic choices that give you the biggest bang for your buck without sending the final invoice through the roof.

    One of the single most effective ways to manage the average bathroom remodel cost is to stick with your bathroom's current layout. If you can avoid moving plumbing fixtures like the toilet, sink, or shower, you're already way ahead of the game.

    Shifting those core components around is a surefire way to escalate costs, as it involves complex (and expensive) work from plumbers and electricians. By leaving things where they are, you sidestep the need to reroute all the hidden pipes and wires, saving thousands that can be put toward the beautiful finishes you'll actually see every day.

    Be Strategic with Materials and Finishes

    The materials you choose will have a massive impact on your bottom line. But here’s the good news: being budget-conscious doesn't mean you’re stuck with cheap-looking options. The market is filled with beautiful, durable alternatives that look just as good as their high-end cousins.

    • Flooring and Tile: Instead of splurging on natural stone like marble, check out high-quality porcelain or ceramic tiles. Modern versions can realistically mimic stone or wood textures while offering better durability and easier maintenance.
    • Vanities and Countertops: You can get a high-end look from a stock or semi-custom vanity without paying for a fully custom piece. Likewise, quartz delivers the elegance of granite but is often more durable and comes with a more predictable price tag.
    • Refinish Instead of Replace: Is your bathtub structurally sound but just looks a bit dated? Professional refinishing can make it look brand new for a fraction of the cost and hassle of a full replacement.

    For more ideas, you can dive into other budget-friendly bathroom remodel tips in our detailed guide. These small adjustments really do add up to significant savings.

    The Power of a Contingency Fund

    Here’s a hard-earned truth from the field: no matter how well you plan, remodels almost always have a few surprises in store. As soon as we open up the walls, we might find anything from old water damage to plumbing that’s not up to modern code. This is exactly why a contingency fund is non-negotiable.

    Setting aside an extra 10% to 20% of your total budget for the unexpected isn't just a "nice-to-have"—it's an absolute must for a stress-free project. This fund is your safety net, ensuring that a surprise issue doesn't derail your entire plan.

    Think of it as renovation insurance. Having that buffer means you and your contractor can tackle problems the right way when they pop up, protecting the long-term integrity of your new bathroom without forcing you to compromise on your original vision.

    Answering Your Top Remodel Questions

    Once you start seriously thinking about a bathroom remodel, the questions start popping up. How long will my bathroom be out of commission? What kind of surprises might pop up? Let's walk through some of the most common questions we hear from homeowners. Getting these answers upfront helps build confidence and ensures your project runs smoothly.

    How Long Does a Bathroom Remodel Actually Take?

    This is probably the number one question, and homeowners are often surprised by the answer. A quality remodel isn't a weekend job—it’s a carefully choreographed dance of demolition, trades, and inspections.

    A simple cosmetic refresh might be done in a week. But for a solid, mid-range remodel, you should plan for about 2 to 3 weeks. If you're going for a full luxury gut-renovation, especially if we're moving walls or fixtures, that timeline can easily stretch to 4 to 8 weeks or even longer. There's just no way to rush the sequence of demolition, plumbing, electrical, inspections, and all the finish work.

    What Are the Most Common “Hidden” Costs?

    The most common budget-busters are the ones hiding behind your walls. You just can’t see them until demolition begins, which is exactly why a contingency fund is a non-negotiable part of any remodeling budget.

    We often uncover things like water damage from a slow, decades-old leak that has rotted the subfloor. Or we find old electrical wiring that doesn’t meet modern safety codes. It's also not uncommon to find mold that needs to be properly remediated before we can build anything new.

    A seasoned contractor can usually spot the warning signs during an initial inspection, but it’s always smart to have a financial cushion, especially in older homes where surprises are just part of the territory.

    Will I Need a Permit for My Bathroom Remodel?

    This really boils down to the scope of your project. If you're just painting the walls or swapping out a faucet, you’re in the clear. But the second you touch the core systems of the room, you're in permit territory.

    You will almost certainly need a permit if your remodel involves:

    • Moving Plumbing: Shifting the location of a toilet, sink, or shower means changing the plumbing map.
    • Altering Electrical: Adding new outlets, a circuit for heated floors, or new lighting all require a permit.
    • Changing the Footprint: Any structural changes, like taking down or moving a wall, absolutely must be permitted.

    Working with a licensed, professional contractor means this is all handled for you. It's your guarantee that the work is safe, up to code, and properly documented—all of which is critical when you eventually sell your home.

    Can I Save Money by Buying My Own Materials?

    It seems like a smart way to trim the budget, but buying your own materials can backfire in a big way. Contractors usually get trade discounts that you can't access, which often erases any savings you thought you were getting.

    The bigger issue, though, is logistics. When your contractor is in charge of sourcing, they are responsible for everything. If a vanity you bought shows up cracked or a faucet is missing a key part, the entire project can come to a screeching halt. That delay will cost you money. It also opens you up to other risks, which we cover in our guide on how to avoid fake bathroom remodel contractors. The best approach is to talk it over with your contractor first and figure out a sourcing plan that makes sense for both of you.


    Ready to transform your bathroom without the guesswork? The team at NorCal Construction has the expertise to guide you through every step, from initial design and budgeting to a flawless final reveal. Contact us today to start planning your project.

    Authored using Outrank
  • Your Complete Guide to a Whole Home Renovation

    Your Complete Guide to a Whole Home Renovation

    Thinking about a whole home renovation? It's a huge undertaking, one that completely reshapes your living space. We're not just talking about a fresh coat of paint; this is about gutting rooms, moving walls, updating ancient plumbing and electrical systems, and rethinking your home's entire layout. It's a massive investment, but it’s also an investment in your lifestyle and your property's future value.

    Consider this guide your personal roadmap. It’s designed to take a process that feels overwhelming and break it down into a clear, step-by-step plan you can actually follow.

    What to Expect in This Whole Home Renovation Guide

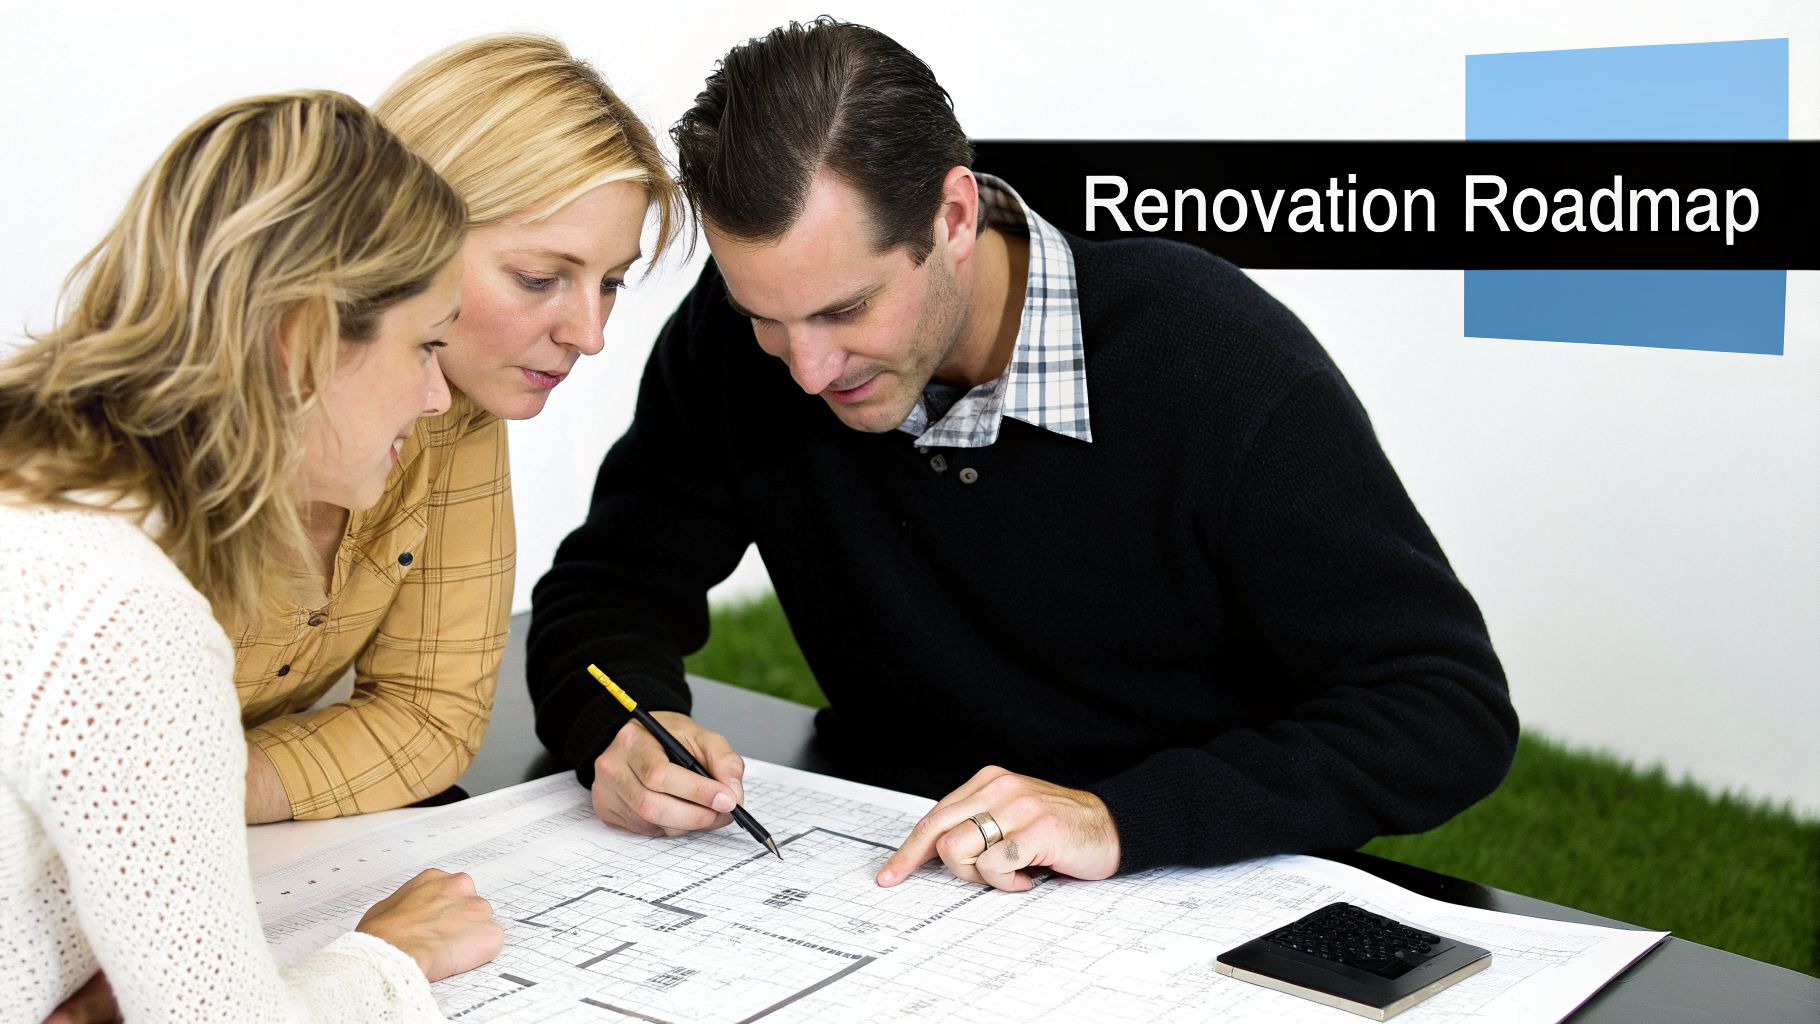
    Three people, two women and a man, reviewing blueprints for a home renovation project.

    Starting a complete remodel is one of the most exciting—and nerve-wracking—projects you can take on as a homeowner. It's your chance to craft a space that truly works for you and your family, from the flow of the kitchen to the location of the laundry room. This is about more than just construction; it's about creating a home that supports your life, not one you have to work around.

    Think of this guide as your project kickoff. We’ll walk through the entire journey, phase by phase, from the first "what if" conversation to the final, triumphant walkthrough. My goal here is to give you the insider knowledge you need to make smart, confident decisions every step of the way.

    Why Now Is a Great Time to Remodel

    If you've been on the fence, the current market makes a strong argument for renovating. So many homes in California and Arizona are getting on in years, and they simply weren't built for the way we live today. A whole home renovation is your opportunity to fix all those little (and big) frustrations, bringing your house up to modern standards of efficiency, safety, and style. Often, it makes a lot more sense financially than trying to find a new house that checks all the boxes.

    The numbers back this up. The U.S. home remodeling market is booming, jumping 26.6% between 2021 and 2022 to an incredible $515 billion. And it’s not slowing down. This sustained growth makes investing in your current property a solid and rewarding move. If you're curious, you can dig into these home remodeling statistics to get the full picture.

    A large-scale remodel is a partnership. The success of your project hinges on assembling a team of trusted professionals, including architects, designers, and a general contractor who understands your vision and can execute it flawlessly.

    Mapping Out Your Journey

    To get through a whole home renovation without losing your mind, you need to understand the path ahead. This guide is built to walk you through every critical stage, making sure no detail gets missed. We'll cover everything you need to know to feel in control of the process.

    To give you an idea of the project's arc, let's look at the key phases you'll be navigating.

    Whole Home Renovation At a Glance

    Phase Key Objective Typical Duration
    1. Planning & Design Define scope, set a budget, hire a team, and finalize architectural plans. 1 – 4 months
    2. Permitting Submit plans to local authorities and secure all necessary building permits. 1 – 6+ months
    3. Construction Demolition, structural work, systems (HVAC, plumbing, electrical), finishes. 6 – 12+ months
    4. Final Touches Final inspections, punch list completion, and project close-out. 2 – 4 weeks

    This table provides a bird's-eye view, but we're about to dive deep into what each of these stages really entails.

    Here’s a glimpse of what we'll explore together:

    • Defining Your Vision and Budget: We’ll start by aligning your dream home with a realistic financial plan.
    • Navigating Permits and Timelines: You'll learn the ins and outs of the administrative hurdles, with a special focus on CA and AZ requirements.
    • Assembling Your Professional Team: I’ll give you tips on how to find and vet the right contractors and designers to bring your vision to life.
    • Selecting Materials and Finishes: We'll talk about making smart choices that balance aesthetics, durability, and cost.
    • Living Through Construction: You'll get practical advice for managing daily life while your home is a construction zone.

    By the time you're done with this guide, you’ll have a complete roadmap for turning your current house into the home you've always wanted.

    Nailing Down Your Renovation Budget and Scope

    Let's be honest: every great home renovation starts with a good spreadsheet, not a sledgehammer. The success of your entire project really boils down to two things that work hand-in-hand: a crystal-clear scope and a budget that’s grounded in reality. If you get these two pieces right from the get-go, you'll save yourself from the headaches of scope creep, surprise costs, and a whole lot of stress later on.

    Think of this early planning stage as drawing the map for your investment. It’s where you take all those design dreams floating around in your head and translate them into a concrete, practical plan that actually fits your finances. Without this solid foundation, even the most beautiful vision can turn into a nightmare.

    The All-Important "Needs vs. Wants" List

    First things first: you need to have a brutally honest conversation with yourself (and your partner, if you have one) about your needs versus your wants. This simple exercise is the key to figuring out where to spend your money wisely. A "need" is something you absolutely have to fix for your home to function better, while a "want" is a cherry-on-top feature you'd love to have but could live without.

    For example, needing to tear down a wall to open up a cramped, dark kitchen is a functional need. Wanting a specific type of imported Italian marble for the countertops, on the other hand, is a stylistic want. One solves a daily frustration; the other is about aesthetics.

    To get clear on your own project, grab a piece of paper and try this:

    • List Your Needs: What are the real problems you’re trying to solve? Think about nagging structural issues, ancient plumbing or electrical systems, safety hazards, or a layout that just drives you crazy every day.
    • List Your Wants: Now for the fun part. What would make you fall in love with your home all over again? This is where you put things like that spa-like primary bathroom, a pro-grade six-burner range, or custom-built bookcases.
    • Rank Everything: Go through both lists and rank each item by importance. This becomes your cheat sheet for making smart trade-offs when the budget gets tight.

    This little list will become your North Star, guiding you when you have to choose between upgrading the ancient HVAC system (a definite need) and splurging on those designer light fixtures you saw on Instagram (a want).

    Getting Real About Renovation Costs in CA & AZ

    Budgeting for a major renovation means you have to get familiar with local costs, and there’s no sugarcoating it—California and Arizona are expensive places to build. As a general rule of thumb, homeowners here can expect to spend anywhere from $100 to over $250 per square foot. That's a huge range, and where your project falls depends entirely on how deep you're going.

    A project that involves moving walls, rerouting plumbing, and overhauling the electrical system is always going to land on the higher end of that scale. In contrast, if your reno is more about cosmetic upgrades—new floors, fresh paint, modern fixtures—you'll be closer to the lower end.

    Here's a hard truth many homeowners miss: the "invisible" stuff is expensive. It’s not uncommon for 50-60% of your total budget to go toward things you’ll never see, like structural work, foundation fixes, and updated HVAC, plumbing, and electrical systems. They aren't glamorous, but they're what makes a home safe and comfortable.

    Your Best Friend: The Contingency Fund

    I can't stress this enough: no matter how perfectly you plan, there will be surprises. That's just the nature of tearing down walls. This is where a contingency fund goes from being a nice idea to an absolute necessity. Don't think of it as an "if you need it" fund; it's a "when you need it" fund.

    Ask any seasoned contractor, and they'll tell you the same thing: setting aside an extra 15-20% of your total project cost is non-negotiable. This is your safety net for when a plumber discovers hidden water damage, your electrician says the old panel needs a mandatory upgrade to meet code, or a key material gets stuck in a supply chain jam. Without that cushion, a small hiccup can throw your entire project off the rails.

    How to Pay for It All: Your Financing Options

    For most people, a whole-home renovation is a massive investment that requires more than what's sitting in a savings account. The good news is there are several well-worn paths to financing your project, and each has its own pros and cons.

    • Home Equity Line of Credit (HELOC): Think of this as a credit card that uses your home's equity as the limit. It’s a revolving line of credit, so you can draw money as you need it to pay contractors. This flexibility is perfect for the unpredictable payment schedule of a big renovation.
    • Home Equity Loan: If you prefer predictability, this might be your best bet. You get a single lump-sum payment with a fixed interest rate, so your monthly payments will never change. This works well when you have a firm, all-in quote from your builder.
    • Cash-Out Refinance: With this option, you replace your current mortgage with a new, bigger one and pocket the difference in cash. It can be a fantastic move if you're able to lock in a lower interest rate than you have now, letting you fund the reno and save on your mortgage at the same time.

    Before you make any decisions, it’s a great idea to chat with a financial advisor. They can help you figure out which route makes the most sense for your financial health and long-term goals. Once you have a solid scope, a detailed budget, and a smart financing plan, you're ready to start the exciting part.

    Navigating Your Renovation Timeline, Permits, and Local Codes

    A whole-home renovation is a lot like conducting an orchestra. For everything to come together beautifully, every player—from the plumber to the painter—needs to hit their cues at exactly the right time. Get the sequence wrong, and you've got chaos and costly delays.

    Think about it: you can't lay down those gorgeous new hardwood floors while drywall dust is still flying. And you definitely can't close up the walls until a city inspector has given the new electrical wiring a thumbs-up. Each step logically builds on the one before it, creating a natural progression from demolition day to that final, satisfying coat of paint. Sticking to this order is the secret to keeping your project on track and on budget.

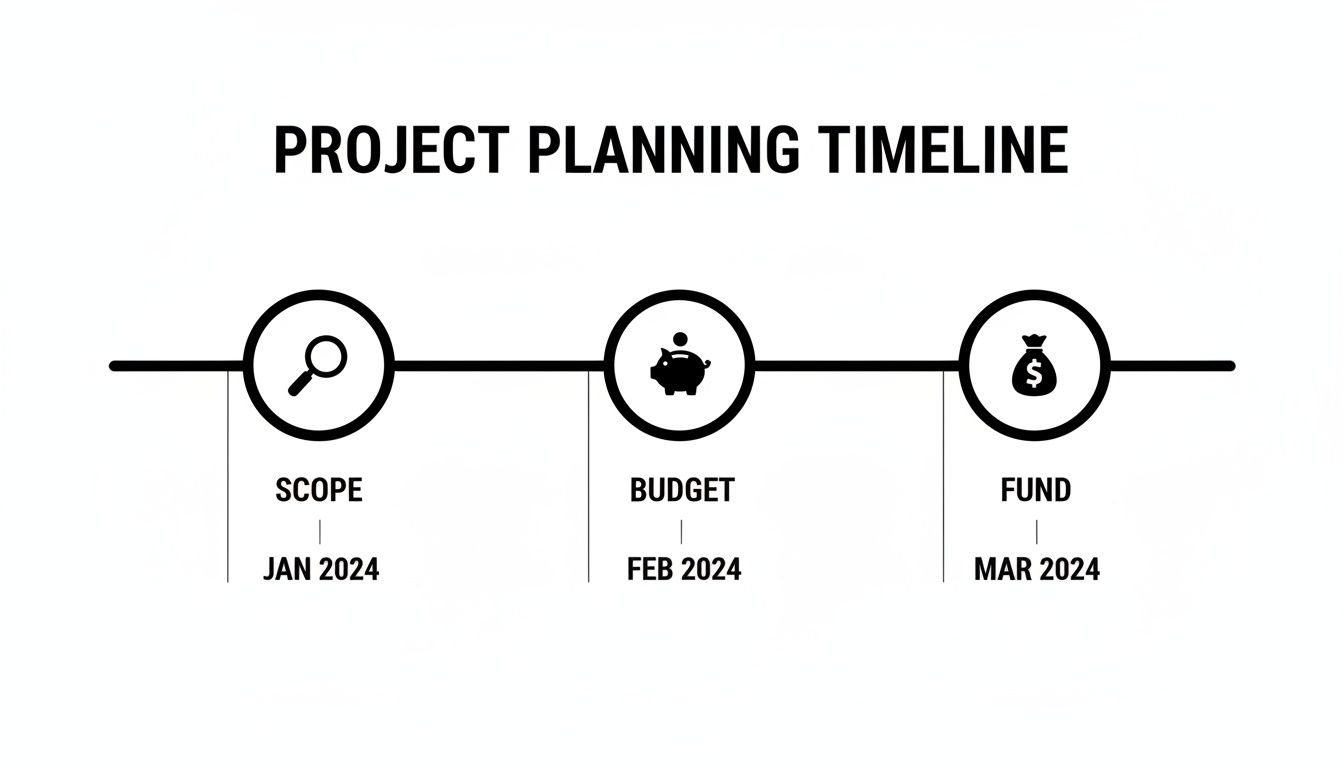
    This high-level timeline gives you a bird's-eye view of how those crucial first steps—defining your scope, setting a budget, and securing funding—all fit together before a single wall comes down.

    A project planning timeline diagram illustrating scope, budget, and fund stages with monthly dates for 2024.

    What's the Deal with Permits?

    Before you can even think about swinging a sledgehammer, you'll need to navigate the permitting process. This is simply the official step where your local building department reviews and signs off on your plans. It can feel like a bureaucratic headache, but it serves one vital purpose: to ensure your home is safe, structurally sound, and up to current building codes.

    You won't need a permit for simple cosmetic updates like painting a room or swapping out a faucet. But for a whole-home overhaul, pulling permits is almost always part of the deal.

    Here’s the kind of work that typically requires a permit:

    • Structural Changes: Moving, adding, or taking out any load-bearing walls.
    • Major System Upgrades: Rerouting plumbing, overhauling your electrical panel, or installing a new HVAC system.
    • Expanding Your Footprint: Building an addition or an ADU. For a deep dive into that specific timeline, check out our guide on how long it takes to build an ADU.
    • Exterior Work: Putting on a new roof, replacing all the windows, or installing new siding.

    Trying to skip this step is a bad idea. It can lead to hefty fines, stop-work orders, and massive headaches when it's time to sell your home.

    Getting a Handle on California and Arizona Codes

    In states like California and Arizona, local building codes are a major factor in how you plan your renovation. This is particularly true because so much of the housing is older. In fact, nearly half—48%—of owner-occupied homes in the U.S. were built before 1980, pushing the median home age to a mature 41 years. Instead of moving, more and more homeowners are choosing to bring these aging properties up to modern standards.

    In California, Title 24 is the big one. It's a strict energy efficiency code that sets the bar for insulation, window performance, HVAC systems, and more. Complying isn't optional; it's a mandatory part of getting your plans approved and helps make homes more energy-efficient.

    For instance, if you're replacing windows in California, they must meet specific energy ratings (known as "U-factor" and "SHGC"). Arizona, on the other hand, has tough codes related to water conservation and using materials that can stand up to the desert heat. Your contractor should be an expert on these local rules, making sure your project is compliant from the get-go.

    A Typical Renovation Timeline

    While no two whole-home renovations are identical, the construction phase almost always follows a predictable path once the permits are in hand. Knowing the general flow helps you know what to expect and when.

    Here’s a simplified play-by-play of the construction stages:

    1. Demo & Prep: The messy but satisfying part—tearing out the old to make way for the new.
    2. The Heavy Lifting (Structural): Any work on the foundation, framing, or major structural supports happens now.
    3. Rough-Ins: Plumbers, electricians, and HVAC techs run all the new pipes, wires, and ductwork through the open walls.
    4. First Look (Inspections): A city inspector comes to approve all the rough-in work before anything gets covered up. This is a critical milestone!
    5. Closing Up: Insulation goes in, and drywall goes up. Your rooms start to take shape.
    6. The Pretty Stuff (Finishes): This is when flooring, tile, cabinets, countertops, paint, and light fixtures are installed.
    7. Final Walk-Through (Inspections): The building department gives their final blessing, officially closing out your permits.

    Assembling Your Dream Team and Choosing Materials

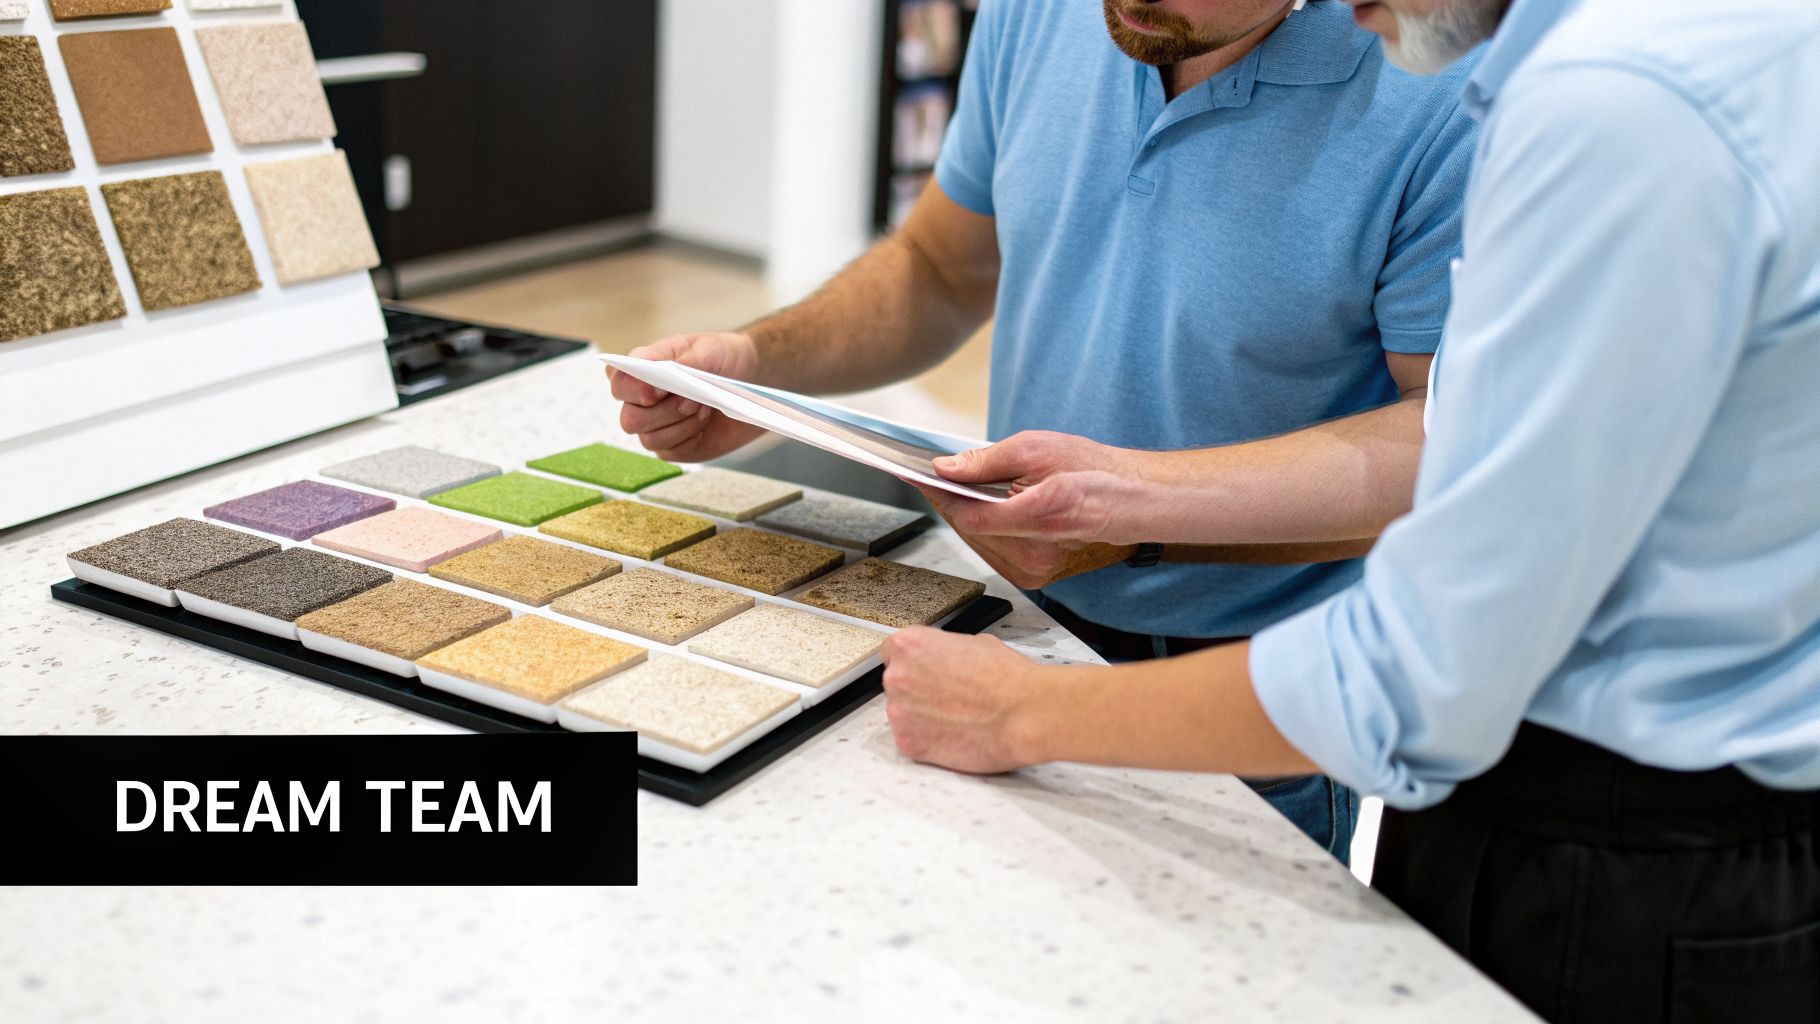
    Two men reviewing various material and carpet samples for a whole home renovation project.

    Any successful whole-home renovation really comes down to two things: the people you hire and the materials you choose. It’s that simple.

    Think of your general contractor as the captain of the ship. They're the ones steering through the project’s complexities, managing the crew, and keeping everything on course. The materials? That’s the very fabric of your new home, defining how it looks, feels, and holds up for years to come.

    Getting these two decisions right is the single best way to ensure your project lands on time, on budget, and leaves you with a home you absolutely love. Getting them wrong, on the other hand, is a recipe for costly mistakes and a whole lot of frustration.

    Finding and Vetting Your General Contractor

    Your relationship with a general contractor isn't a short-term fling; it's a long-term partnership. Finding the right fit is absolutely essential. This isn't the time to just shop for the lowest bid. Instead, your goal should be to find a qualified, trustworthy pro who communicates well and has a portfolio of successful projects just like yours.

    Start by asking for recommendations from friends, family, or local architects and designers. Once you have a shortlist of a few names, it's time to do some real digging. Treat this process exactly like a job interview, because that's what it is.

    When you sit down with potential contractors, be ready with a list of questions. Here are the absolute must-asks:

    • Licensing and Insurance: Ask for their contractor's license number and for proof of general liability and workers' compensation insurance. Don't just take their word for it—verify these credentials with your state's licensing board.
    • Experience and Portfolio: You need to see a portfolio of their completed whole home renovation projects. Even better, ask if you can chat with a couple of their recent clients to get a real feel for what it was like to work with them.
    • Communication Style: How do they plan to keep you in the loop? Do they prefer daily texts, a weekly email summary, or scheduled on-site meetings? A clear communication plan is the best defense against misunderstandings.
    • Subcontractors: Find out if they work with a consistent crew of subcontractors (plumbers, electricians, painters, etc.). A contractor with long-standing relationships usually runs a much smoother, more reliable job site.

    The most important quality in a contractor is trust. You need someone who will be honest and transparent every step of the way, especially when unforeseen challenges arise.

    Keep your eyes open for any red flags during this process. A contractor who is impossible to get a hold of, gives you a vague bid, or pressures you to sign a contract on the spot is probably not the right partner for a major renovation. Taking the time to properly vet your team is an investment that will pay off a hundred times over. If you need a little more help, our article on hiring the right contractor and avoiding fakes has some great tips.

    Understanding Your Construction Contract

    Once you've picked your contractor, the next step is the contract. This is the legally binding document that protects both you and the builder. Whatever you do, never start a project on a handshake deal. A detailed, written contract is completely non-negotiable.

    Make sure your contract clearly spells out these key pieces:

    1. Scope of Work: A very detailed description of every single task to be performed, right down to specific material brands and model numbers.
    2. Payment Schedule: A clear breakdown of when payments are due, tying them to specific project milestones (e.g., foundation poured, framing complete, drywall up).
    3. Project Timeline: An estimated start date and a projected completion date, along with clauses that address how potential delays will be handled.
    4. Change Order Process: A formal system for how any changes to the original plan will be priced, approved in writing, and documented.

    Choosing Materials for Style and Durability

    With your team locked in, the really fun part begins: selecting the materials and finishes that will bring your vision to life. The goal here is to find that sweet spot between aesthetics, long-term durability, and your budget.

    Think practically about how you live in each space. A busy kitchen filled with kids and pets has entirely different demands than a formal dining room that's rarely used. High-traffic areas need materials that can take a beating.

    Here’s a quick rundown of popular choices for key areas:

    • Kitchen Countertops: Quartz is an engineered powerhouse—it's non-porous and incredibly durable, fighting off stains and scratches. Granite is a beautiful natural stone that offers one-of-a-kind patterns, but it does require sealing every so often to keep it from staining.
    • Flooring: Luxury Vinyl Plank (LVP) is a fan favorite because it's waterproof, scratch-resistant, and won't break the bank. It's perfect for kitchens, bathrooms, and basements. Hardwood has a timeless beauty and can be refinished down the road, but it is more vulnerable to water damage and dings.

    Don't ever feel like you have to go all high-end or all budget. It's smart to mix it up. Splurge on that gorgeous, durable countertop you'll be using every single day, and then save some money on a classic, affordable subway tile backsplash. Making thoughtful material choices is how you ensure your renovated home isn't just stunning on day one, but is truly built to last.

    Designing a Home That Works for Your Life

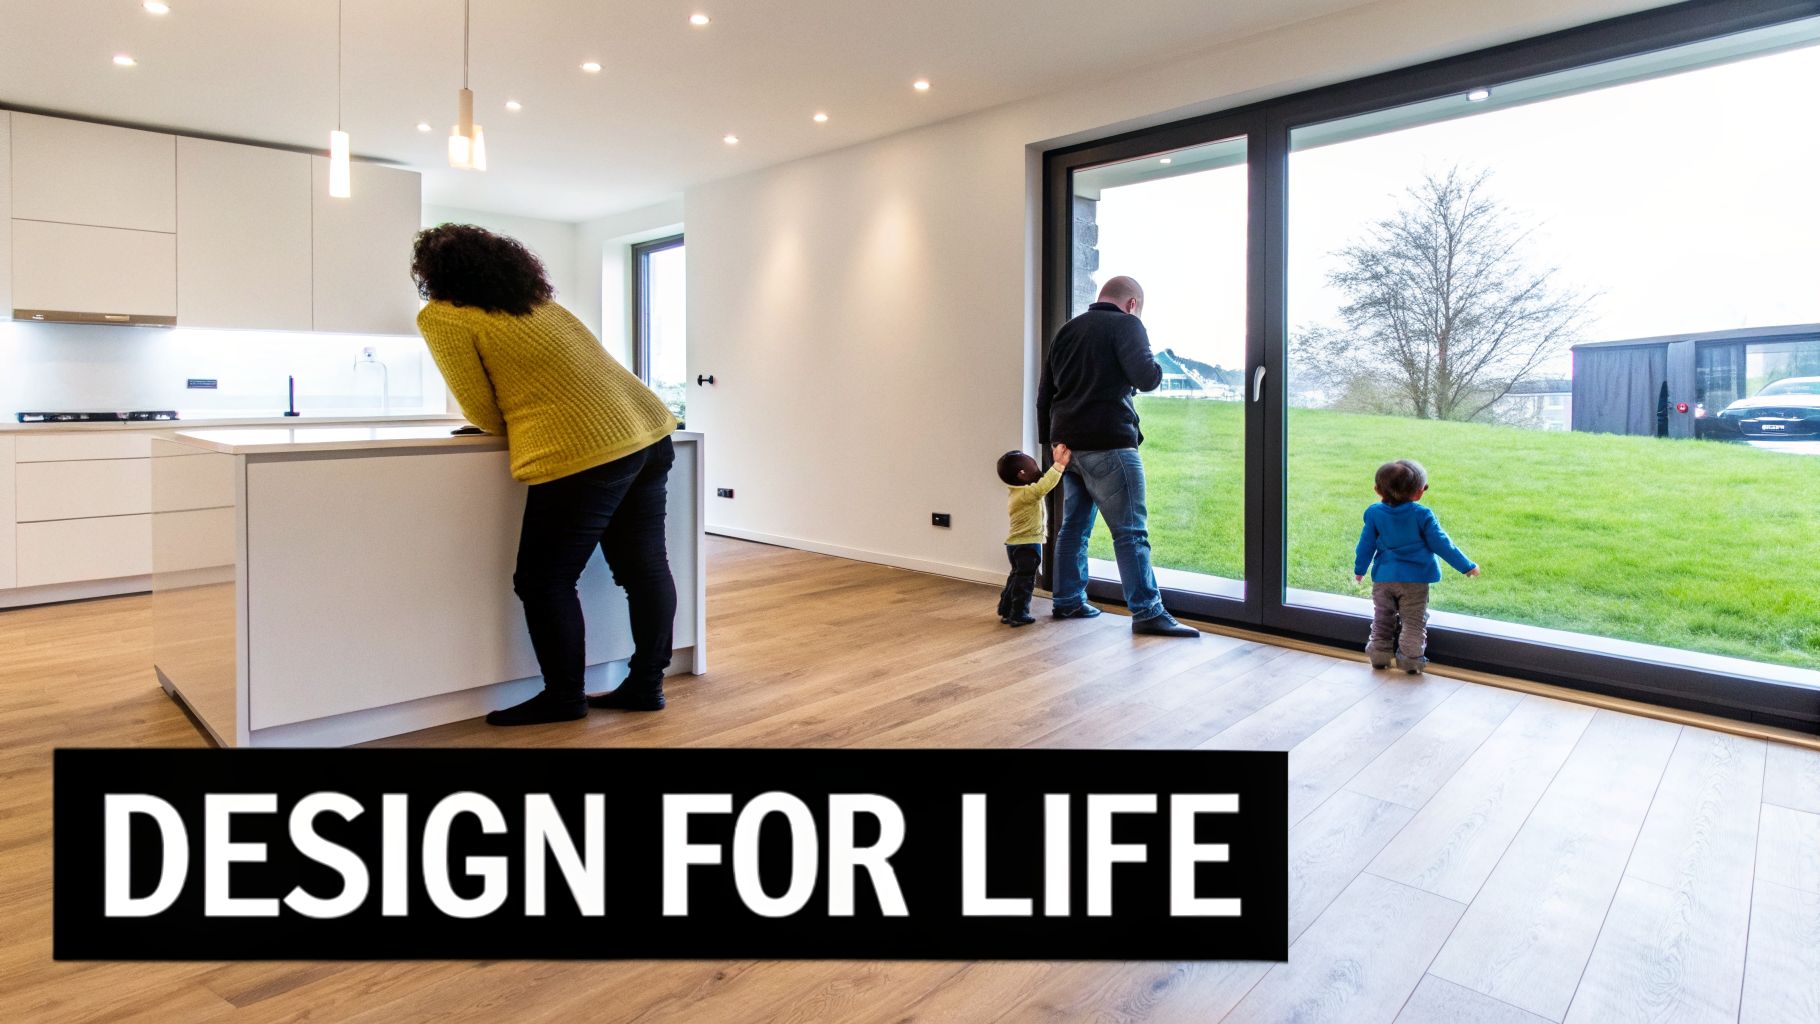
    A family enjoys their modern home with a bright kitchen and large windows overlooking a green yard.

    A whole-home renovation is your chance to do something truly special—to rethink how your home actually works for you and your family. Forget just swapping out old countertops for new ones. This is about shaping your space to fit the rhythm of your life, not the other way around.

    Think of it this way: your home's current layout is a script for your daily life. Are there awkward scenes where everyone bumps into each other in a narrow hallway? Does the path from the garage to the kitchen with groceries feel like an obstacle course? Good design identifies those friction points and erases them.

    The real goal here is to create a home that feels intuitive. It should support how you live, work, and connect without you even having to think about it. This is where you make deliberate, thoughtful choices that pay dividends in comfort and ease for years to come.

    High-Impact Strategies for Modern Living

    If there’s one game-changer in modern home design, it’s the shift to open-concept living. Taking down a non-load-bearing wall between the kitchen, living room, and dining area can radically transform your home's entire feel. You go from a series of closed-off, sometimes cramped rooms to one bright, airy space that’s perfect for everything from quiet family nights to hosting a crowd.

    This layout creates a natural hub for the home where life can happen all at once—someone can be cooking, kids can be doing homework at the island, and others can be relaxing nearby. Of course, a great open plan is more than just a giant room. You have to be smart about defining different “zones” with furniture, rugs, and clever lighting to keep the space from feeling like a warehouse.

    Here are a few high-impact ideas we often recommend:

    • Nail the Kitchen Work Triangle: This classic design principle ensures your sink, stove, and refrigerator are in an efficient, step-saving formation. It’s a small detail that makes a huge difference every single day.
    • Add a Multi-Functional Island: An island is so much more than extra counter space. It’s a prep station, a casual breakfast bar, a homework spot, and the place everyone gathers during a party.
    • Blur the Lines Between Indoors and Out: Installing large sliding or folding glass doors is a fantastic way to connect your main living area to a patio or backyard, making both spaces feel larger and more usable.

    Maximizing ROI in Kitchens and Bathrooms

    Let’s talk about where to put your money for the biggest bang for your buck. Time and time again, kitchens and bathrooms deliver the best return on investment. They are the workhorses of any home, and smart upgrades here not only add serious value but also make your daily routines far more enjoyable.

    It’s no surprise that kitchens represent the biggest slice of the global renovation pie, accounting for over 28% of spending in 2024. These projects often see a 70-85% return on investment. With the U.S. remodeling industry on track to hit $164.5 billion by 2025, focusing on these key areas is a proven strategy for boosting your home's value. You can dig deeper into the home improvement market stats if you're interested.

    For the kitchen, focus on an ergonomic layout that’s also warm and welcoming. In the bathroom, the goal is often to create a spa-like retreat. Think about features that feel like a luxury but solve practical problems, like a walk-in shower, a freestanding tub, or double vanities to ease the morning rush hour. For some great ideas, check out our guide on the latest kitchen trends you'll want in your home.

    Material and Finish Comparison for High-Impact Areas

    Choosing the right materials for your kitchen and bathrooms is a balancing act between aesthetics, budget, and real-world durability. Below is a quick comparison of popular options to help guide your decisions.

    Material Type Best For Durability Maintenance Relative Cost
    Quartz Countertops Kitchens & high-traffic baths Excellent (scratch & stain resistant) Very Low (non-porous) High
    Granite Countertops Kitchens demanding a natural look Very Good (heat resistant) Moderate (requires sealing) High
    Porcelain Tile Bathroom floors & shower walls Excellent (waterproof, durable) Low (grout needs cleaning) Moderate
    Luxury Vinyl Plank (LVP) Kitchen & bath floors Very Good (waterproof, scratch resistant) Very Low (easy to clean) Low-Moderate
    Custom Wood Cabinetry Kitchens for a premium feel Good (can dent or scratch) Moderate (requires gentle cleaning) Very High
    Laminate Countertops Budget-conscious projects Fair (can scratch & chip) Low (easy to clean) Low

    Ultimately, the best choice depends on how you use the space. A busy family kitchen might benefit from indestructible quartz, while a guest bath could be the perfect place for a more delicate but beautiful material.

    Integrating an Accessory Dwelling Unit

    Our lives change, and sometimes our homes need to change with them. Accessory Dwelling Units (ADUs)—also known as granny flats or in-law suites—are a fantastic solution that more and more homeowners are including in their renovation plans. They offer incredible flexibility, whether you need a private space for aging parents, a dedicated home office, a guesthouse, or a new source of rental income.

    Adding an ADU isn't just about building a small house in the backyard. The key is to plan it as an integrated part of your property, so it complements the main home rather than feeling like an afterthought.

    A well-designed ADU feels like a natural extension of the property, not a separate, tacked-on structure. This means matching architectural styles, using complementary materials, and creating thoughtful landscaping to connect the two spaces.

    Whether you build a detached unit or convert an existing garage, an ADU is a powerful way to add valuable square footage and make your property far more adaptable for whatever the future holds.

    Managing the Construction Phase and Final Touches

    With your plans finalized and permits in hand, the project moves off the page and into your home. This is where the real work begins. The construction phase is easily the longest and most disruptive part of the journey, but the right mindset and a few smart strategies can make all the difference. Think of yourself as the project's CEO—you don't need to swing a hammer, but your oversight and communication are absolutely critical.

    Living through the dust, noise, and a revolving door of contractors is a real test of patience. While many homeowners choose to move out temporarily, plenty of people stay put, which just requires some clever planning. Most contractors will advise against it for safety and efficiency, but if you have to stay, setting up a "safe zone" is non-negotiable.

    This dust-free zone should have everything you need to get by, like a temporary kitchen with a microwave, a hot plate, and a mini-fridge. You'll also want to establish clear boundaries and work hours with your crew to maintain some sense of normalcy and respect for your living space.

    Staying on Track and Handling Changes

    Clear and consistent communication is the secret sauce for a smooth construction phase. Set up a regular rhythm for check-ins with your general contractor, whether it’s a quick daily text update or a more formal weekly meeting on-site. This keeps you in the loop on progress, gives you a chance to ask questions, and helps you nip small issues in the bud before they grow into big problems.

    Now, even the most flawlessly planned project hits a snag or two. You might stand in the newly framed-out space and realize you desperately want another window, or the crew might open up a wall and uncover an unexpected plumbing issue. This is exactly what a formal change order process is for.

    A change order is a written document that details any change from the original contract. It spells out the new work, the cost (or savings), and how it will affect the timeline. Never, ever agree to a change based on a verbal promise alone. Getting it in writing protects everyone involved.

    This simple piece of paper ensures there are no nasty surprises on your final bill and that everyone is on the same page. It’s a powerful tool for keeping your renovation budget from spiraling out of control.

    The Final Stretch and the Punch List

    As the dust settles and the last light fixtures are hung, it's time for one of the most satisfying steps: the punch list walk-through. This is a formal inspection you do with your contractor to spot any last-minute fixes or incomplete items before you hand over that final payment.

    This is your moment to be picky. Get up close and look for things like:

    • Paint drips, smudges, or scuffs on walls and trim
    • Cabinet doors or drawers that don't open and close smoothly
    • Cracked or missing tile grout
    • Scratches or dings on new countertops or flooring
    • Light switches, outlets, or appliances that aren't working correctly

    Create a detailed list—the punch list—for your contractor to work through. Once every item is completed to your satisfaction and the final city inspections are signed off, you can officially call the project complete. Don't forget to collect all the warranties for your new appliances, windows, and other major materials. This final, detailed review ensures the home you envisioned is the one you get to move back into.

    Burning Questions About Whole-Home Renovations

    Even with the most detailed blueprint in hand, a whole-home renovation can feel like you're assembling a giant puzzle without the box lid. It’s completely normal to have questions pop up along the way. Let's tackle some of the most common ones we hear from homeowners, so you can move forward with clarity and confidence.

    What's the Best Time of Year to Start?

    Timing your project is a strategic move that can seriously impact your schedule and budget. While you can technically start anytime, most experienced contractors will tell you that late spring or early summer is the sweet spot.

    The weather is on your side, which means fewer delays from rain, especially when you're dealing with foundation work or anything that opens your home to the elements. Materials like paint, caulk, and sealants also cure much more effectively in warmer, drier weather. Just remember, this is also peak season for construction, so you'll want to lock in a great contractor well in advance.

    What Are the Biggest Unexpected Costs I Should Brace For?

    No matter how carefully you plan, every renovation has its secrets. The most common and costly surprises are almost always lurking behind the drywall.

    Here are the usual suspects:

    • Archaic Electrical Wiring: Finding old knob-and-tube or aluminum wiring that doesn't meet modern safety codes is a classic discovery. This isn't an optional fix; it has to be brought up to code.
    • Hidden Water Damage: A tiny, slow leak from decades ago can lead to major rot in your subfloors and framing, turning a simple project into a significant structural repair.
    • DIY Structural "Mistakes": Sometimes, you uncover that a previous owner took out a load-bearing wall without adding the right support. This discovery immediately triggers the need for expensive engineering and structural work.

    This is exactly why that 15-20% contingency fund isn't just a nice-to-have—it's your project's essential safety net. Think of it as insurance against the unknown.

    Do I Really Need to Move Out? How Long?

    This is the big lifestyle question: stay or go? While living on-site can save you a chunk of change on rent, for a full-scale home renovation, nearly every professional will tell you to move out. The reality of living with constant dust, deafening noise, and no kitchen or bathroom is more than just an inconvenience; it's a massive source of stress.

    For a whole-home project, your best bet is to plan on vacating the property from demolition day straight through to the final walkthrough. It’s safer, more efficient, and preserves your sanity.

    Giving your crew an empty house means they can work faster and more effectively, without having to navigate around your family's daily life. You should plan on being out of your home for the entire construction timeline, which typically runs anywhere from 6 to 12 months, sometimes longer for very complex projects. Factoring temporary housing costs into your initial budget from day one is one of the smartest moves you can make.


    Planning a major renovation is a huge undertaking, but you don't have to figure it all out on your own. The team at NorCal Construction has the expertise to guide you through every phase, from the first sketch to the final, beautiful reveal. Start your transformation with us today.

    Published via Outrank tool

  • A Homeowner’s Guide To Tub To Shower Conversions

    A Homeowner’s Guide To Tub To Shower Conversions

    If you've ever looked at your old, clunky bathtub and pictured a sleek, spacious shower in its place, you're in good company. A tub-to-shower conversion is one of the most popular bathroom upgrades out there. It’s a project where you rip out the old tub and install a walk-in shower, which can instantly update the look of your space while making it far more practical and safe.

    Why Ditch the Tub for a Shower?

    The choice to swap a rarely-used bathtub for a modern shower usually comes down to a mix of lifestyle changes, a desire for a fresh look, and a bit of future-proofing. This isn't just about changing a fixture; it's about making your bathroom work better for you and your daily routine. It's an upgrade that can completely change how the room feels and functions.

    This isn't a niche trend, either. The North American bath remodeling market was worth a massive $67.8 billion in 2023 and is expected to climb to $88.4 billion by 2032. That number tells you just how many people are rethinking their bathrooms. You can explore more data on the growing bathroom remodeling market to get a sense of the scale.

    More Space, Modern Style

    The most immediate change you'll notice is how much bigger the room feels. A traditional tub with a shower curtain really closes off a space, making it feel dark and cramped. A walk-in shower, especially one with a simple glass door, opens everything up with clean lines and an illusion of depth.

    This project is your chance to bring your bathroom's style into the present day. You're getting rid of a standard-issue fixture and creating a focal point that feels truly contemporary. The main benefits here are:

    • An Open, Airy Vibe: Tearing out the high walls of a tub makes a small bathroom feel significantly larger and brighter.
    • A Fresh Look: It’s the perfect excuse to bring in modern materials like large-format tiles, stylish new fixtures, or frameless glass.
    • Endless Customization: You can design your shower from the ground up with cool features like built-in storage niches, a comfortable bench, or a unique tile pattern that a standard tub just can't offer.

    A Safer, More Accessible Bathroom

    For a lot of homeowners, the decision is all about safety. Having to step over a high tub wall every day is not just an annoyance; it's a genuine fall risk, particularly for older adults or anyone with limited mobility. A tub-to-shower conversion is a direct solution.

    A low-curb or zero-threshold shower entry removes one of the biggest tripping hazards in the home. It's a smart, forward-thinking move that supports aging in place, making it possible to stay in your home safely and comfortably for years to come.

    And focusing on accessibility doesn't mean you have to compromise on style. These days, you can find beautiful grab bars in finishes like matte black or brushed gold that look more like high-end accessories than safety equipment. Benches can be built right into the tile work for a seamless look. The end result is a bathroom that’s as sophisticated as it is safe.

    Exploring Your Shower Conversion Options

    So, you've decided to ditch that old tub for a new shower. That’s the first big step! Now comes the fun part: figuring out what kind of shower is right for your home. This isn't a one-size-fits-all decision. The best path for you really boils down to your budget, your timeline, and the look you’re going for.

    Think of it like getting a new suit. You could grab one off the rack, get a custom-tailored one, or even opt for something completely bespoke. Each gets the job done, but the experience, cost, and final result are worlds apart. Your shower options are pretty similar.

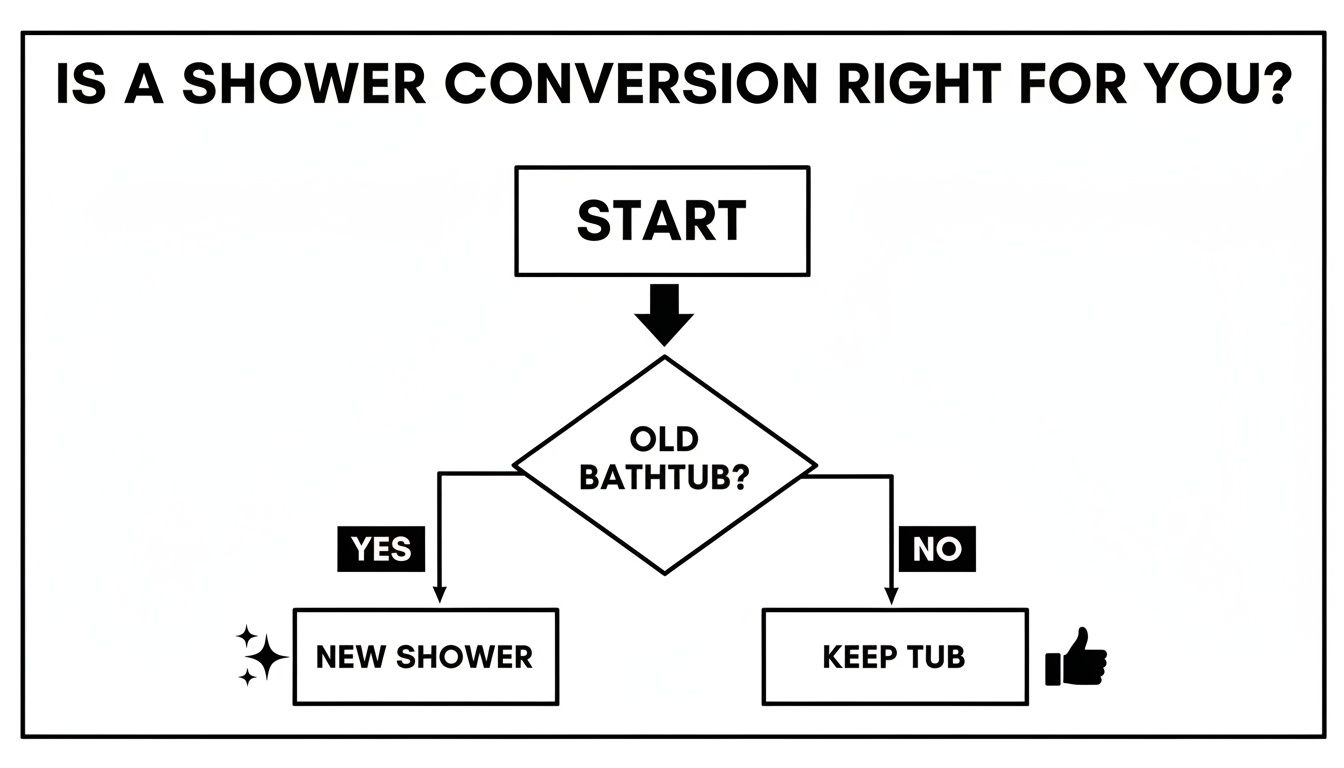
    This little flowchart helps visualize that first fork in the road. Is that old tub just not cutting it anymore?

    A flowchart on shower conversion asks if a bathtub is old, leading to a new shower or keeping the tub.

    Ultimately, the goal is to swap out that old tub space for something that works better for you and looks a whole lot sharper. Let's break down the three main ways to get there.

    The Prefabricated Shower Kit: Quick and Easy

    A prefabricated shower kit is the "all-in-one" solution of the bathroom world. It's a complete package that includes a shower pan and interlocking wall panels, usually made from durable materials like acrylic or fiberglass. If speed and budget are your top priorities, this is often the way to go.

    The biggest selling point here is how fast it comes together. A good pro can often get a prefab kit installed in just a couple of days since there’s no tile setting or grout work involved. Plus, the seamless, non-porous surfaces are a breeze to clean—no more scrubbing grout lines!

    The trade-off, of course, is customization. You’re working with the sizes, colors, and styles the manufacturer offers. While the designs have gotten much better over the years, they might not deliver that unique, high-end look some homeowners are after.

    The Custom Tiled Shower: Your Vision, Your Design

    If a prefab kit is the off-the-rack option, a custom tiled shower is the perfectly tailored one. This route gives you complete creative freedom. You choose literally everything: the exact size and shape of the shower, the tile material, the layout pattern, and where you want to put handy features like benches and shampoo niches.

    This is how you get a shower that feels like it was truly made for your bathroom. From timeless subway tile to elegant natural stone, the design possibilities are virtually endless. This level of detail doesn't just look great; it can also add significant value to your home.

    A custom tiled shower is a real investment in your home's style and day-to-day function. It costs more and takes longer to build, but the payoff is a durable, personalized oasis that often becomes the centerpiece of the bathroom.

    The main considerations here are time and money. Tiling is a skilled craft that demands expert waterproofing and precise installation, making it a more expensive and drawn-out project than putting in a prefab unit.

    The Curb-less (or Barrier-Free) Shower: The Peak of Style and Safety

    The curb-less shower, also called a barrier-free or zero-threshold shower, is where modern design and accessibility meet. Just as the name implies, the bathroom floor flows right into the shower space without any curb or lip to step over.

    This is the gold standard for aging-in-place design because it eliminates a common trip hazard and makes it easy for a wheelchair to roll right in. But beyond the practical safety benefits, curb-less showers create an open, spa-like atmosphere that can make the whole bathroom feel bigger and more luxurious.

    This is, however, the most complex and expensive conversion of the bunch. To make it work, the shower floor has to be recessed into your home’s floor joists to create the proper slope for drainage. It’s a major construction project involving structural and plumbing modifications, so it’s definitely a job for a seasoned professional. While it isn’t the right fit for every home or budget, its blend of safety and high-end style is truly unmatched.

    Comparing Tub To Shower Conversion Types

    To help you weigh your options, here’s a quick side-by-side comparison of the three main conversion types. Think about what matters most to you—cost, speed, or complete design freedom.

    Feature Prefabricated Kit Custom Tiled Shower Curb-less Shower
    Typical Cost Low to Moderate Moderate to High High to Very High
    Installation Time 1-3 days 5-10+ days 2+ weeks
    Customization Low (limited sizes/colors) High (endless options) Very High (fully integrated)
    Maintenance Very Low (no grout) Moderate (grout sealing) Moderate (grout sealing)
    Best For Budget, speed, rental properties Personalization, home value Accessibility, luxury design

    Each path leads to a fantastic new shower, but knowing the pros and cons upfront will ensure you choose the one that aligns perfectly with your goals for the project.

    Budgeting for Your Tub-to-Shower Conversion

    Let's talk money. It's often the biggest question mark in any remodel, and a tub-to-shower conversion is no different. The final price can swing wildly, from around $3,000 for a simple, all-in-one prefabricated kit to well over $15,000 for a custom-tiled, curb-less shower with all the bells and whistles. Knowing what drives those numbers is the first step to building a budget that actually works for you.

    Think of it like buying a car. You have the base model price, but then you start adding features—leather seats, a sunroof, a better sound system. Each choice affects the final sticker price. A basic, functional shower is your starting point, but luxury tile, high-end fixtures, and complex plumbing changes are the upgrades that will shape your total investment.

    Key Factors That Influence Your Budget

    A few key decisions will have the biggest impact on your total spending. Once you understand them, you can figure out where to splurge and where you might be able to save a few bucks.

    • Type of Shower: As we've touched on, a prefabricated kit is your most economical route. A custom-tiled shower lands in the mid-to-high range, while a true curb-less design is the premium option because of the extra structural and plumbing work it demands.
    • Material Choices: This is a big one. The price gap between standard ceramic tile and imported natural stone can easily run into the thousands. The same goes for fixtures—a basic showerhead is a world away from a multi-jet, thermostatic shower system.
    • Plumbing Complexity: Is your contractor just swapping out the old fixtures for new ones? Or are they tearing into the walls and floor to move the drain and supply lines? Rerouting plumbing is a labor-intensive job that will definitely add to the bottom line.
    • Labor Rates: Where you live matters. A seasoned pro in a high-cost-of-living area like California is going to charge more than a general handyman in a more affordable region. Experience and reputation play a huge role here, too.

    Understanding Market Context

    It's also interesting to see how this project fits into the broader home improvement landscape. While the global bathtub market was valued at a massive USD 10.72 billion in 2023, the numbers also show a clear shift in what homeowners want, especially here in North America. This region holds the largest market share, but the fast-growing popularity of modern shower systems tells us that the old tub-centric bathroom is on its way out.

    The cost of your conversion is an investment in your home's functionality, safety, and aesthetic appeal. By understanding the cost breakdown, you can allocate your funds to the features that matter most to you, whether that's accessibility, luxury, or a simple, modern update.

    Smart Ways to Manage Your Spending

    Getting a beautiful new shower doesn’t have to mean draining your savings. With some smart planning, you can make choices that give you a high-end look without the high-end price. For more ideas on managing costs, check out our guide on bathroom remodel tips to help you upgrade without breaking the bank.

    Here are a few proven strategies to keep your budget on track:

    1. Keep the Plumbing Layout: This is the single most effective way to control costs. If you can leave your shower drain and water supply lines right where they are, you'll save a significant amount on labor.
    2. Choose Cost-Effective Materials: You can absolutely get a premium look for less. For example, modern porcelain tiles do an incredible job of mimicking expensive marble or natural stone for a fraction of the cost.
    3. Bundle Your Purchases: Whenever you can, try to buy your shower pan, wall surrounds, and fixtures from the same supplier. Many companies offer package deals or discounts for buying everything together.
    4. Prioritize Your "Wants" vs. "Needs": Get honest about what's a must-have and what's a nice-to-have. If an integrated bench is non-negotiable for safety, make it a priority in your budget. If that fancy rainfall showerhead is just a "want," it might be the first thing to cut if costs start to creep up.

    Choosing The Right Materials And Fixtures

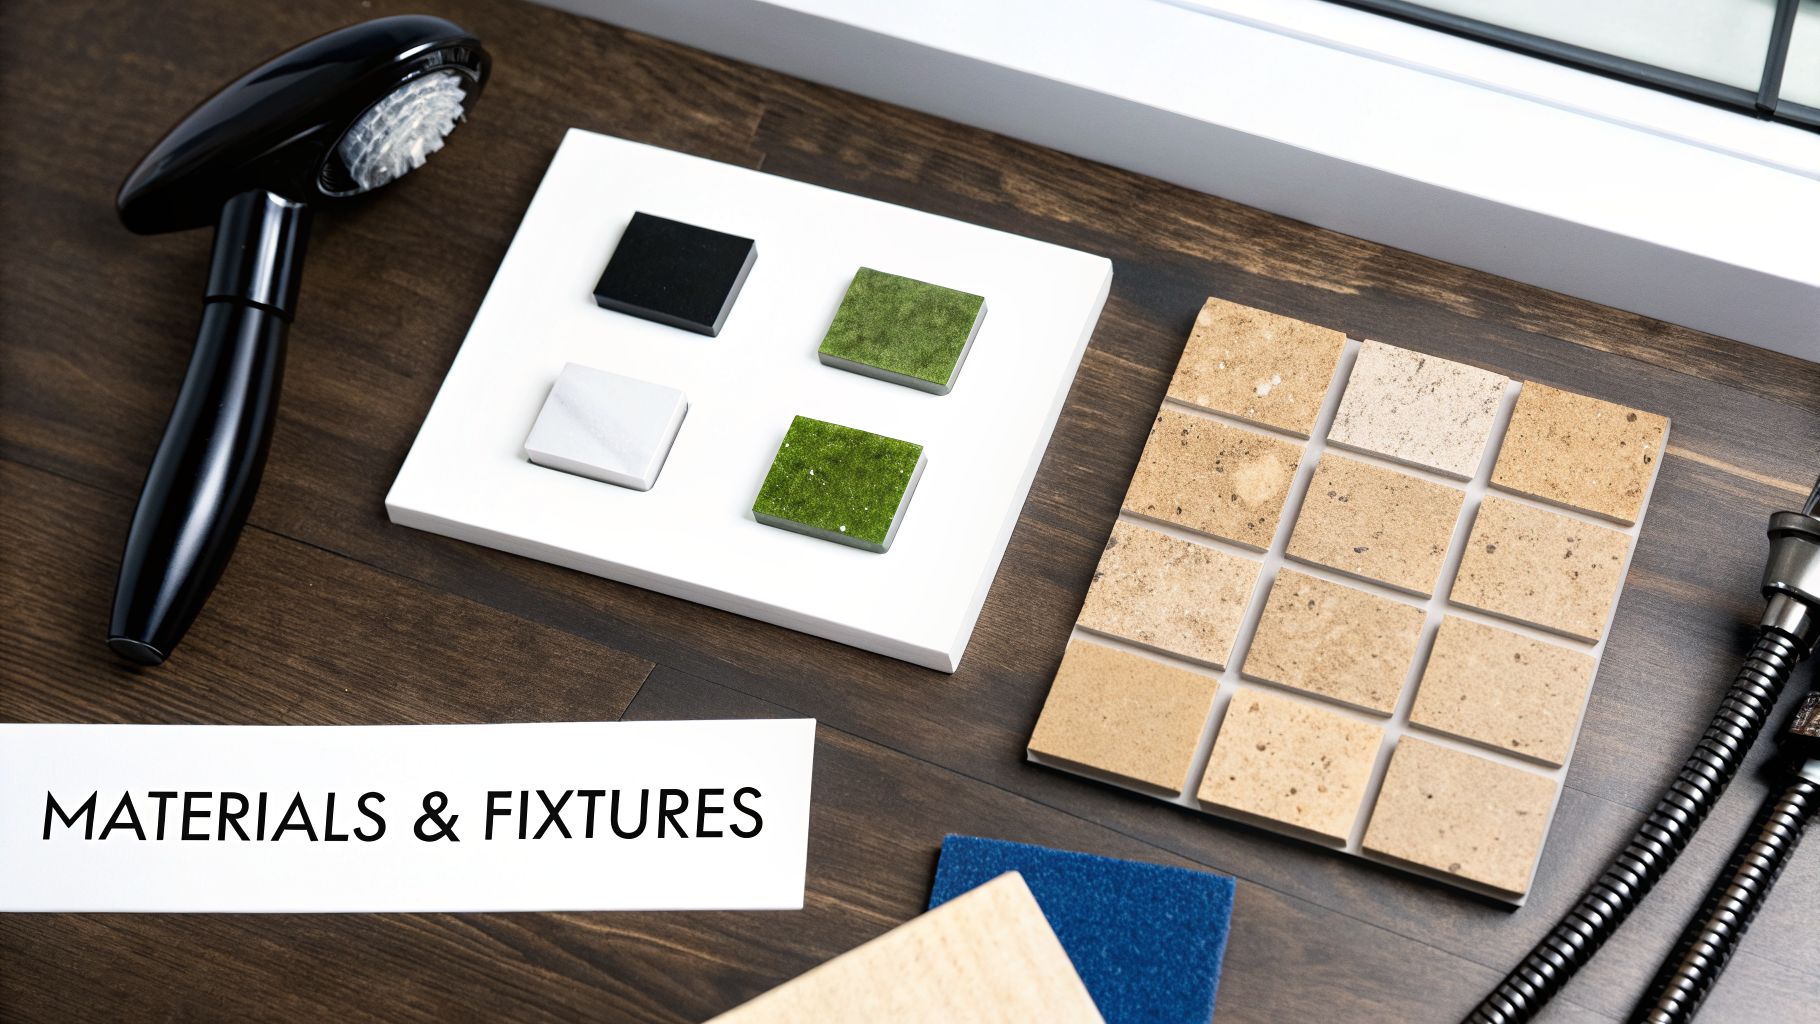
    Bathroom renovation materials and fixtures, including tile samples, a shower head, and plumbing hoses.

    Okay, you’ve got the bones of your project planned out. Now for the fun part—choosing the materials and fixtures that will bring your new shower to life. This is where your personal style really gets to shine.

    The choices you make here will define everything from the daily vibe of your bathroom to how much time you spend cleaning it on weekends. It's a balancing act between the look you want, the durability you need, and the budget you have.

    Start with the Shower Walls

    Think of the shower walls as the main backdrop. They set the tone for the entire room, so it’s a big decision.

    • Acrylic and Fiberglass Panels: If "low-maintenance" is your mantra, these are for you. They create a seamless, grout-free surface that’s a breeze to wipe down. No scrubbing grout lines on a Saturday morning.
    • Porcelain and Ceramic Tile: For total creative freedom, nothing beats tile. You can go for a timeless subway tile pattern, a bold mosaic, or something totally unique. The design possibilities are endless, but just remember that those grout lines will need regular attention.
    • Natural Stone: For pure, organic luxury, materials like marble, granite, or travertine are hard to beat. Every piece is one-of-a-kind. The trade-off? Stone is porous and needs to be sealed regularly to keep it looking pristine and prevent water stains.

    Selecting Your Shower Fixtures

    Next up is the hardware—the stuff you'll actually touch and use every single day. These fixtures have a massive impact on your daily routine, so it’s worth thinking through how you want your shower to feel.

    The showerhead is obviously the star of the show. A standard wall-mounted head gets the job done, but why stop there? A rainfall showerhead delivers a gentle, luxurious stream, while a handheld wand is incredibly practical for rinsing hair, cleaning the shower, or bathing kids and pets. Many people opt for a dual system to get the best of both worlds.

    Don't forget the valve hiding behind the wall—it’s just as important. Upgrading to a thermostatic valve is a game-changer. It keeps the water temperature perfectly consistent, meaning no more surprise bursts of icy cold or scalding hot water when someone flushes a toilet.

    The right fixtures do more than just deliver water; they elevate the entire shower experience. From maintaining the perfect temperature to providing targeted relief for sore muscles, modern hardware turns a daily chore into a moment of relaxation.

    Elevating Function with Smart Add-Ons

    The final touches are all about adding convenience and a little bit of luxury. These are the details that take a shower from good to great.

    Consider a few of these popular upgrades:

    • Built-In Niches: These recessed shelves give you a sleek, clutter-free spot for shampoos and soaps. Say goodbye to rusty shower caddies.
    • Integrated Benches: A built-in or fold-down seat is a fantastic addition for comfort and safety. It’s perfect for relaxing under the water or just having a place to prop your leg while shaving.
    • Glass Doors: A frameless glass door instantly makes a bathroom feel bigger and brighter, a huge step up from a clingy shower curtain.

    Technology is also making its way into the bathroom. The smart shower market is booming, expected to hit $1.49 billion by 2031 in the U.S. alone. These systems let you dial in the perfect temperature, pressure, and even steam settings with a digital controller or your voice. You can explore the latest trends in the smart shower market to see what's possible.

    By mixing and matching these elements thoughtfully, your new shower becomes a truly personalized retreat that not only looks incredible but works perfectly for you.

    Understanding The Conversion Process Step By Step

    An outdoor image featuring a house, backyard, a clawfoot bathtub, and 'CONVERSION STEPS' text.

    Turning a clunky bathtub into a sleek, modern shower might seem like a bit of construction magic, but it’s really a well-defined process. Knowing what happens behind the scenes helps you set realistic expectations for timelines, understand the temporary disruption, and truly appreciate the skill involved.

    Think of it as a carefully choreographed performance in several acts. Each phase is critical, building on the last to create the final, beautiful result. A small mistake in an early step, like waterproofing, can cause major headaches down the road, which is why a methodical, professional approach is non-negotiable.

    Phase 1: Initial Demolition and Preparation

    The first day is always the messiest but also the most satisfying—it’s time to say goodbye to the old tub. Before the first swing of a hammer, your contractors will prep the area to keep dust and debris contained. This usually means laying down protective floor coverings and sealing the bathroom doorway with plastic sheeting.

    Then, the demolition begins. The crew will disconnect the plumbing and physically remove the old bathtub and any surrounding materials, like dated tile or a one-piece fiberglass insert. The goal is to strip the space right down to the wall studs and subfloor, creating a clean slate for your new shower.

    This demolition phase is also a moment of truth. Once the walls are open, contractors can inspect the existing plumbing, framing, and subfloor. It's the best time to spot any hidden water damage or mold that needs to be fixed before anything new goes in.

    This initial teardown typically takes about a day and sets the stage for everything that follows.

    Phase 2: Plumbing and Electrical Rough-In

    With the area cleared out, the focus shifts to the "bones" of your new shower. During the rough-in phase, plumbers and electricians map out and install all the necessary infrastructure that lives behind the walls. This is where the real transformation of a tub to shower conversion happens.

    A plumber will move the drain from the tub's position to the center of the new shower floor. They'll also install the new shower valve at the proper height and run water lines for the showerhead and any other fixtures you've chosen, like a handheld wand or body jets. If you're adding new lighting, a better exhaust fan, or a smart shower controller, an electrician runs the new wiring at this stage.

    It’s called a "rough-in" because it's all done before any drywall or backer board goes up. This step is critical and requires a solid understanding of local building codes to ensure everything is safe, functional, and ready for inspection.

    Phase 3: Waterproofing and Installation

    This is, without a doubt, the most important stage of the entire project. Faulty waterproofing is the number one cause of shower failures, leading to thousands of dollars in hidden damage from leaks and mold. Professionals use a multi-layered system to create a completely sealed, watertight enclosure.

    The process usually involves these key steps:

    • Installing the Shower Pan: The base of your shower is set in place. It's carefully sloped to guarantee water flows directly to the drain.
    • Putting Up Cement Backer Board: Water-resistant backer board is installed on the wall studs, creating a stable and durable surface for your tile or wall panels.
    • Applying a Waterproofing Membrane: A liquid-applied or sheet membrane is used to seal every seam, corner, and screw head. This creates a seamless, impenetrable barrier against moisture.

    Only after the waterproofing is complete and fully cured can your chosen wall material—whether it's elegant tile or low-maintenance acrylic panels—be installed. Tiling is a particularly meticulous job that can take several days to allow for setting and grouting.

    For more deep-dive project management tips, our article on how to plan a bathroom remodel step-by-step is a great resource.

    Phase 4: Final Fixtures and Finishing Touches

    The finish line is finally in sight! Once the tile grout or panel adhesive has fully cured, the final elements that bring the whole look together are installed. This is the part where your new shower really starts to look like the one you envisioned.

    Your contractor will install the showerhead, the control trim, and any other fixtures. The glass door or panel is carefully measured and fitted into place, and any final painting or trim work is completed.

    The very last step is a thorough cleaning and a final inspection to make sure every single detail is perfect. Then, it's all yours to enjoy.

    To help you keep track of all the moving parts, here’s a simple checklist you can use to follow your project from start to finish. It’s a great way to stay organized and ensure nothing gets missed.

    Tub-To-Shower Conversion Project Checklist

    Phase Task Status (To Do, In Progress, Complete)
    1. Planning & Design Finalize shower layout, style, and dimensions.
    Select all materials: tile, wall panels, shower pan, fixtures.
    Choose a contractor and sign the contract.
    Apply for and receive any necessary building permits.
    2. Demolition Protect surrounding areas from dust and debris.
    Remove the old bathtub and wall surrounds.
    Inspect studs, subfloor, and plumbing for hidden damage.
    Address any necessary repairs (e.g., rot, mold).
    3. Rough-In Adjust drain location for the new shower.
    Install the new shower valve and water lines.
    Run any new electrical wiring for lights or fans.
    Pass the rough-in inspection with the city/county inspector.
    4. Waterproofing Install the new shower pan.
    Install cement backer board on walls.
    Apply a waterproof membrane to the pan and walls.
    5. Installation Install wall tile or surround panels.
    Grout and seal the tile (if applicable).
    Install the flooring in the rest of the bathroom (if part of the project).
    6. Finishing Install the shower trim kit, showerhead, and other fixtures.
    Install the shower glass door or panel.
    Complete any final painting, trim, or caulking.
    7. Final Inspection Conduct a final walkthrough with your contractor.
    Complete the final inspection with the city/county inspector.
    Make the final payment to your contractor.

    Using a checklist like this simplifies the entire process, giving you a clear roadmap and peace of mind as your beautiful new shower comes to life.

    Navigating Permits And Local Building Codes

    Let's be honest, diving into the world of building permits and local codes can feel a little intimidating. It's definitely not as fun as picking out tile, but getting this part right is one of the most important steps in any tub to shower conversion.

    Think of building codes less like a rulebook meant to slow you down and more like a safety manual for your home. They exist to make sure every project is structurally sound, safe, and built to last. A permit is simply the green light from your city or county to start the work, kicking off a process of inspections that protect you, your family, and your home’s value.

    When Is A Permit Required?

    This is one of the first questions homeowners ask. While the specific rules can change from one town to the next, you will almost certainly need a permit for a tub-to-shower conversion because the project involves changing your home's plumbing.

    Count on getting a permit if your project involves any of these key tasks:

    • Moving or altering plumbing lines: Shifting the drain from a tub’s position to the center of a new shower floor is a major plumbing change that requires a permit.
    • Changing electrical wiring: If you're adding recessed lighting in the shower or putting in a new, more powerful exhaust fan, that's electrical work that needs to be up to code.
    • Modifying structural elements: This is a big one. For more involved projects like a curb-less, walk-in shower, the floor structure itself often has to be altered.

    A permit is your insurance policy against shoddy work. It ensures that critical systems like plumbing and waterproofing are installed correctly by a professional, preventing nightmare scenarios like hidden leaks, rot, and mold growth down the road.

    A reputable, professional contractor will take care of the entire permitting process for you, from submitting the plans to scheduling all the necessary inspections.

    Key Code Requirements Inspectors Look For

    When the city inspector shows up, they aren’t there to admire your tile choice. Their focus is 100% on safety and function, and they have a specific checklist of items that must comply with local and national building codes. Knowing what’s on their list really highlights why hiring a pro is so critical.

    For homeowners in states with stringent building standards like California and Arizona, these points are especially important.

    • Proper Drain Size and Slope: To prevent clogs and standing water, the shower drainpipe must be at least 2 inches in diameter. The shower floor itself needs a precise slope—at least 1/4 inch per foot, but no more than 1/2 inch per foot—to guide every drop of water toward that drain.
    • Ventilation: A damp bathroom is a breeding ground for mold and mildew. Codes mandate a mechanical exhaust fan that can move enough air (measured in CFM, or cubic feet per minute) to vent all that moist, steamy air directly outside.
    • Waterproofing: This is a make-or-break item. The inspector will verify that a continuous, properly installed waterproofing membrane is in place behind the tile and under the shower floor. This is absolutely non-negotiable.
    • Accessibility Standards: Even if you don't need them now, thinking ahead is smart. Many codes encourage following standards from the Americans with Disabilities Act (ADA). A common practice is to install solid wood blocking inside the walls, making it easy and secure to add grab bars in the future.

    Meeting every one of these requirements is just part of the job for an experienced contractor. They make sure your beautiful new shower isn't just a cosmetic upgrade, but a safe, durable, and fully compliant improvement to your home.

    Answering Your Top Questions About Tub-to-Shower Conversions

    As you get closer to pulling the trigger on your bathroom remodel, you're bound to have some practical questions. These are the details that really matter for your budget, timeline, and home's future. Let's tackle the questions we hear most often from homeowners just like you.

    How Long Will This Actually Take?

    Every project is a little different, but we can give you a pretty good idea of what to expect. If you're going with a straightforward, prefabricated shower kit, a pro can often have it installed in just one to three days.

    For a custom-tiled shower, however, you'll need a bit more patience. A realistic timeline for a custom job is anywhere from three to seven days. That longer window gives us the time needed for proper demolition, plumbing work, installing a bulletproof waterproofing system, carefully setting tile, grouting, and finally, putting in the glass and fixtures. The final timeline always comes down to the complexity of your specific design and whether any city inspections are required.

    Will I Tank My Home's Value by Removing My Only Tub?

    This is probably the number one concern we hear, and it's a smart question to ask. The short answer is: probably not. In today's market, a beautifully designed walk-in shower often maintains or even increases a home's value. The old rule of thumb that every home needs a bathtub is fading, especially when it comes to the master suite.

    What really matters is who your potential buyer might be down the road. If you live in a neighborhood full of young families, taking out the only tub could be a negative. But for a huge number of buyers, like empty-nesters or anyone valuing accessibility, that spacious, modern shower is a major selling point.

    Here's the bottom line: A dated, clunky bathroom will hurt your home's value far more than the absence of a tub. A well-executed shower conversion is a significant upgrade that makes your home more beautiful and functional.

    Can I Just Do This Myself?

    We love the DIY spirit, but a tub-to-shower conversion is one of those jobs best left to the professionals. This isn't just about looks; it involves tricky plumbing and electrical work. Most importantly, it requires expert-level waterproofing, where a tiny mistake can lead to a total disaster.

    A failed waterproofing job is a homeowner's nightmare. It can cause slow, hidden leaks that lead to structural rot and black mold—problems that can easily cost tens of thousands to fix. A licensed contractor brings the necessary skills and ensures the entire project is up to code. You can learn more about the dangers of hiring the wrong person in our guide on how to spot and avoid fake bathroom remodel contractors.

    Hiring a pro isn't just an expense; it's an investment in protecting your home and getting the job done right the first time.


    Ready to transform your bathroom with a seamless, professional tub-to-shower conversion? The team at NorCal Construction has the expertise to bring your vision to life, ensuring a beautiful, durable, and fully compliant result. Start your project with a free consultation today!

    Published via the Outrank app