So, you're thinking about remodeling your bathroom. It's one of the best home improvements you can make, but the first question on everyone's mind is always the same: what's it going to cost?
The truth is, there's no single answer. A bathroom remodel can range from a simple weekend refresh to a down-to-the-studs transformation. Nationally, you can expect the average bathroom remodel cost to land somewhere between $7,000 for a small, basic update and upwards of $25,000 for a high-end, luxury project.
For most people, a full remodel of a standard 5×8 foot bathroom usually settles in the $10,000 to $15,000 range. These numbers are a great starting point, but your final cost will come down to the specific choices you make.
What Is the True Cost of a Bathroom Remodel?
Before you start pinning pictures of walk-in showers and freestanding tubs, it's crucial to get a handle on your budget. Think of it like planning a road trip—you need to know your destination and how much gas money you have before you hit the road. It saves you from running out of fuel halfway there.
The final price of your remodel really boils down to three things: the scope of the project, the materials you choose, and the cost of labor. Let's break down what that means for your wallet.
Setting a Realistic Financial Baseline
To give you a clearer picture, let's look at the different tiers of a bathroom remodel. This will help you see where your own project might fit in.
Bathroom Remodel Cost at a Glance
This table offers a quick summary of what you can expect to spend based on how deep you want to go with your renovation.
| Remodel Tier | Typical Cost Range (National Average) | Common Features |
|---|---|---|
| Basic / Cosmetic Update | $3,000 – $7,000 | New paint, updated fixtures (faucet, showerhead), new lighting, and replacing a vanity or toilet with stock models. The layout remains unchanged. |
| Mid-Range Remodel | $7,000 – $18,000 | Includes everything in a basic update, plus new flooring, a new tub/shower combo, a semi-custom vanity, and better-quality tile. Plumbing stays in the same location. |
| Full / Luxury Overhaul | $18,000 – $35,000+ | A complete gut renovation. This tier involves changing the layout, moving plumbing and electrical, high-end materials (natural stone), custom cabinetry, and luxury features like heated floors or a steam shower. |
As you can see, the jump from a simple cosmetic touch-up to a full luxury overhaul is significant, and it all comes down to the details.
The Three Pillars of Remodel Costs
Getting a grip on your budget means understanding where every dollar is going. Essentially, your total cost is a balancing act between these three key components.
Scope of Work: This is the biggest driver. Are we just swapping out a faucet and painting the walls, or are we tearing down walls and moving the toilet? The more complex the job, the higher the cost.
Materials and Finishes: Your taste has a major impact. Choosing a standard ceramic tile versus imported Carrara marble will create a massive difference in your materials budget.
Labor: Don't underestimate this one. The skilled professionals—plumbers, electricians, tile setters, and carpenters—are what make the project happen. Labor often accounts for 40% to 60% of the total project cost.
Here's a pro tip: a smaller bathroom doesn't always mean a dramatically smaller price tag. The cost per square foot can actually be higher because you're fitting all the same complex plumbing and electrical work into a tighter, more challenging space.
Where Your Remodel Budget Actually Goes
So, you've seen the average price tags, but what are you actually paying for? Let's pop the hood on a bathroom remodel budget and see where every dollar goes. It’s easy to get fixated on the final number, but the real power comes from understanding how that number is built.
Think of it this way: the total cost isn't one giant, mysterious expense. It's a collection of dozens of smaller costs, from the plumber's hourly rate to the exact faucet you fell in love with. When you can see the individual pieces, you can start having real, productive conversations with your contractor about where to spend and where you might be able to save.
The Great Divide: Labor vs. Materials
The first thing to understand is the fundamental split in any remodel budget: labor versus materials. Most homeowners focus on the shiny new fixtures and tile, but it’s often the skilled labor that makes up the biggest chunk of the bill.
You can generally expect labor to eat up 40% to 60% of your total project cost. This isn’t just one person’s time; it’s the combined expertise of a whole team of professionals who make the magic happen.
- General Contractor: The project's quarterback, managing schedules, coordinating all the different trades, and making sure the job site runs like a well-oiled machine.
- Plumbers & Electricians: These are the licensed pros doing the critical work behind the walls. Their job is to ensure your bathroom is not just beautiful, but safe and up to code.
- Tile Setters & Carpenters: True artisans. Their craftsmanship is what you see every day, from perfectly level tile lines to a flawlessly installed custom vanity.
- Painters & Finishers: They're the ones who handle the final details, applying that perfect coat of paint and making the whole space feel polished and complete.
The other 40% to 60% of your budget is for all the physical stuff—the materials and fixtures. This is where your personal taste really drives the cost, covering everything from the tub and toilet to the grout, paint, and light switches.
A Detailed Cost Breakdown by Category
Ready to get even more granular? Let's slice up that budget pie a bit further. While every single project has its own unique quirks, a typical mid-range bathroom remodel budget tends to follow a predictable pattern.
The chart below gives a great visual overview of how projects scale from a simple refresh to a full-blown luxury gut renovation.
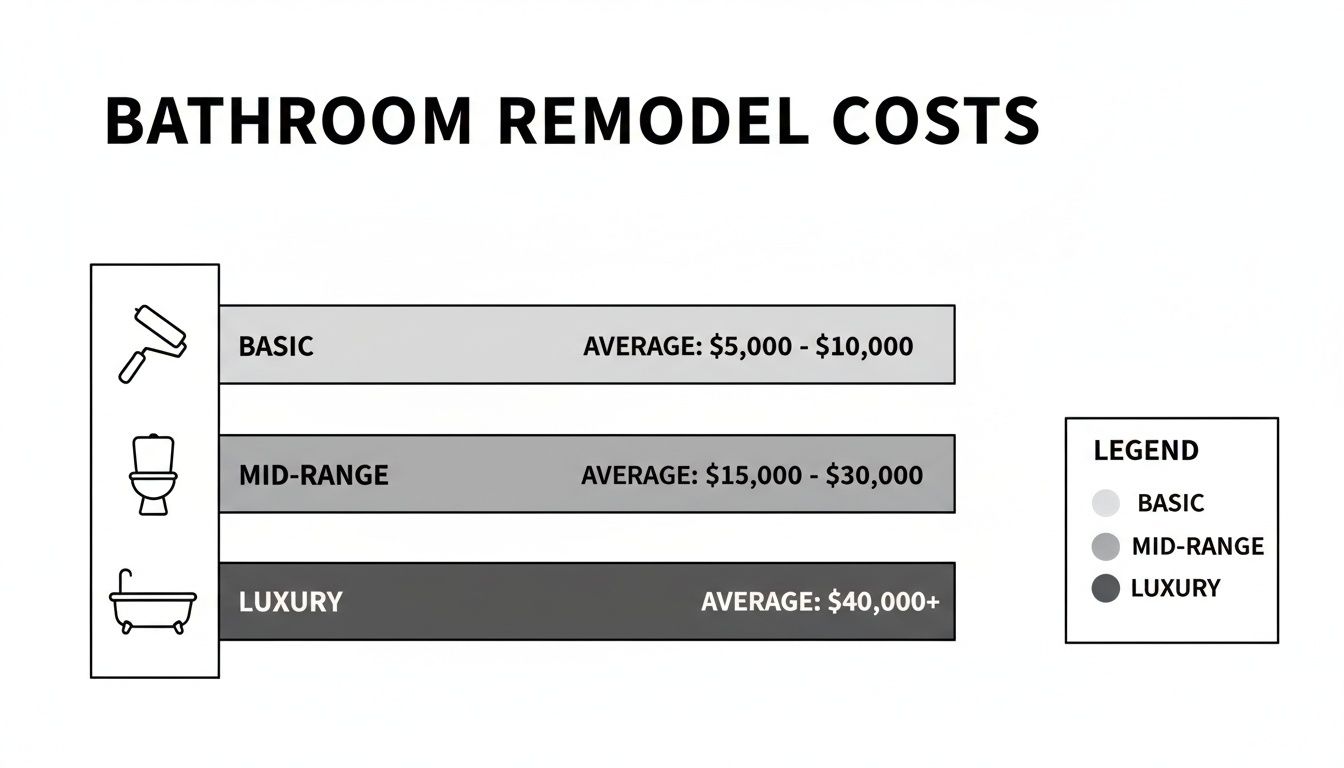
It’s a handy reference to see where your own project might fall on the spectrum. Now, let’s dig into the line items that add up to those final numbers.
- Labor (40-60%): As we covered, this is almost always the biggest piece of the pie, paying for all the skilled professionals.
- Cabinetry and Vanities (10-20%): This is a wide range. You could be looking at a simple, off-the-shelf vanity from a big-box store or a fully custom, furniture-grade piece.
- Fixtures (10-15%): This bucket includes your toilet, sink, faucet, tub, and showerhead. Opting for a high-end freestanding tub or a smart toilet with all the bells and whistles will quickly push this percentage up.
- Tile and Flooring (7-12%): The cost here is a two-part equation: the price of the material (think ceramic vs. marble) and the complexity of the installation. A tricky mosaic pattern takes way more time and skill to lay than simple, large-format tiles.
- Plumbing and Electrical (5-10%): This might look like a small slice, but don't be fooled. The moment you decide to move a toilet or add new recessed lighting, this cost can climb fast.
- Countertops (3-7%): Your options here run the gamut from affordable laminate to premium quartz or granite.
- Lighting and Ventilation (3-5%): Never underestimate the importance of good lighting and a powerful, properly vented exhaust fan. They're critical for making the room functional and preventing moisture issues down the road.
- Permits, Design, and Other (2-5%): This catch-all category covers the necessary evils like city permits, any professional design fees, and hopefully, a small contingency fund for those "uh-oh" moments.
It's crucial to remember that labor and materials are deeply intertwined. A complex herringbone tile pattern, for example, doesn't just mean more intricate tile cuts (which creates more material waste); it dramatically increases the installer's time, bumping up your labor cost.
Seeing your project broken down like this helps you shift your mindset. You're not just buying "a new bathroom"; you're orchestrating an assembly of specific parts and expert services. That perspective is the key to making smart, confident decisions that honor both your design dreams and your budget.
How Project Scope Determines Your Final Cost
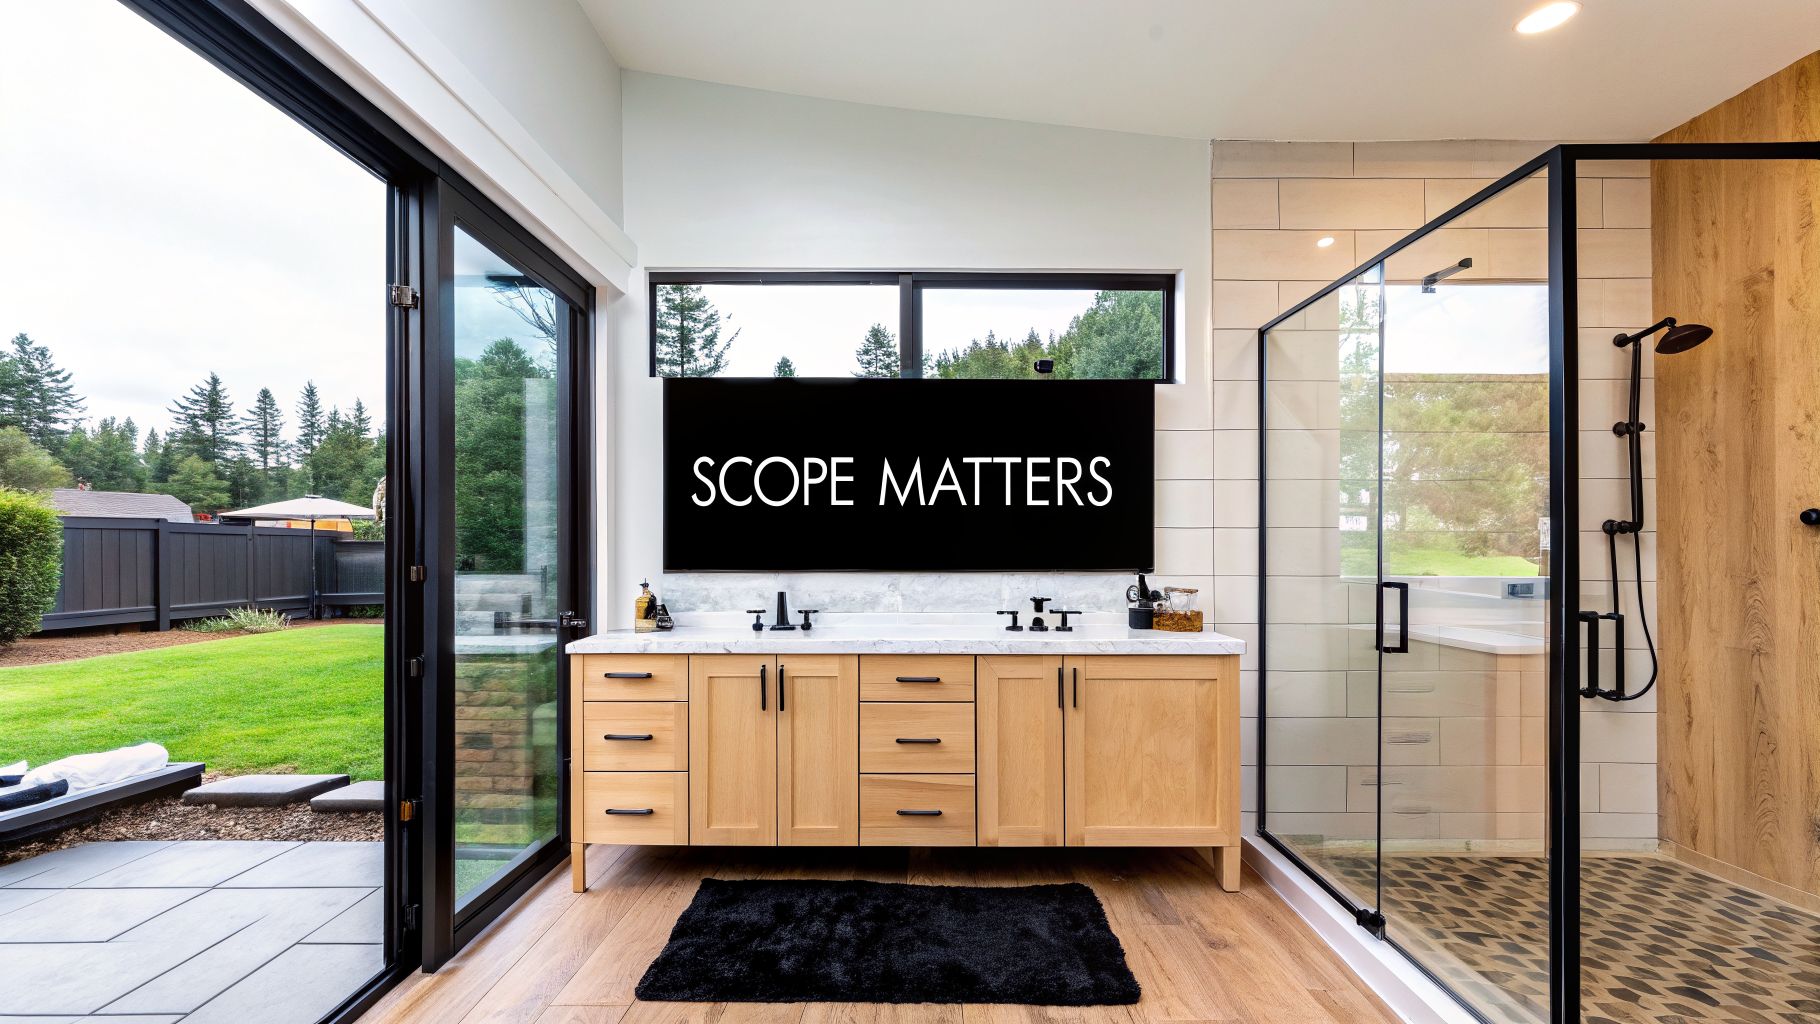
The single biggest factor driving the average bathroom remodel cost is the scope of the project. There's a world of difference between a simple weekend refresh and a complete, down-to-the-studs transformation. That difference shows up not just on the final invoice but in the timeline, the disruption to your daily life, and the overall complexity.
Think of it like working on a car. A cosmetic update is like getting new tires and a fresh coat of wax—it looks fantastic but doesn't touch the engine. A mid-range remodel is like dropping in a new engine and transmission; you're overhauling the core components. A luxury renovation? That's building a custom car from the ground up, where every single part is hand-selected for performance and style.
To get a real handle on your budget, let's break down these three main tiers of bathroom remodeling. Figuring out which category your vision fits into is the essential first step toward setting a realistic financial plan.
The Cosmetic Update: A High-Impact Refresh
A cosmetic update is all about getting the maximum visual bang for your buck with minimal disruption. This is the perfect route if your bathroom's layout works and the main fixtures are in good shape, but the style just feels dated. The key here is that you are not moving any plumbing or electrical wiring.
This approach zeroes in on surface-level changes that can often be knocked out pretty quickly. The goal is a fresh new look without the cost and headache of major construction.
Common cosmetic updates include:
- A Fresh Coat of Paint: Still the most cost-effective way to completely change the mood of a room.
- New Fixtures: Swapping out an old faucet, showerhead, and cabinet hardware is an instant modernization trick.
- Updated Lighting: Ditching a dated vanity light for a stylish new fixture can brighten the whole space and make it feel more inviting.
- Refinishing Surfaces: Instead of a full replacement, you can have a tub or tile professionally reglazed for a clean, like-new appearance.
- New Accessories: Don't underestimate the power of new towel bars, a stylish mirror, or even a new shower curtain to tie the room together.
The Mid-Range Remodel: A Substantial Overhaul
This is the most common type of bathroom remodel we see. It goes well beyond the surface, involving the replacement of major components but without changing the room's fundamental layout. A mid-range project is the right call when fixtures are starting to fail, surfaces are worn out, and you need more than just a cosmetic lift.
While the toilet, sink, and shower stay in their original spots to avoid expensive plumbing rerouting, almost everything else you see and touch gets replaced. This tier delivers a powerful transformation, significantly improving both how the bathroom works and how it looks.
Key Insight: The main jump from a cosmetic to a mid-range remodel is the replacement of major items. In a mid-range project, the old vanity comes out, the tub is swapped for a new one, and new flooring goes down—all tasks that require more skilled labor and materials.
Typical elements of a mid-range remodel:
- New Vanity and Countertop: Upgrading from a basic cabinet to a quality semi-custom vanity with a new stone or quartz top.
- New Toilet and Tub/Shower: Replacing old, inefficient models with modern, water-saving fixtures and a fresh tub or shower stall.
- New Flooring: Tearing out that old linoleum or cracked tile and installing durable, beautiful flooring like porcelain tile or luxury vinyl plank.
- Updated Tile Work: Adding a new tile surround for the shower or a stylish backsplash behind the vanity for a more finished look.
When you're planning a project of this scale, knowing the sequence of events is crucial. For a detailed look, check out our guide on how to plan a bathroom remodel step-by-step, which walks you through the entire process.
The Luxury Transformation: A Complete Reimagining
A luxury or full-gut renovation is where you truly start with a blank slate. This isn't an update; it's a complete reimagining of the space. Walls might come down, the entire layout could be reconfigured, and premium materials and high-end features are brought in.
This is, by far, the most expensive and time-consuming scope. It involves every trade—plumbers, electricians, carpenters, and tile setters—all working together to build a completely new room from the studs out. The average bathroom remodel cost for this tier can climb quickly, as every custom choice adds another layer of labor and complexity.
Luxury transformations often feature:
- Layout Changes: Moving the toilet to a new wall, converting a tub into a massive walk-in shower, or even expanding the bathroom's footprint by borrowing space from a closet.
- High-End Materials: Custom cabinetry, natural stone countertops, and designer tile that makes a statement.
- Premium Features: Think heated floors, steam showers, smart toilets with all the bells and whistles, and elegant freestanding soaking tubs.
- Structural and Systems Work: This means rerouting all plumbing and electrical lines to fit the new design and bringing everything up to modern building codes.
Why Your Zip Code Is a Major Factor in Your Remodel Budget
It’s easy to find a "national average" for a bathroom remodel, but honestly, those numbers can be pretty deceptive. The reality is, a project in Phoenix and the same project in the San Francisco Bay Area will have wildly different price tags. Your specific location is one of the biggest drivers of the final cost, affecting everything from your plumber's hourly rate to the cost of a simple 2×4.
Think about it like this: a cup of coffee costs more in a big city airport than it does at your local small-town diner. The coffee is the same, but you're paying for the higher rent, wages, and operating costs of that location. Construction works the exact same way. The local economy dictates the price of just about everything.
This is especially true for homeowners in the areas we know best: California and Arizona. Getting a handle on these regional differences is the first step to building a budget that makes sense and avoiding any nasty surprises when the quotes start rolling in.
California vs. Arizona: A Tale of Two Budgets
Even though they're neighbors, California and Arizona can feel like they're on different planets when it comes to construction costs. Why the huge gap? It mostly boils down to three things: labor rates, material costs, and how complicated the local building codes are. A bathroom remodel that runs you $18,000 in a Phoenix suburb could easily cost $25,000 or more for the exact same job in much of Northern California.
Let’s dig into what’s behind that price difference.
- Labor Wages: This is the big one. California, especially around its major cities, has some of the highest labor costs in the nation. Skilled tradespeople—the plumbers, electricians, and tile setters who make your project happen—need to earn a higher wage just to keep up with the state's cost of living.
- Material and Supply Chain Costs: While a faucet might have a national price, getting it to your front door doesn't. Logistics, fuel, and local supplier pricing mean that same vanity or box of tile will almost always have a higher sticker price in California than in Arizona.
- The Regulatory Maze: All the permits and paperwork required for a remodel come with fees, and those fees are typically much steeper in California.
The takeaway is simple: A higher cost of living means a higher cost of construction. Every single person on your job site, from the project manager down to the person hauling away debris, has their wages tied to the local economy. This is, without a doubt, the single biggest factor in regional price differences.
How Building Codes Drive Up Costs
Beyond the broad economic picture, specific state and local building codes can add unique costs to your project. California is known for having some of the most rigorous regulations in the country. While they’re great for safety and energy efficiency, they definitely add to the total cost of a remodel.
A perfect example of this is California's Title 24, the state's building energy efficiency standards. For your bathroom remodel, Title 24 sets strict rules for things like:
- High-efficacy lighting: You'll be required to use energy-saving fixtures, like LEDs.
- Ventilation fan performance: Your exhaust fan has to meet specific standards for both airflow and energy consumption.
- Water conservation: Toilets, faucets, and showerheads must all be low-flow models to comply with state water-saving mandates.
These upgrades will absolutely save you money on your utility bills over the long run, but they often mean buying more expensive fixtures and paying for a more careful installation to pass inspection. This adds to your upfront cost. Arizona has its own building codes, of course, but they tend to be less complex, making the compliance process simpler and usually cheaper. It’s a clear example of how your address directly impacts the final number on your invoice.
Getting the Best Return on Your Investment
A bathroom remodel isn't just an expense; it's a strategic investment in your home's value and your daily life. When we talk about "return," we're really talking about two different things. There's the financial payback you get when you sell, and then there's the immediate upgrade to your quality of life. Thinking about both is how you make smart decisions that truly pay off.
The financial return on investment (ROI) is simply how much of your project cost you can expect to get back. While the housing market always has its ups and downs, a solid mid-range bathroom remodel is consistently one of the best home improvement projects for ROI. Nationally, it's not uncommon for homeowners to recoup 55% to 70% of what they spent.
Let’s put that into perspective. If your average bathroom remodel cost comes in at $15,000, a good ROI could add over $10,000 to your home's resale value. But here’s the key: not all upgrades have the same impact on potential buyers.
Maximizing Your Financial ROI
If you're looking for the best financial return, your goal should be to appeal to the broadest audience of future buyers. That usually means choosing functional, timeless upgrades over highly personal or trendy ones that could look dated in a few years.
Here are some of the upgrades that consistently deliver the biggest bang for your buck:
- Universal Design Features: Think walk-in showers with no curb, comfort-height toilets, and even stylish grab bars. These features make a bathroom safer and more accessible for everyone, from young kids to older adults, which is a huge selling point.
- Neutral and Timeless Finishes: You really can't go wrong with the classics. White subway tile, simple quartz countertops, and clean, elegant fixtures have a lasting appeal. They create a bright, inviting space that lets buyers easily imagine themselves living there.
- Water-Efficient Fixtures: Low-flow toilets and faucets have gone from a "green" option to a standard expectation. They signal that a home is modern and efficient, and buyers appreciate the real savings on their future utility bills.
The most profitable remodels are the ones that solve obvious problems. If you fix a clumsy layout, add desperately needed storage, or replace fixtures that are clearly past their prime, you’re making a tangible improvement that buyers can see and are willing to pay more for.
Don't Forget Your "Lifestyle ROI"
Numbers are important, but don't lose sight of your own happiness and comfort in the home you live in now. We call this your "lifestyle ROI"—the daily dividend you collect from having a space that works beautifully for you and just makes you feel good.
Think about the little annoyances in your current bathroom. Are you constantly fighting for sink space in the morning? Is the lighting so bad it makes getting ready a chore? Is the tiny shower a daily source of frustration? A smart remodel gets rid of those friction points, making every single day a little easier and more enjoyable.
This personal value is harder to put a number on, but it's just as real. Creating a spa-like retreat where you can decompress after a long day or a super-functional bathroom that gets your family out the door on time is an investment in your well-being. The best remodels strike that perfect balance, mixing smart, resale-friendly choices with the features that will bring you personal joy. That's how you make sure your new bathroom is an asset in every sense of the word.
Smart Ways to Manage Your Remodel Costs

Keeping your project on budget doesn't mean you have to give up on your dream bathroom. It's all about making smart, strategic choices that give you the biggest bang for your buck without sending the final invoice through the roof.
One of the single most effective ways to manage the average bathroom remodel cost is to stick with your bathroom's current layout. If you can avoid moving plumbing fixtures like the toilet, sink, or shower, you're already way ahead of the game.
Shifting those core components around is a surefire way to escalate costs, as it involves complex (and expensive) work from plumbers and electricians. By leaving things where they are, you sidestep the need to reroute all the hidden pipes and wires, saving thousands that can be put toward the beautiful finishes you'll actually see every day.
Be Strategic with Materials and Finishes
The materials you choose will have a massive impact on your bottom line. But here’s the good news: being budget-conscious doesn't mean you’re stuck with cheap-looking options. The market is filled with beautiful, durable alternatives that look just as good as their high-end cousins.
- Flooring and Tile: Instead of splurging on natural stone like marble, check out high-quality porcelain or ceramic tiles. Modern versions can realistically mimic stone or wood textures while offering better durability and easier maintenance.
- Vanities and Countertops: You can get a high-end look from a stock or semi-custom vanity without paying for a fully custom piece. Likewise, quartz delivers the elegance of granite but is often more durable and comes with a more predictable price tag.
- Refinish Instead of Replace: Is your bathtub structurally sound but just looks a bit dated? Professional refinishing can make it look brand new for a fraction of the cost and hassle of a full replacement.
For more ideas, you can dive into other budget-friendly bathroom remodel tips in our detailed guide. These small adjustments really do add up to significant savings.
The Power of a Contingency Fund
Here’s a hard-earned truth from the field: no matter how well you plan, remodels almost always have a few surprises in store. As soon as we open up the walls, we might find anything from old water damage to plumbing that’s not up to modern code. This is exactly why a contingency fund is non-negotiable.
Setting aside an extra 10% to 20% of your total budget for the unexpected isn't just a "nice-to-have"—it's an absolute must for a stress-free project. This fund is your safety net, ensuring that a surprise issue doesn't derail your entire plan.
Think of it as renovation insurance. Having that buffer means you and your contractor can tackle problems the right way when they pop up, protecting the long-term integrity of your new bathroom without forcing you to compromise on your original vision.
Answering Your Top Remodel Questions
Once you start seriously thinking about a bathroom remodel, the questions start popping up. How long will my bathroom be out of commission? What kind of surprises might pop up? Let's walk through some of the most common questions we hear from homeowners. Getting these answers upfront helps build confidence and ensures your project runs smoothly.
How Long Does a Bathroom Remodel Actually Take?
This is probably the number one question, and homeowners are often surprised by the answer. A quality remodel isn't a weekend job—it’s a carefully choreographed dance of demolition, trades, and inspections.
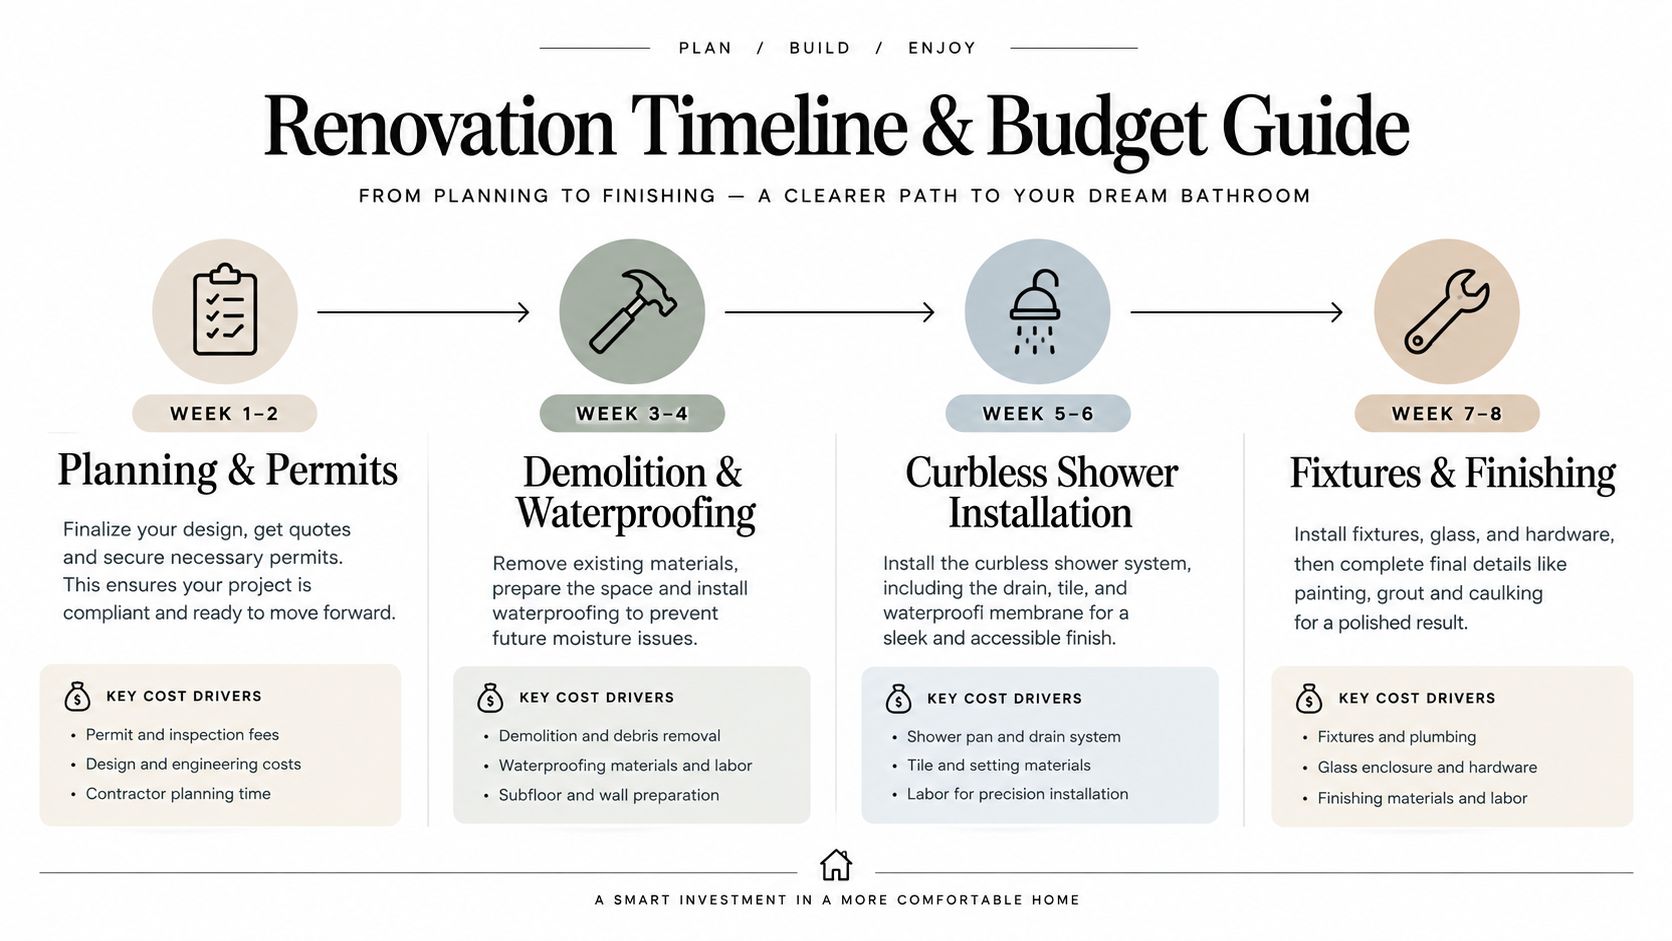
A simple cosmetic refresh might be done in a week. But for a solid, mid-range remodel, you should plan for about 2 to 3 weeks. If you're going for a full luxury gut-renovation, especially if we're moving walls or fixtures, that timeline can easily stretch to 4 to 8 weeks or even longer. There's just no way to rush the sequence of demolition, plumbing, electrical, inspections, and all the finish work.
What Are the Most Common “Hidden” Costs?
The most common budget-busters are the ones hiding behind your walls. You just can’t see them until demolition begins, which is exactly why a contingency fund is a non-negotiable part of any remodeling budget.
We often uncover things like water damage from a slow, decades-old leak that has rotted the subfloor. Or we find old electrical wiring that doesn’t meet modern safety codes. It's also not uncommon to find mold that needs to be properly remediated before we can build anything new.
A seasoned contractor can usually spot the warning signs during an initial inspection, but it’s always smart to have a financial cushion, especially in older homes where surprises are just part of the territory.
Will I Need a Permit for My Bathroom Remodel?
This really boils down to the scope of your project. If you're just painting the walls or swapping out a faucet, you’re in the clear. But the second you touch the core systems of the room, you're in permit territory.
You will almost certainly need a permit if your remodel involves:
- Moving Plumbing: Shifting the location of a toilet, sink, or shower means changing the plumbing map.
- Altering Electrical: Adding new outlets, a circuit for heated floors, or new lighting all require a permit.
- Changing the Footprint: Any structural changes, like taking down or moving a wall, absolutely must be permitted.
Working with a licensed, professional contractor means this is all handled for you. It's your guarantee that the work is safe, up to code, and properly documented—all of which is critical when you eventually sell your home.
Can I Save Money by Buying My Own Materials?
It seems like a smart way to trim the budget, but buying your own materials can backfire in a big way. Contractors usually get trade discounts that you can't access, which often erases any savings you thought you were getting.
The bigger issue, though, is logistics. When your contractor is in charge of sourcing, they are responsible for everything. If a vanity you bought shows up cracked or a faucet is missing a key part, the entire project can come to a screeching halt. That delay will cost you money. It also opens you up to other risks, which we cover in our guide on how to avoid fake bathroom remodel contractors. The best approach is to talk it over with your contractor first and figure out a sourcing plan that makes sense for both of you.
Ready to transform your bathroom without the guesswork? The team at NorCal Construction has the expertise to guide you through every step, from initial design and budgeting to a flawless final reveal. Contact us today to start planning your project.
Authored using Outrank